How to Draw Breasts and Waist for Anime Girls: A Step-by-Step Guide by Japanese Pro Artists
These construction studies use simple adult mannequins so you can focus on placement and form. Try the checks on your own character drawing before adding clothes or shading.
 Construction study
The five stages at a glance
 01
01
 02
02
 03
03
 04
04
 05
05
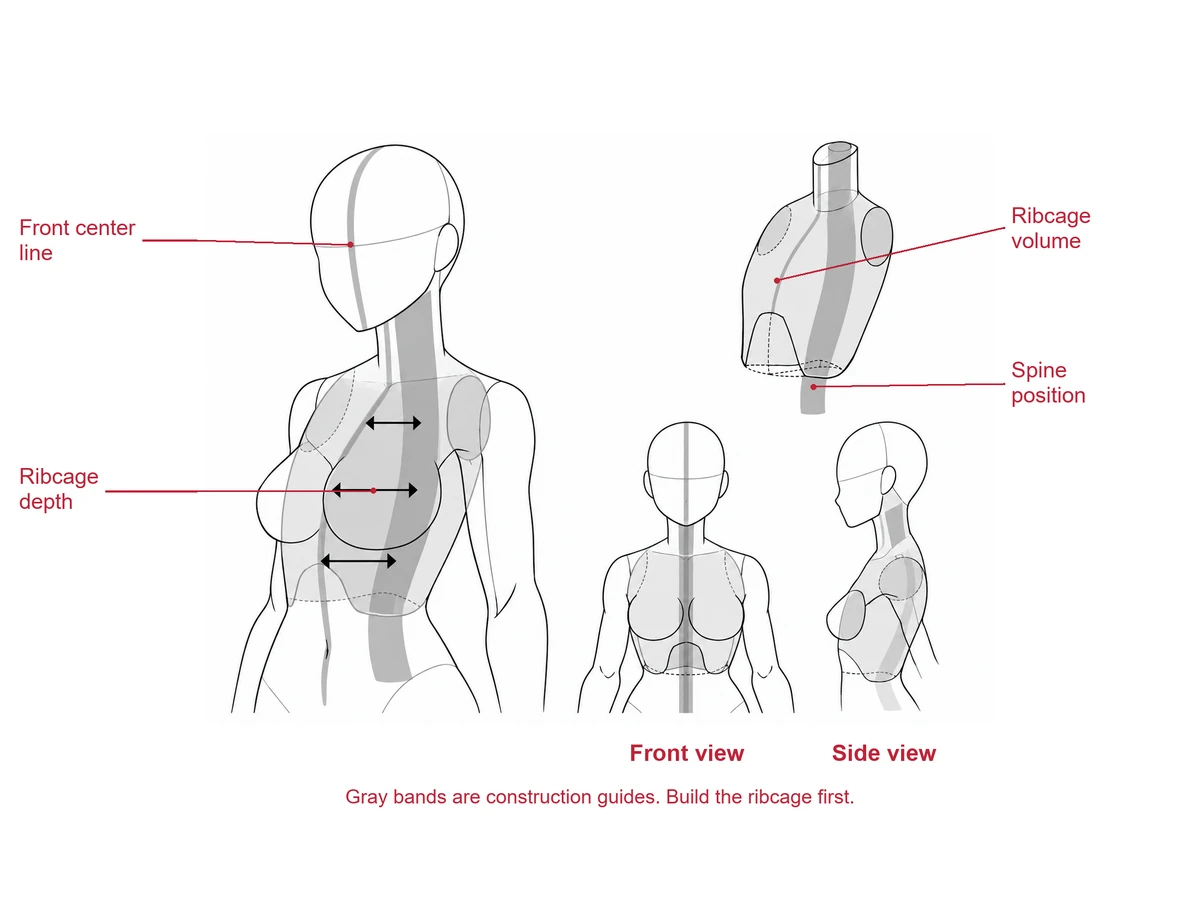
Step 01 · Ribcage volume
What should you draw before the breasts?
Build a rounded ribcage with a front, sides and back before adding the chest.Start with the neck, shoulders and a simple ribcage mass. Give it depth as well as width: a flat oval cannot tell you where the chest attaches when the body turns. Draw a center line down the front and a separate guide for the back.
The gray shapes in the study make that hidden structure visible. The band toward the back shows the approximate position of the spine; its width is a drawing aid, not the thickness of a bone. Keep the ribcage in mind even where the breasts hide its outline.
Construction study
Step 02 · Placement
Where do the breasts sit on the torso?
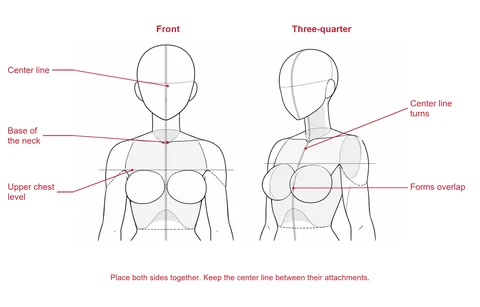
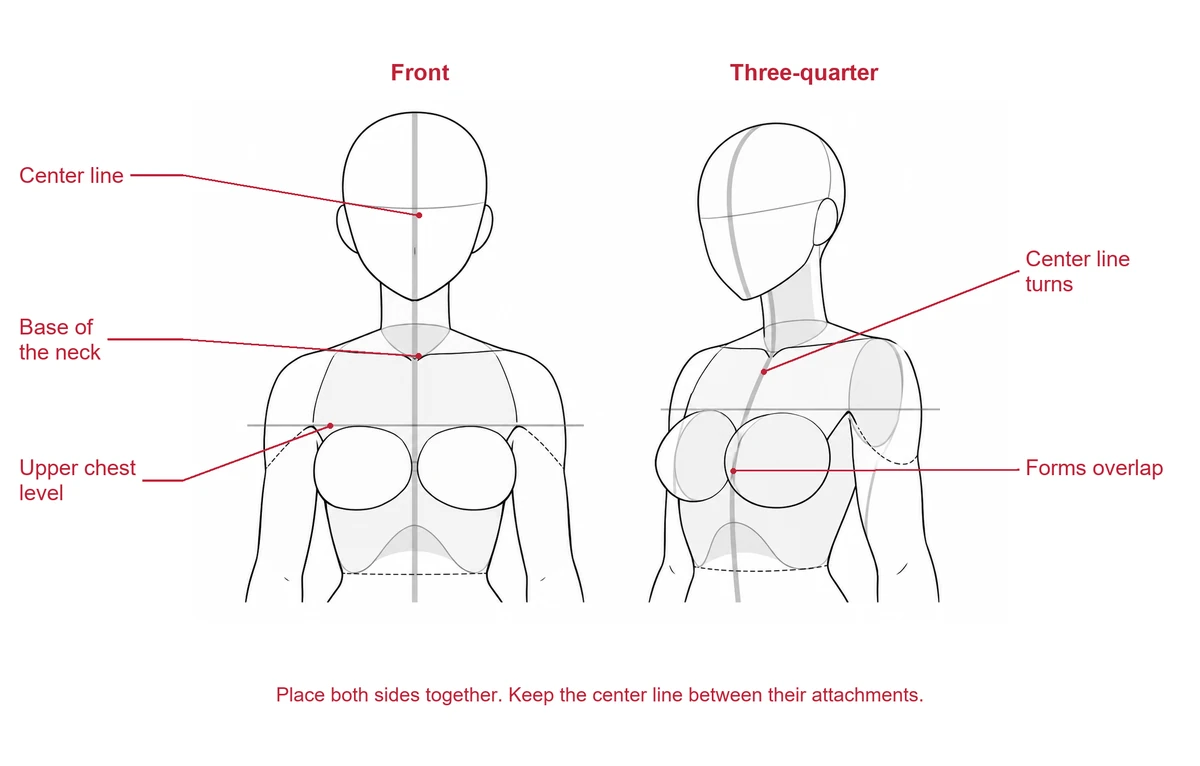
Place them on either side of the chest center line, then check their height together.Find the hollow at the base of the neck and follow the front center line down the ribcage. In a straight, neutral front view, use it to place the pair with balanced spacing. The upper attachment area is near the level beneath the armpits in this simplified construction.
When the torso turns, that center line turns with it. The near breast can hide part of the guide, and the far side looks narrower. Keep track of where each form meets the ribcage instead of copying two identical circles across the page.
 Construction study
Step 03 · Three-quarter and side views
How does the breast shape change when the body turns?
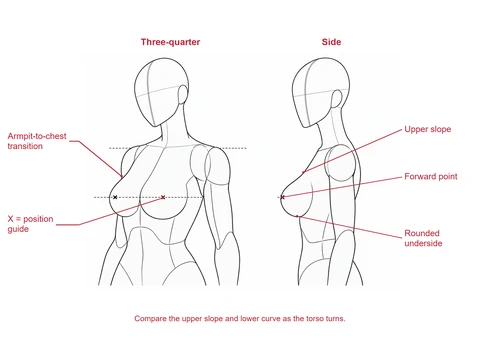
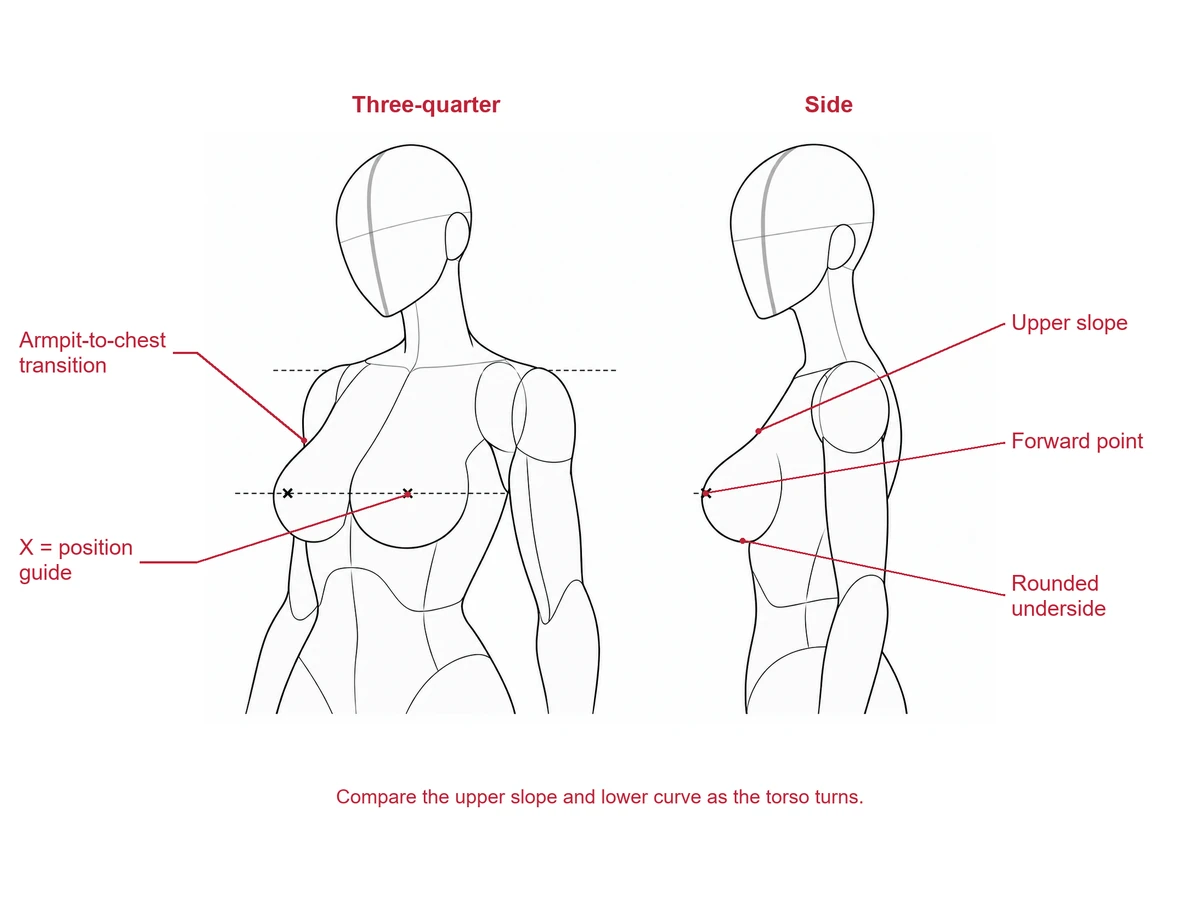
Turn the whole chest in space and separate the upper slope from the rounded lower contour.Use the three-quarter view to check overlap: the near form covers more of the ribcage, while the far form has less visible width. Follow the transition from the armpit into the side of the chest. A single uninterrupted circle tends to flatten it.
In profile, compare the upper slope, the forward projection and the lower curve. They do not all follow the same arc. The X marks are position guides for comparing the views, not details to add to the finished drawing. Shape and fullness vary between characters, so use a reference for the body you want to draw.
 Construction study
Step 04 · Waist shape
How do you connect the chest to the waist?
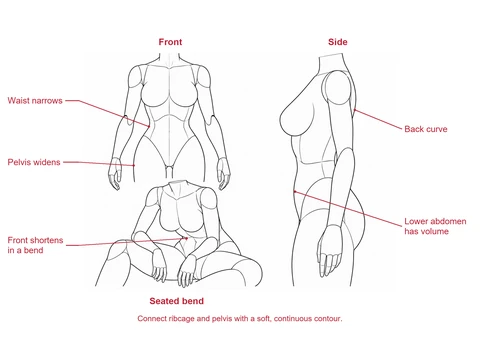
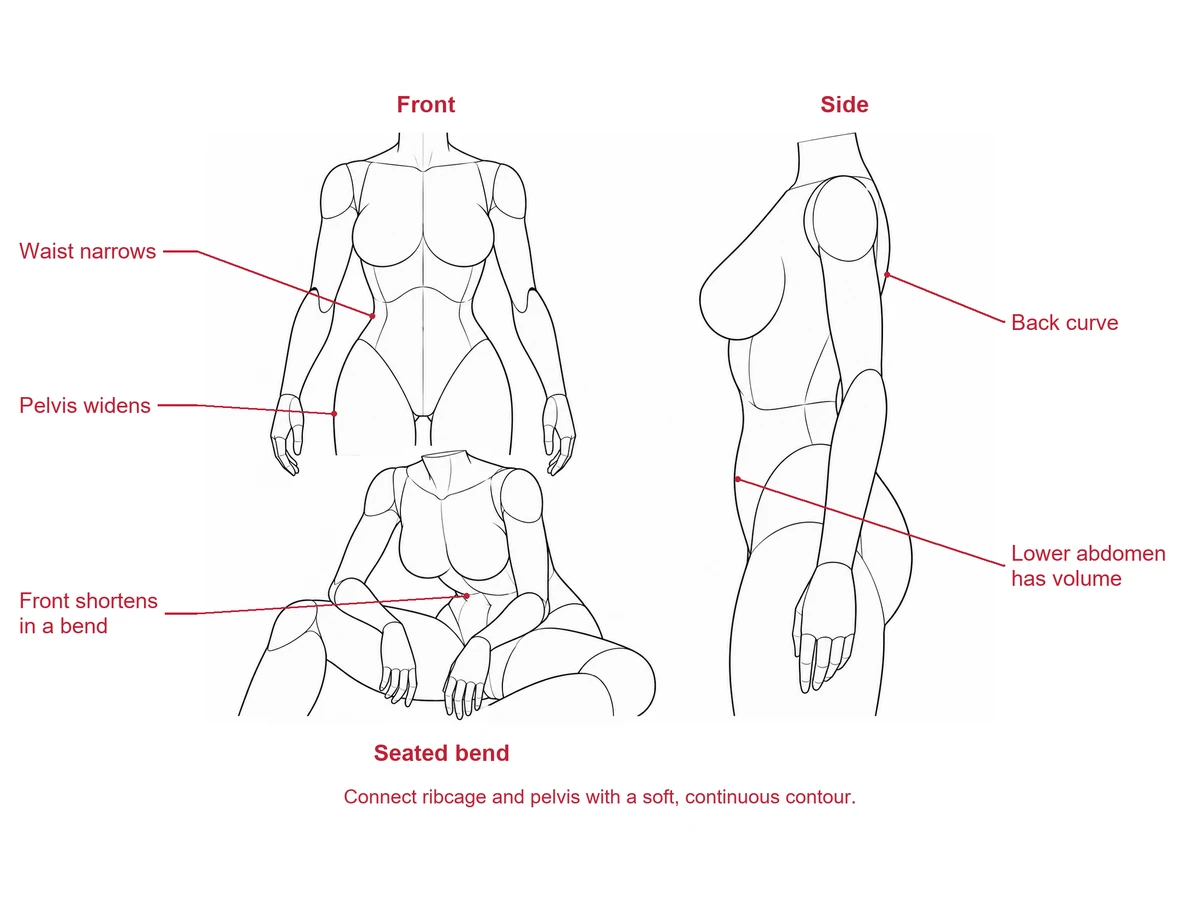
Draw the space between ribcage and pelvis from the front and side before adding a bend.From the front, follow the ribcage as it narrows toward the waist, then let the outline widen toward the pelvis. Avoid pinching the middle into a sharp corner. The side view has its own rhythm: the lower abdomen has volume, and the back has a curve.
Now try the seated pose. As the torso bends forward, the front of the waist becomes shorter and the back lengthens. Let the abdomen change shape between the two larger masses. These drawings show one set of proportions; a narrow waist is a character choice, not a rule for every female body.
 Construction study
Step 05 · Bend and twist
How do you keep the torso solid when it bends or twists?
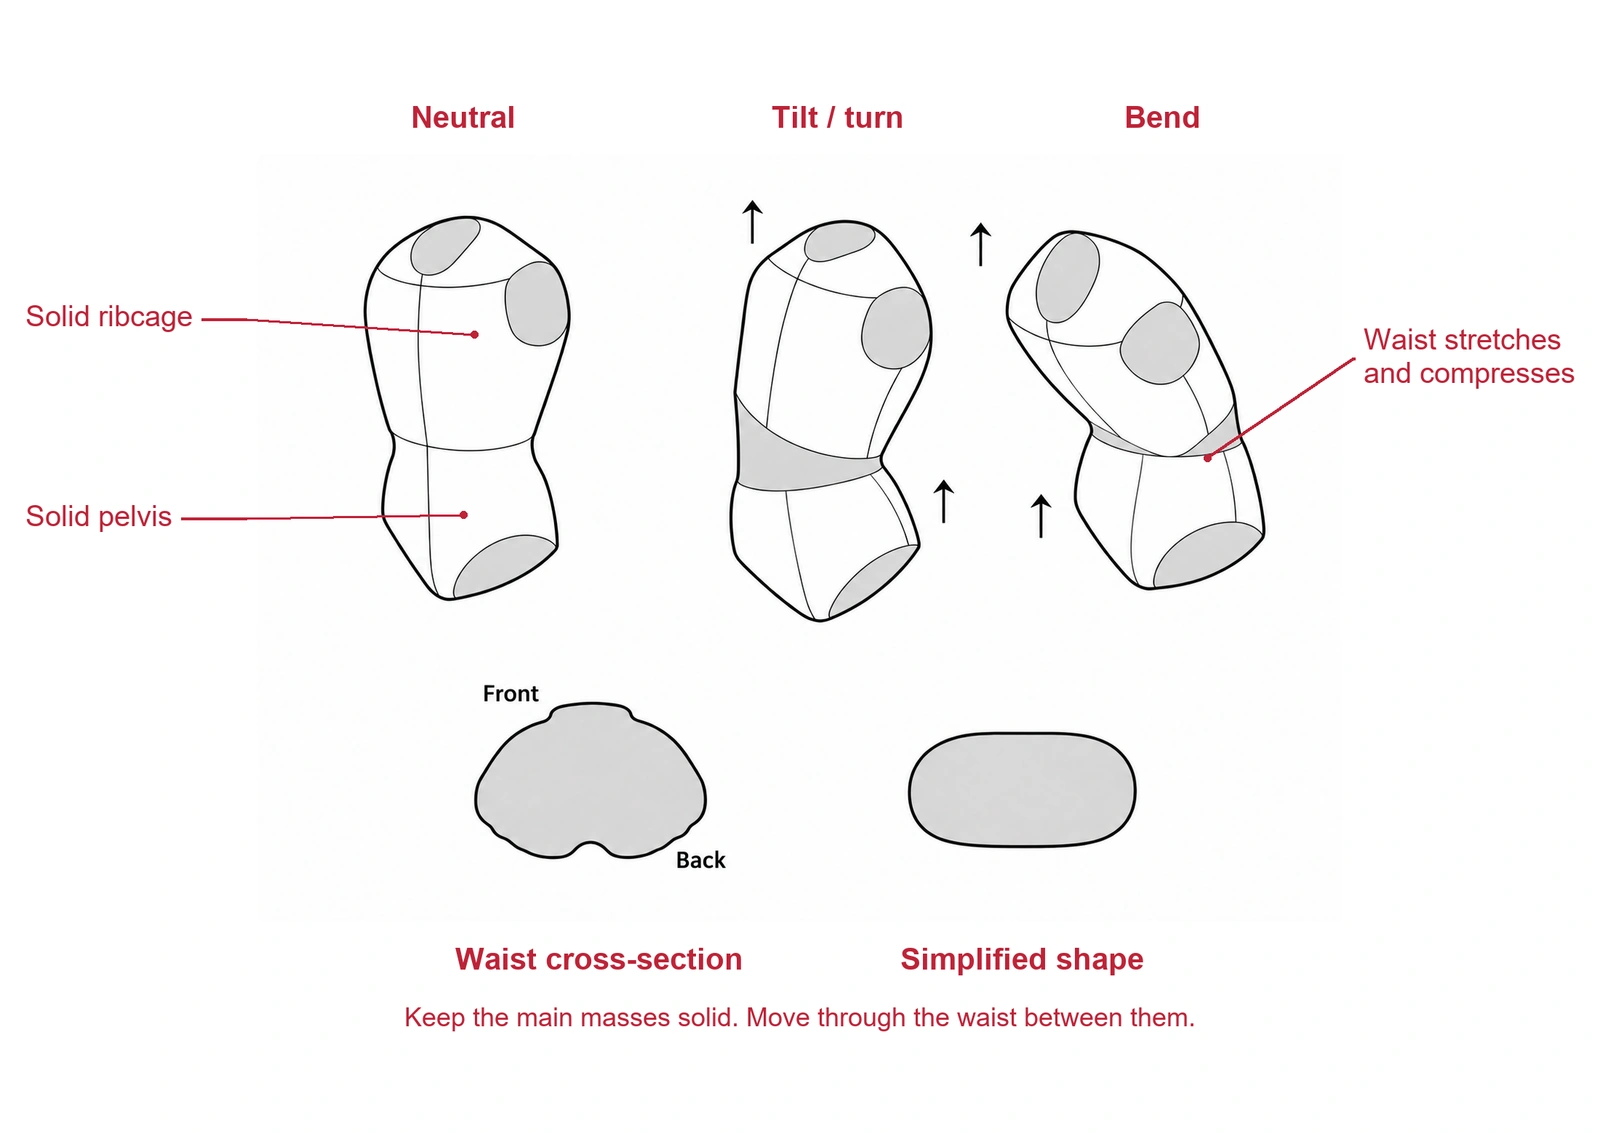
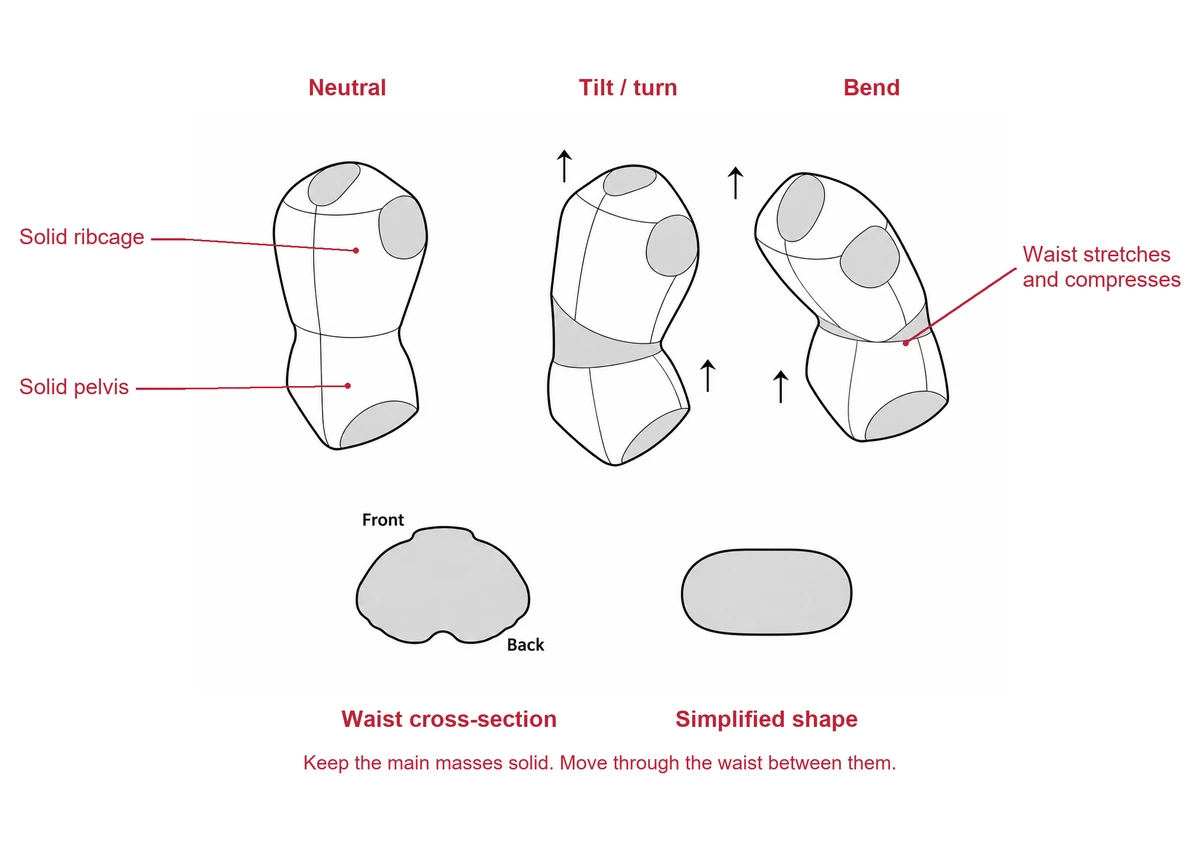
Keep the ribcage and pelvis as solid masses; change the flexible space between them.Block in the upper and lower masses, then decide how they tilt or turn relative to each other. In a bend, the connecting area stretches on one side and compresses on the other. In a twist, the front guides wrap around that connection. Do not reshape the entire ribcage to make the pose work.
The gray bands mark the flexible region. The lower-left shape is a waist cross-section, labeled Front and Back; the rounded rectangle beside it is an easier construction substitute. Give that section depth, then rotate it with the pose.
 Construction study
From rough construction to a shaded torso
The same pose, before and after. Check placement in the rough sketch, clean up the linework, then add simple gray shadows with one light direction.
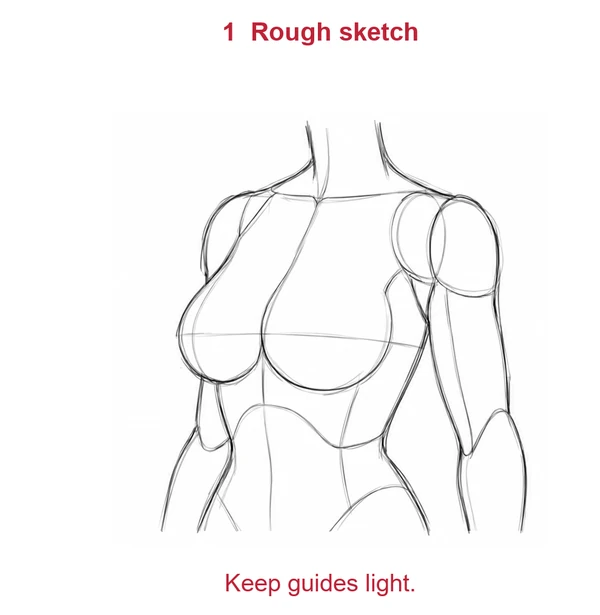
Before: ribcage, center guides and rough contours.
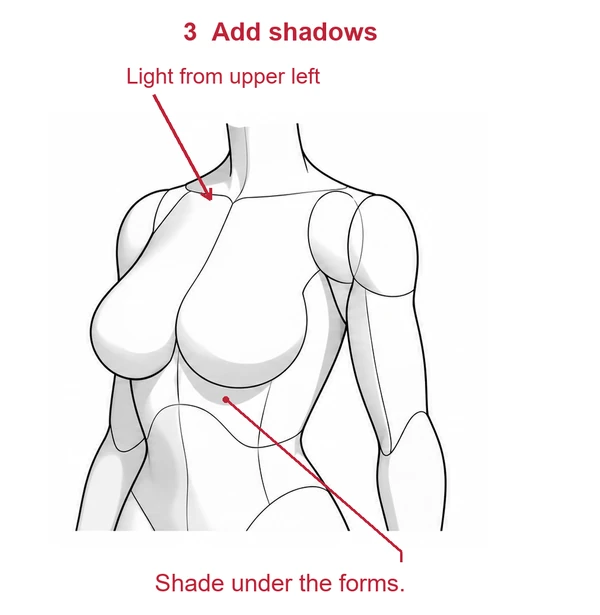
After: clean contours and gray shadows, with light from the upper left.
Where people usually get stuck
Why does my chest look pasted onto the body?
Check the ribcage first. If it has no depth, the breast shapes have nowhere to attach. Sketch the hidden torso outline lightly, then follow the transition from the armpit into the chest.
Why does the far breast look too big?
You may have copied the front-view width into a turned pose. Rotate the center line with the torso, compare the visible attachment areas and allow overlap to hide part of the far form.
Why does my waist look stiff?
The ribcage and pelvis may be facing the same way in every pose. Give them different tilts or turns, then show the connecting area stretching and compressing. Add small folds only after those masses read clearly.
Anime chest and waist drawing FAQ
Can I practice these torso studies with pencil and paper?
Yes. Use light lines for the ribcage, pelvis and center guides, then darken the outline once the placement works. A tablet is optional; the construction checks are the same.
Should I use the same breast shape for every anime character?
No. Size, fullness and body proportions vary. Keep the ribcage and attachment points clear, then use a suitable reference to change the silhouette. The simplified shapes in this guide are practice tools, not a single ideal body.
How can I practice without getting lost in detail?
Draw small front, three-quarter and side studies of the same torso. Compare the shoulder line, chest placement and waist before adding shading. For bending practice, start with the block shapes in step five.
How do I get feedback on my body drawings?
When you join an Anime Art Academy course, a professional Japanese artist gives you personal advice and draws red-line corrections directly on your drawing. There is no limit on how many times you can submit. The only rule: post one drawing at a time, and wait for your teacher's reply before posting the next.