How to Draw Anime Male Short Hair: A Step-by-Step Guide by Japanese Pro Artists
If your anime boy's hair keeps turning into a helmet or a mop instead of that messy short cut half the shonen leads you love have, the trouble usually starts before the first strand. This is how Japanese pros build short male hair: blocks, starting points, then the front and the back.
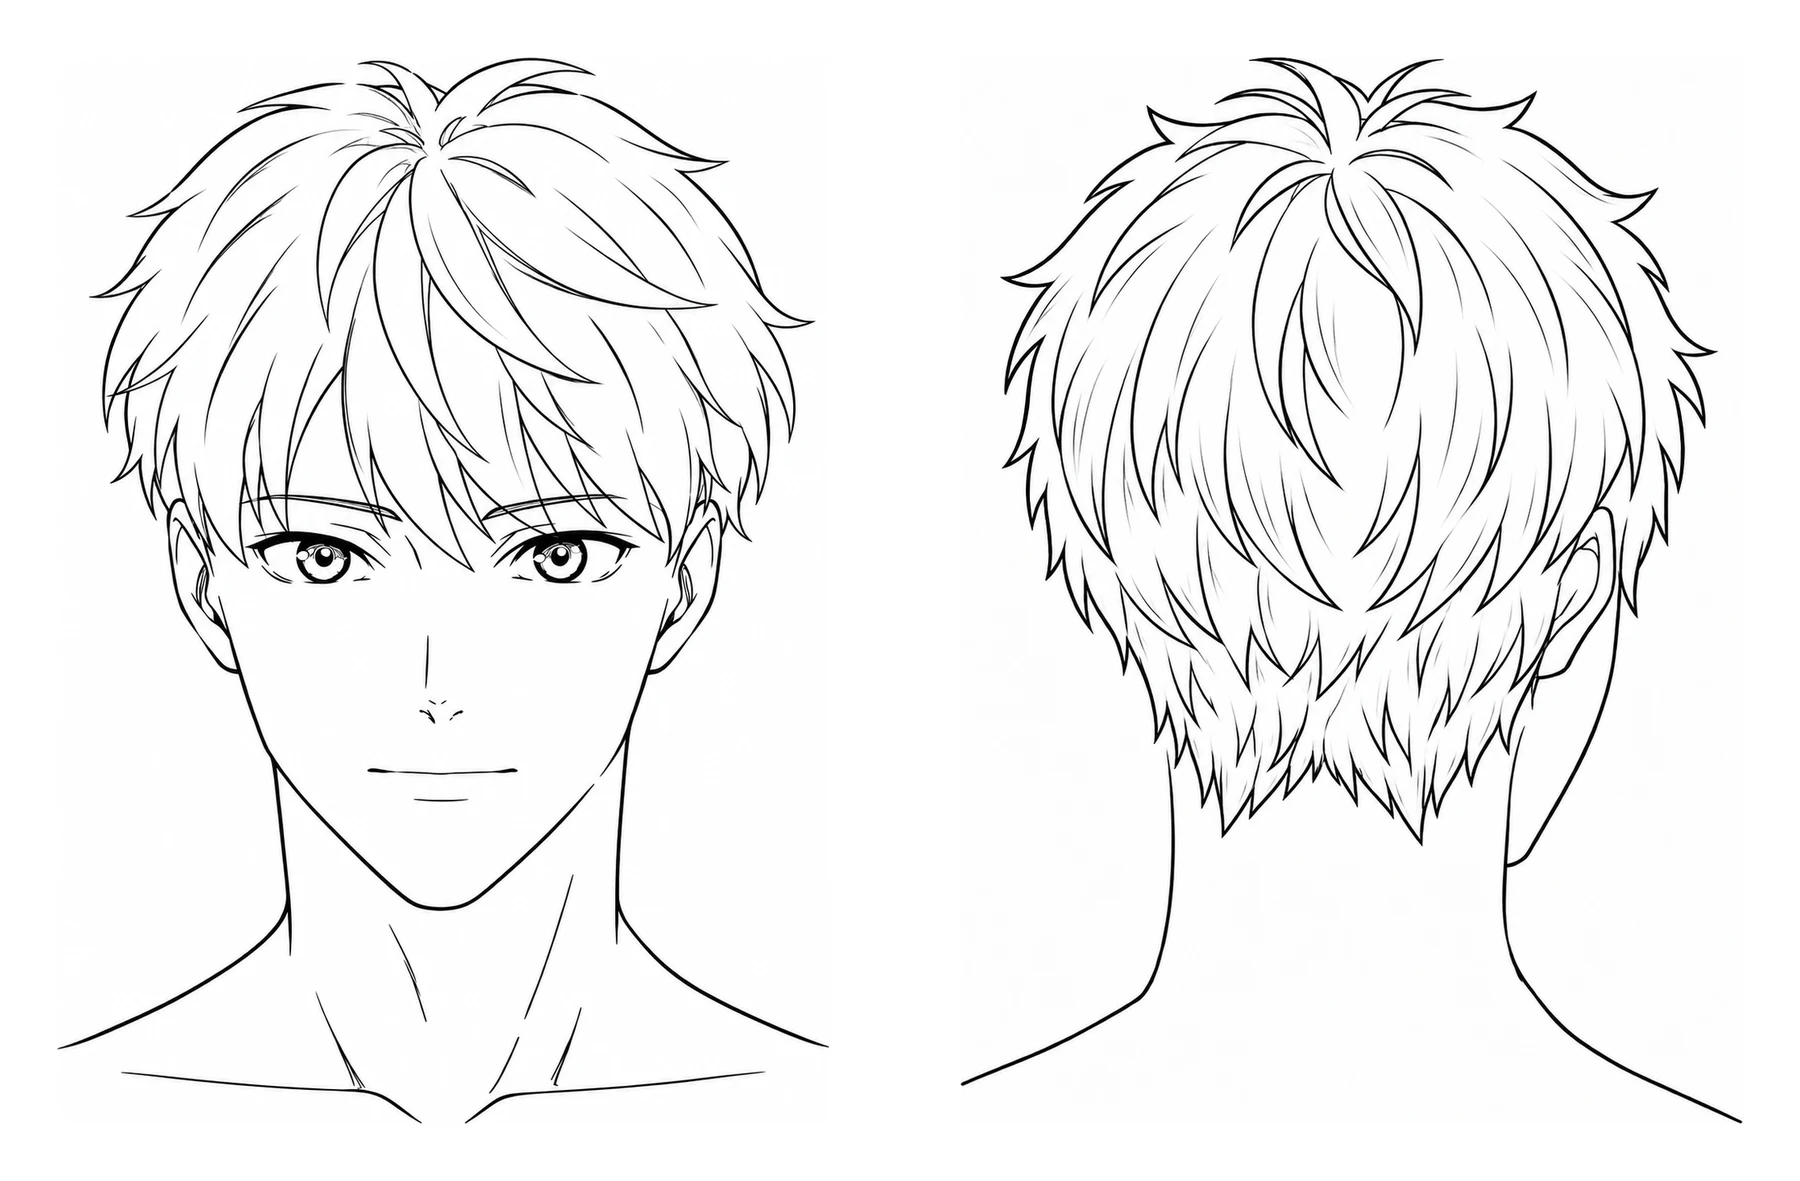 Illustrated examples
The four stages at a glance
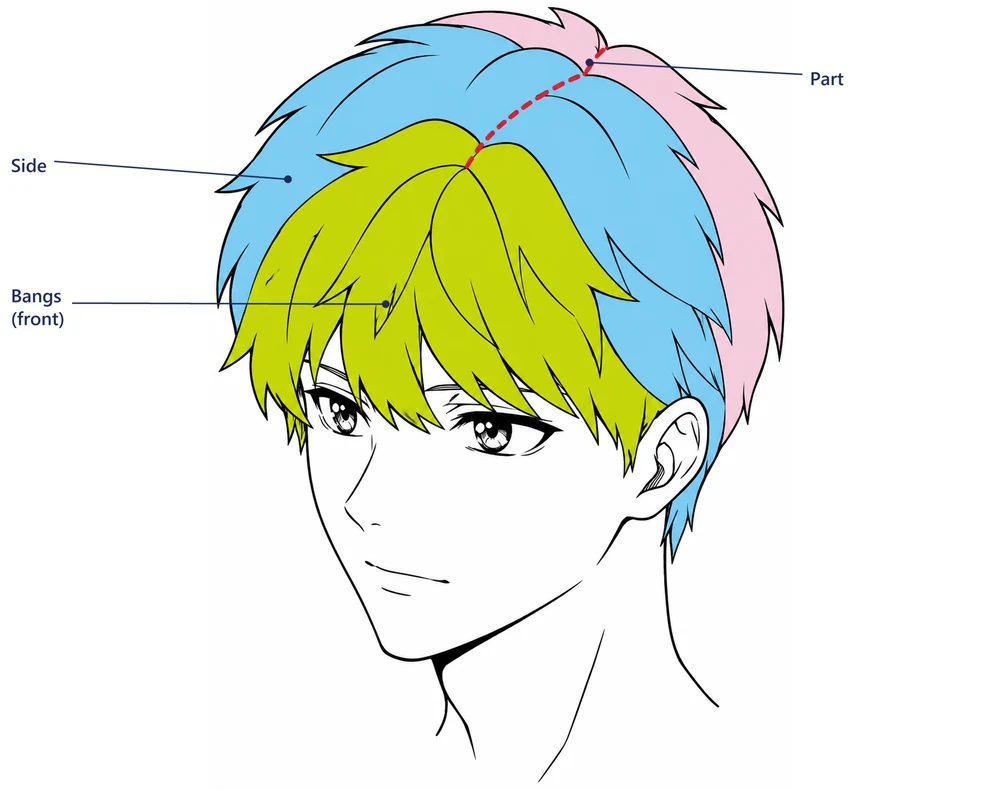 01
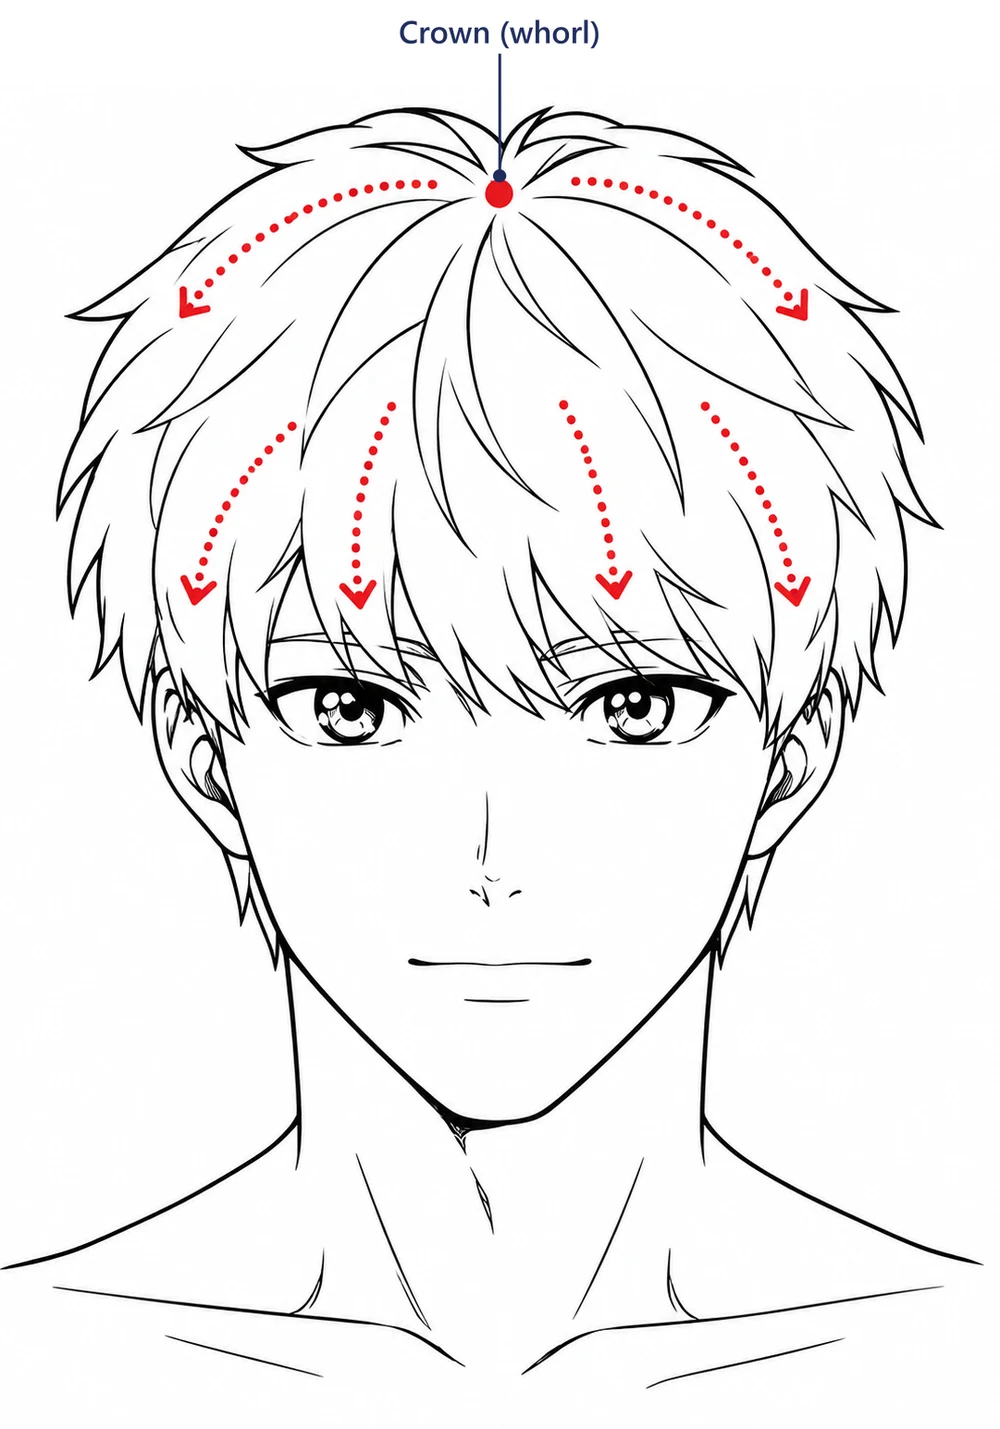 02
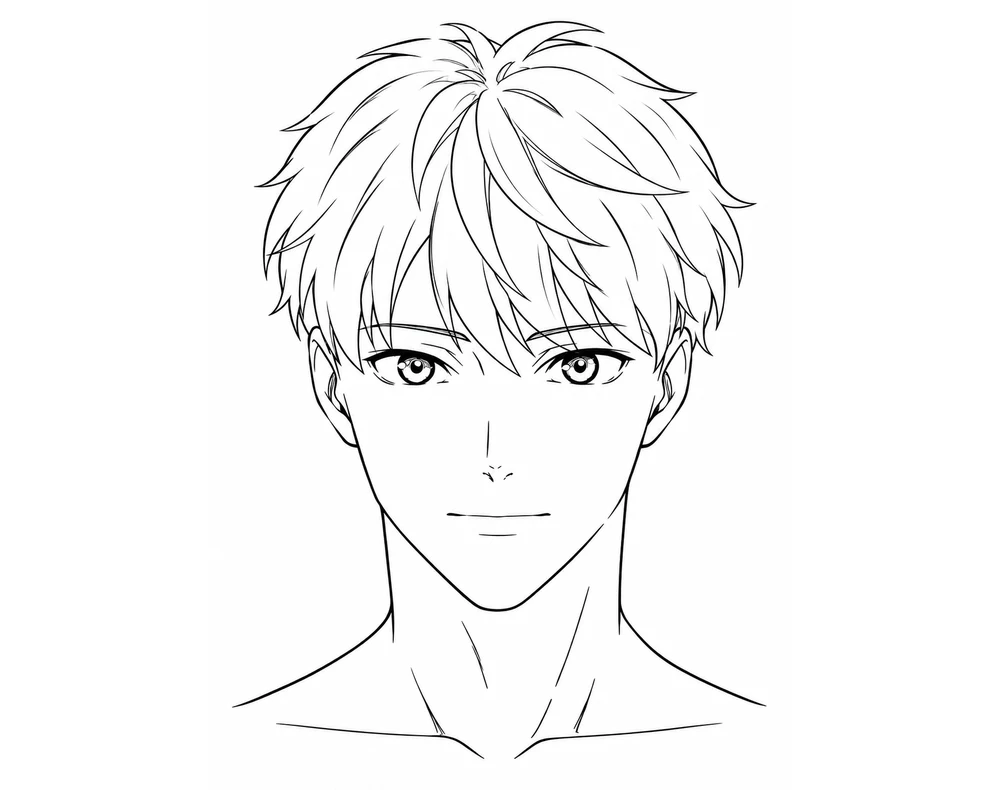 03
 04
Step 01 · Split it into blocks
How do you split anime male hair into blocks?
Treat the hair as a few big bunches: the bangs, the sides, the crown on top and the back.Most people start with strands. That's where it goes wrong. Hair grows out of four areas of the head: the front around the bangs, the sides, the crown in the middle and the back. Rough each area in as a long, curved bunch. The book compares the shape to a bunch of bananas. Do that and the silhouette of the whole hairstyle is there before any detail.
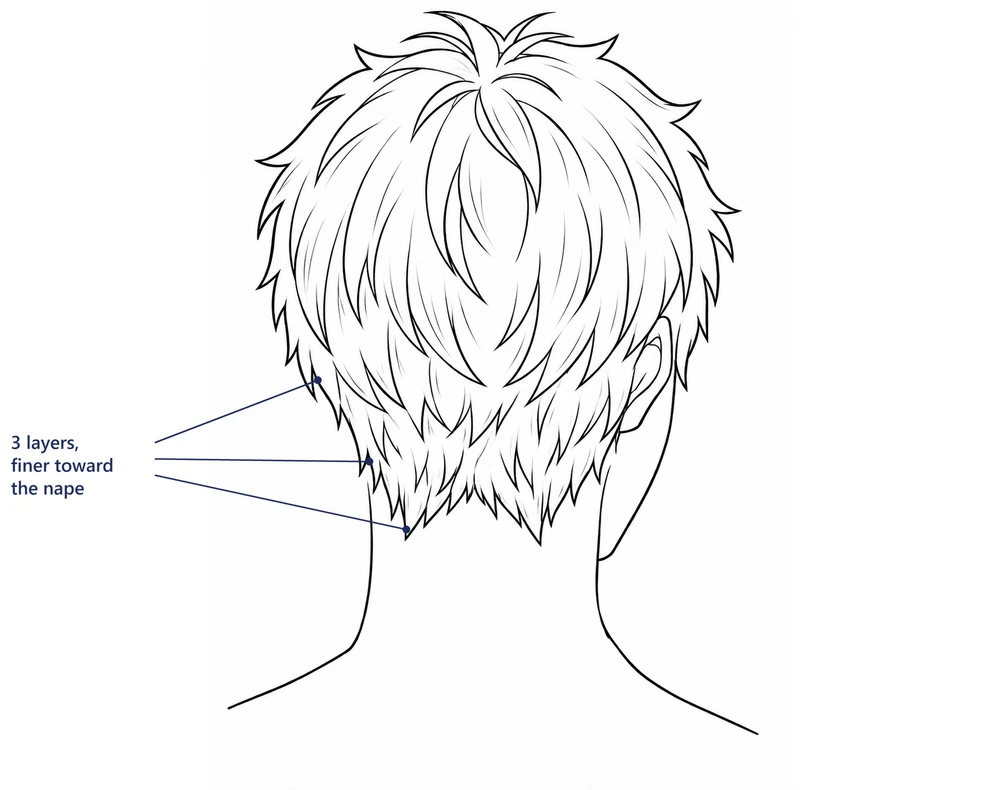
Start at the part and work outward: bangs, then sides, then the back. On short hair, and on boys especially, the back is a pile of short strands overlapping from the whorl down to the nape. Count it as three layers: above the ears, the middle, and the nape.
The blocks at an angle
Green is the bangs, blue the sides, pink the crown and back. The red dashed line is the part.
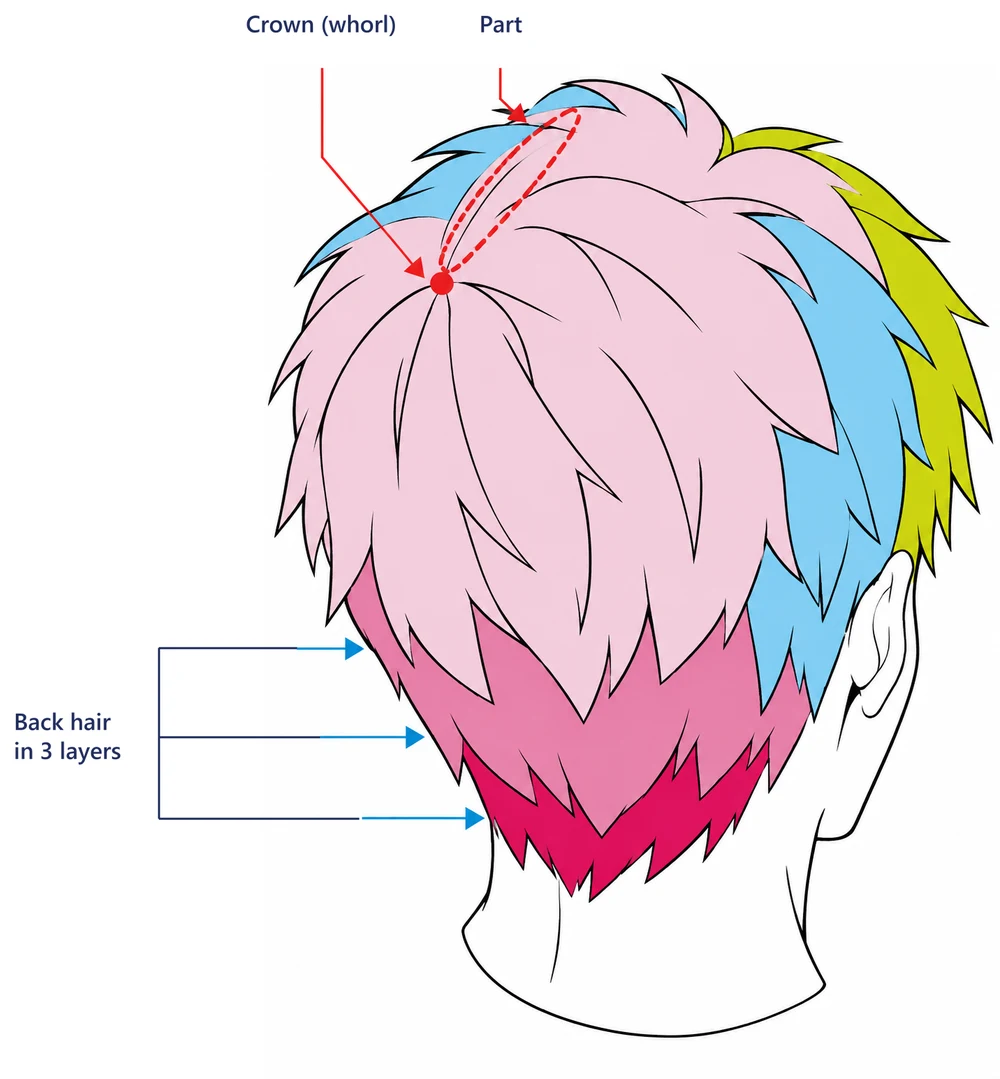
The blocks from above
The whorl (red dot) sits at the back end of the part. The back hair is split into three layers, and each one gets shorter toward the nape.
Step 02 · Find where it grows
Where does anime boy hair grow from?
From three starting points: the whorl, the part and the hairline. Use one, or combine them.Pick one, or mix two or more, and you can get the flow of almost any hairstyle. One catch with the whorl: don't pull every strand out of the exact same point. Hair that sits far from the whorl should start a little further along the head, following its curve.
The part and the whorl are linked. The back end of the part becomes the whorl. So before you draw the back of the head, decide both. Then the flow almost draws itself.
The whorl
Set the whorl on the top or the back of the head, then let the strands spread out from it along the shape of the skull.
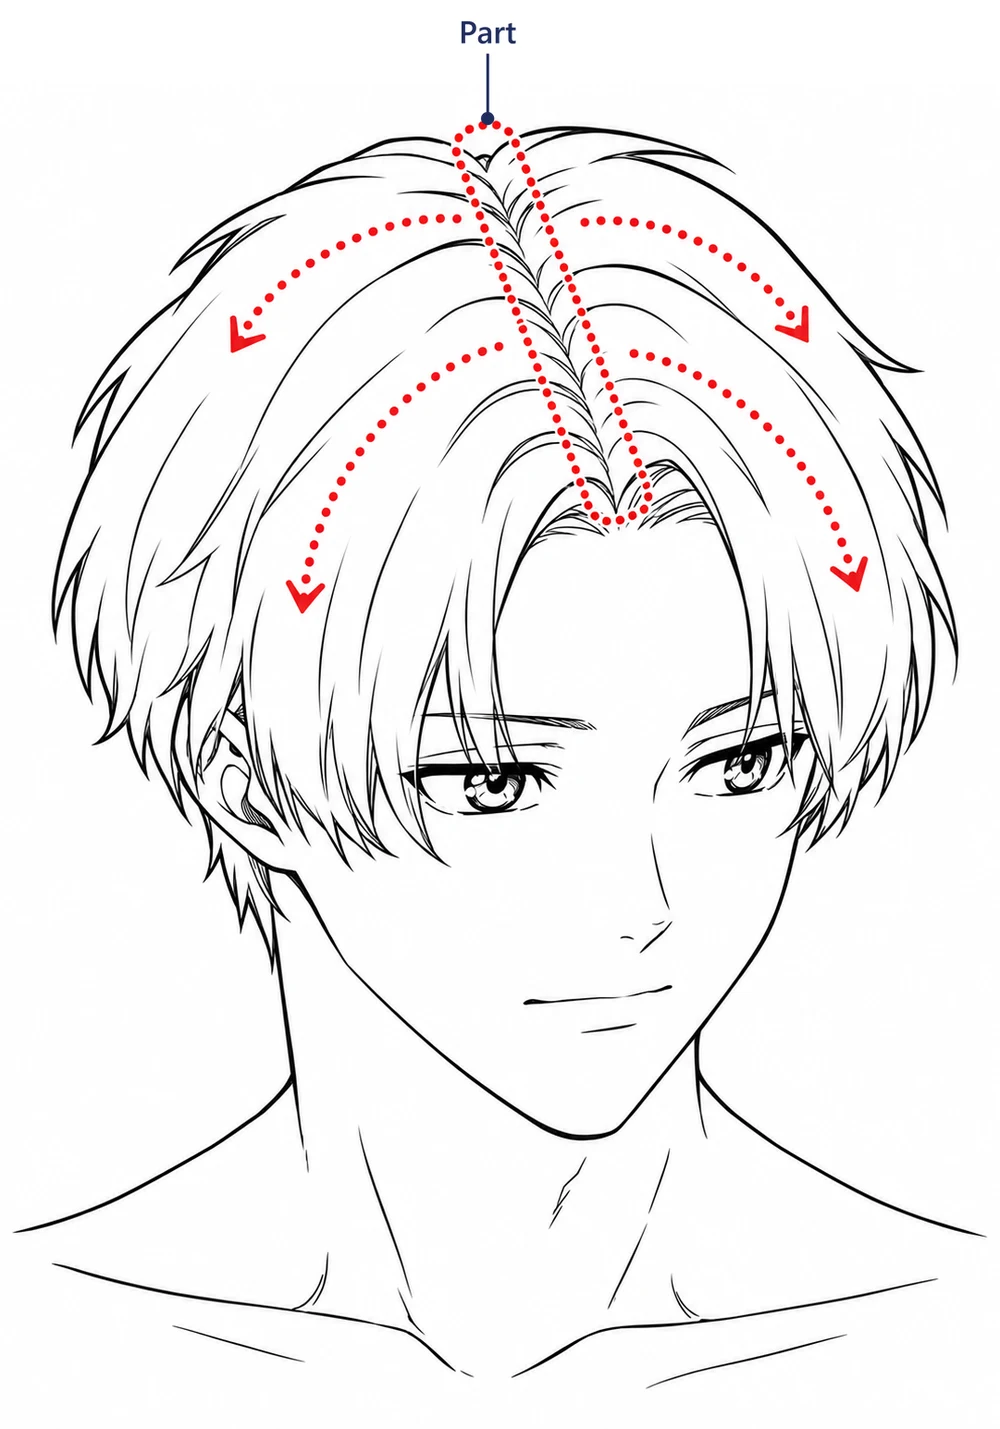
The part
Draw a guide for the part first, then flow the hair left and right along the head.
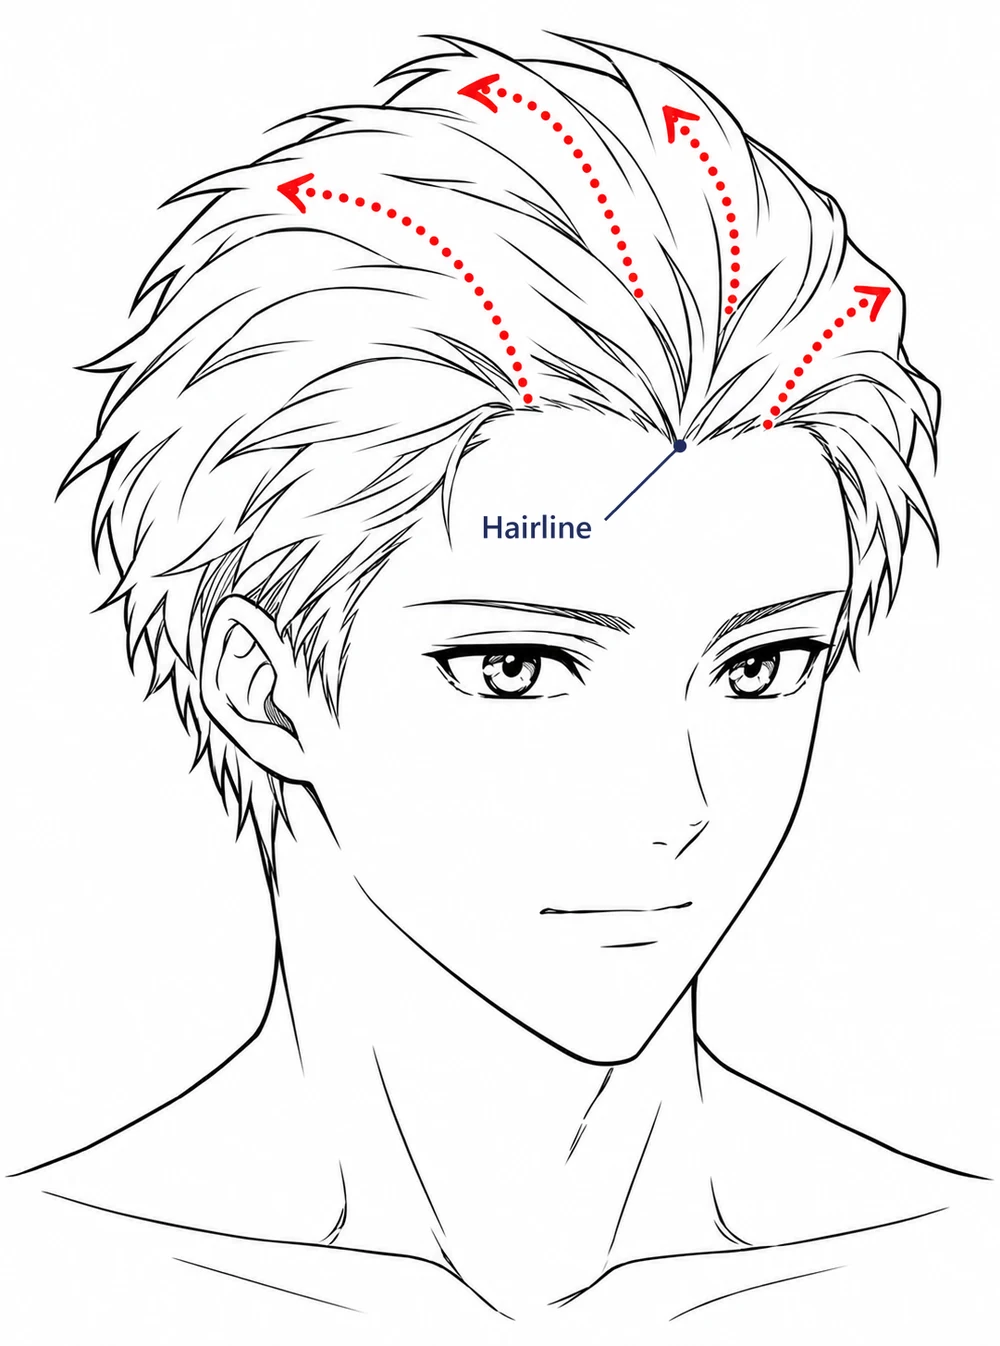
The hairline
Start at the hairline and draw toward the tips. Hair pushed up, or caught in a strong wind, changes which way it flows.
Step 03 · Draw the front
How do you draw short anime male hair from the front?
Lay down two guides first, the skull and the hairline, and the hair has something to sit on.Draw the bald head and the face. Add a back-of-head guide a little wider than the face outline, and a hairline guide from the forehead to just above the ears. Draw the bangs off the hairline guide. Then draw the outline of the hair around the whole head, roughly one size outside the skull line.
Now put a whorl on top and add strands along the flow. Short strands overlap each other, and a few of them flick outward. To finish, add thin lines where strands overlap, to hint at the finer hair. Keep it light. Too many lines and the hair looks unnatural.
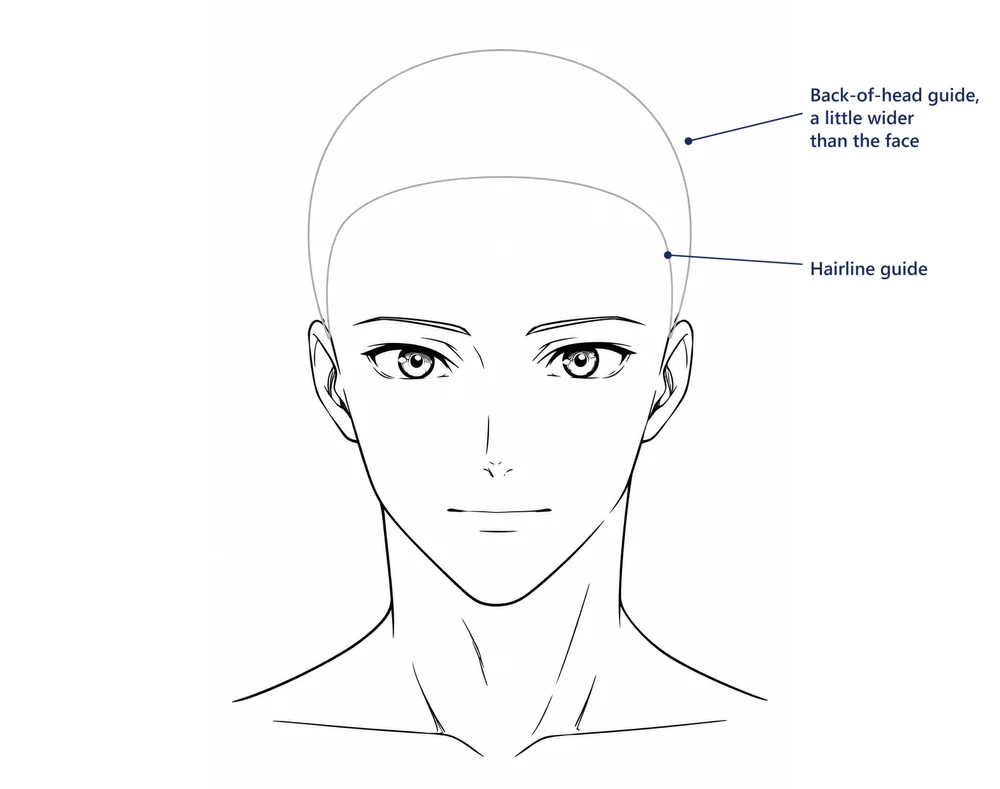
Head and guides
Bald head and face. The gray lines are the back-of-head guide and the hairline guide.
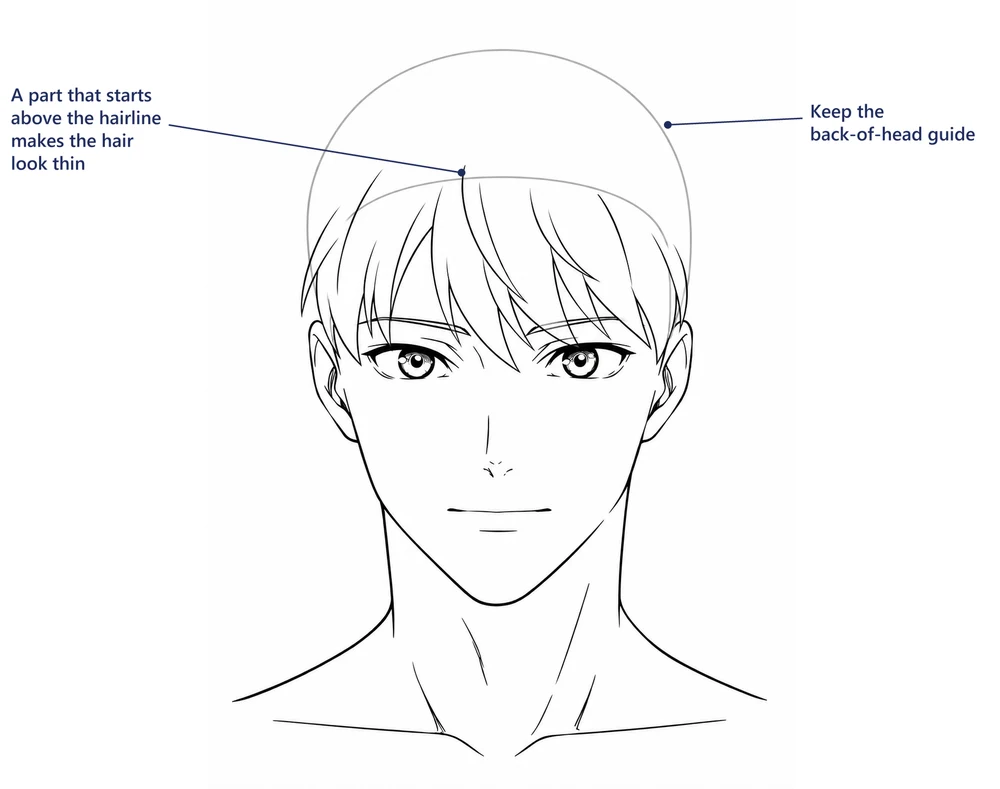
Bangs
Draw the bangs from the hairline guide. Keep the back-of-head guide; you need it for the next stage.
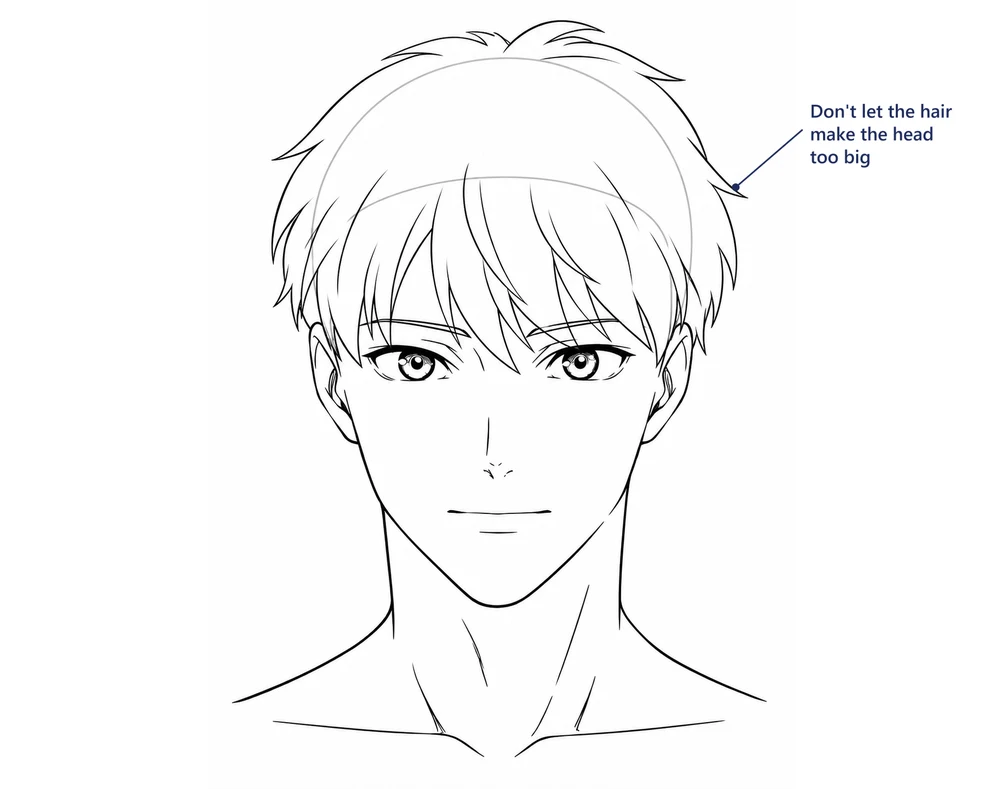
Outline
The hair outline wraps the whole head, about one size outside the skull line.
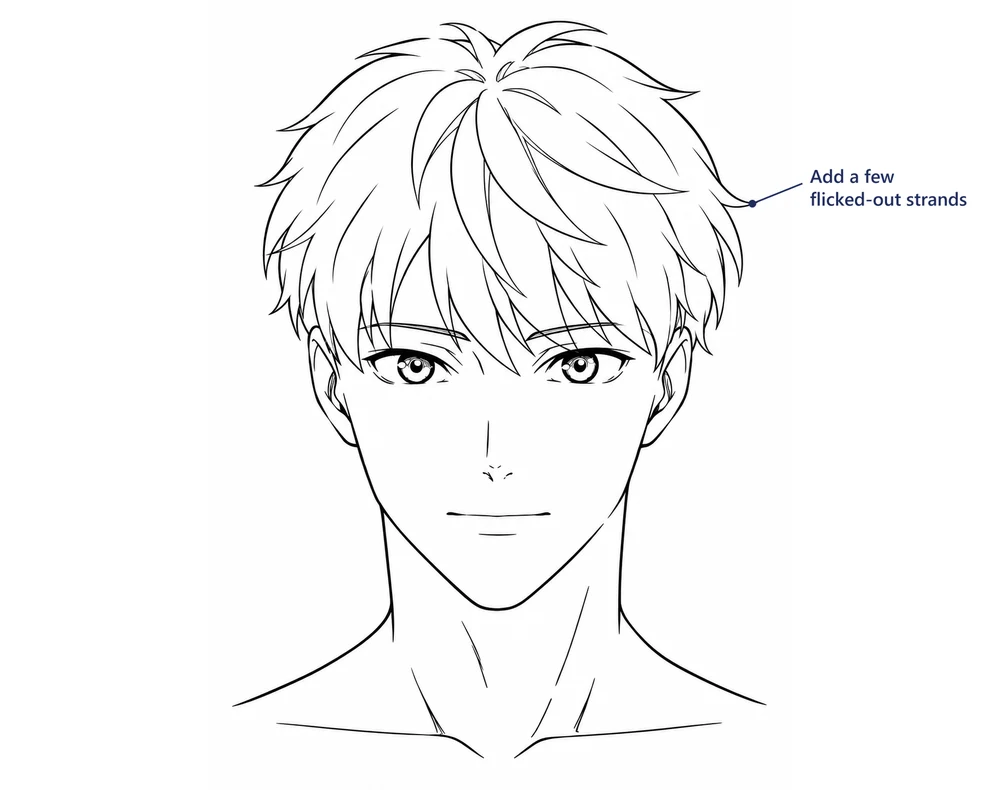
Strands
A whorl on top, strands along the flow, and a few strands flicking out.
Finished
Light, thin lines where strands overlap. Stop before it gets busy.
Step 04 · Draw the back
How do you draw short anime male hair from the back?
Find the whorl with two guide lines, then stack the hair in layers that get shorter toward the nape.Draw the outline of the face and the back of the head as seen from behind. Draw a line linking the ears and a line down the middle of the head. Where they cross is your whorl. Grow rough tufts from it, not just left and right but upward too.
Next, draw the outline of all the hair outside the head guide, again without making the head look too big. Then draw the flow of the whole back from the whorl. Below the ear line, around the nape, the hair is shorter than above. Finish with fine hairs, the same way as the front.
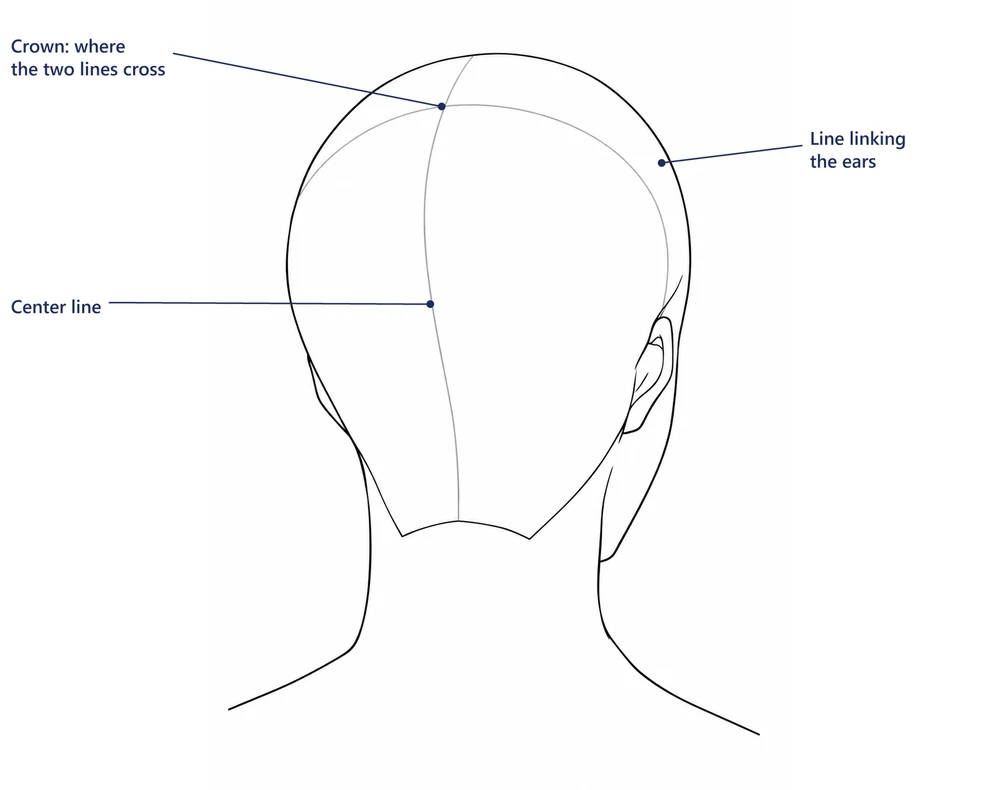
Guide lines
A line linking the ears and a center line. The whorl goes where they cross.
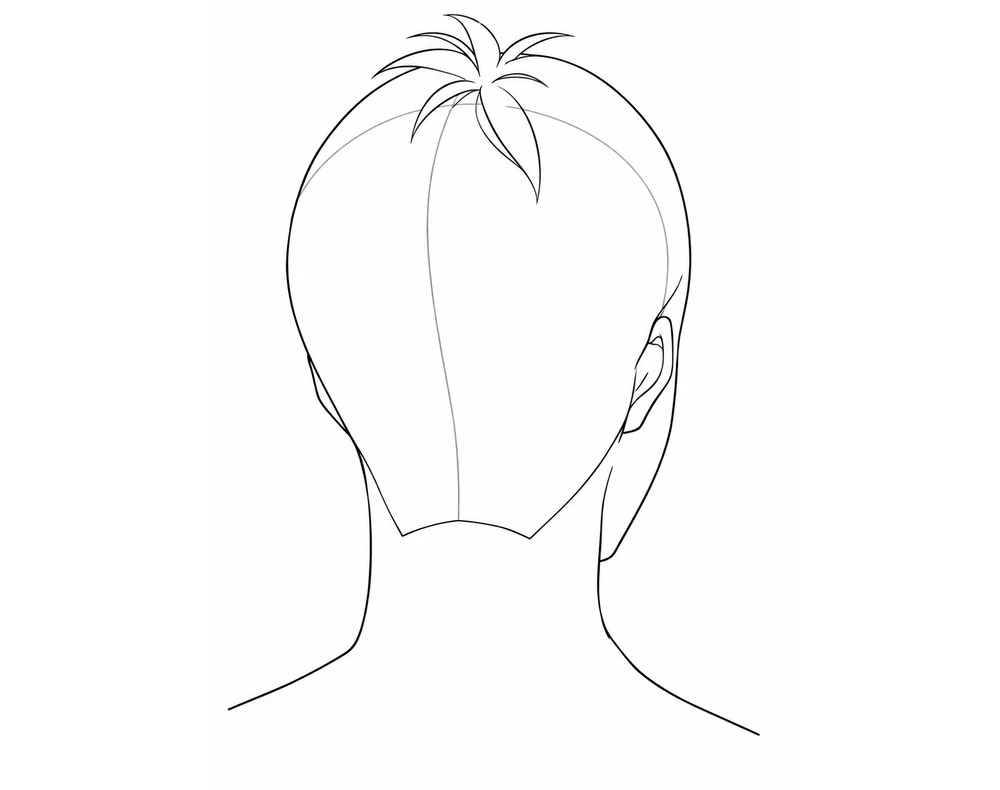
First tufts
Rough tufts from the whorl, going left, right and up.
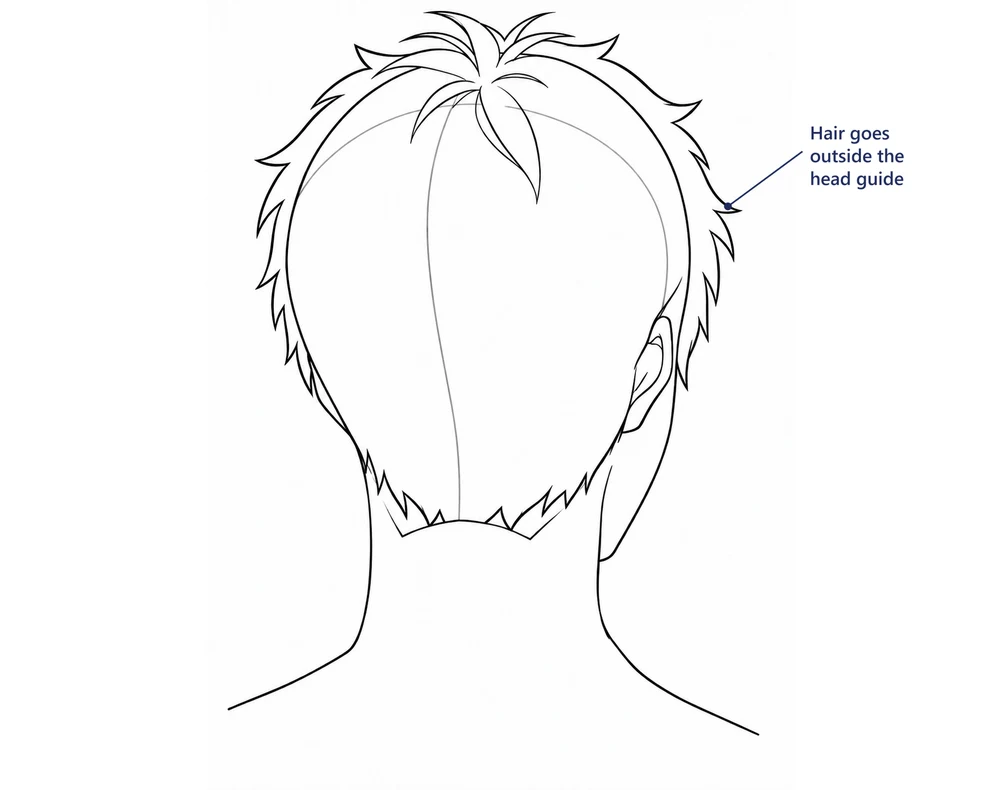
Outline
The hair goes outside the head guide, down to the nape.
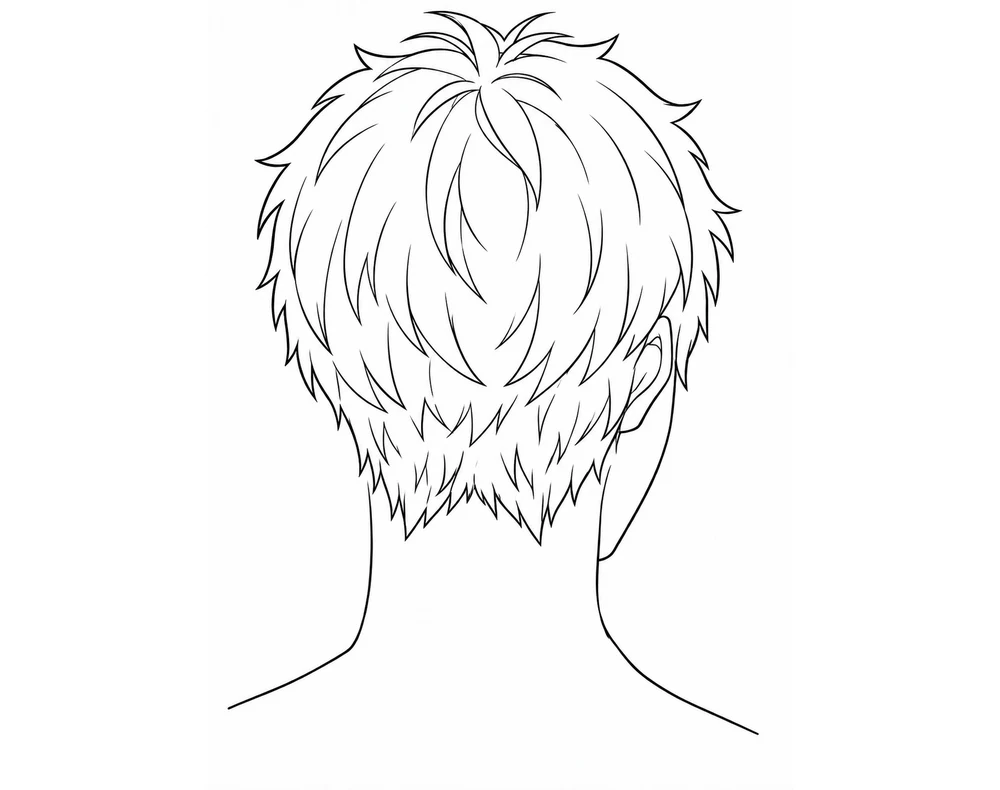
Flow
The flow of the back from the whorl. Hair below the ears is shorter.
Finished
Three layers, getting finer toward the nape.
From guide lines to finished hair
The same head at the start and at the end. Everything in between is the four stages above.
Start: the skull and the hairline as guides.
Finish: blocks, flow and strands built on top.
Where people usually get stuck
Why does my anime boy's hair look like a helmet?
Usually every strand comes out of one point, or the back is one even length. Spread the roots along the head, and break the back into three layers.
Why does the hair look thin at the front?
Check where the part starts. If it begins above the hairline, the hair looks thin. Draw the bangs from the hairline guide.
Why does the head look too big?
The hair outline drifted too far from the skull. Keep it about one size outside the back-of-head guide, and compare the head with the face.
Anime male short hair FAQ
What is the easiest way to draw anime male short hair?
Split it into blocks first (bangs, sides, crown and back), decide where it grows from (the whorl, the part or the hairline), draw the outline about one size outside the skull, and add short, overlapping strands last.
Where does the whorl go on an anime boy's head?
On the top or the back of the head. Seen from behind, draw a line linking the ears and a line down the center of the head. The whorl sits where they cross. The back end of the part also ends at the whorl.
How do I draw the back of short male hair?
Build it in three layers: above the ears, the middle and the nape. Hair below the ear line is shorter, and the strands get finer toward the nape.
How do I get feedback on my hair drawings?
When you join an Anime Art Academy course, a professional Japanese artist gives you personal advice and draws red-line corrections directly on your drawing. There is no limit on how many times you can submit. The only rule: post one drawing at a time, and wait for your teacher's reply before posting the next.