How to Draw Anime Noses: A Step-by-Step Guide by Japanese Pro Artists
If your noses keep coming out too big, crooked, or floating somewhere between the eyes and the mouth, the shape usually isn't the problem. The placement is. Everything here comes from a real Anime Art Academy lesson: one semi-realistic face, then a more stylized one, with every way the teacher draws the nose on each.
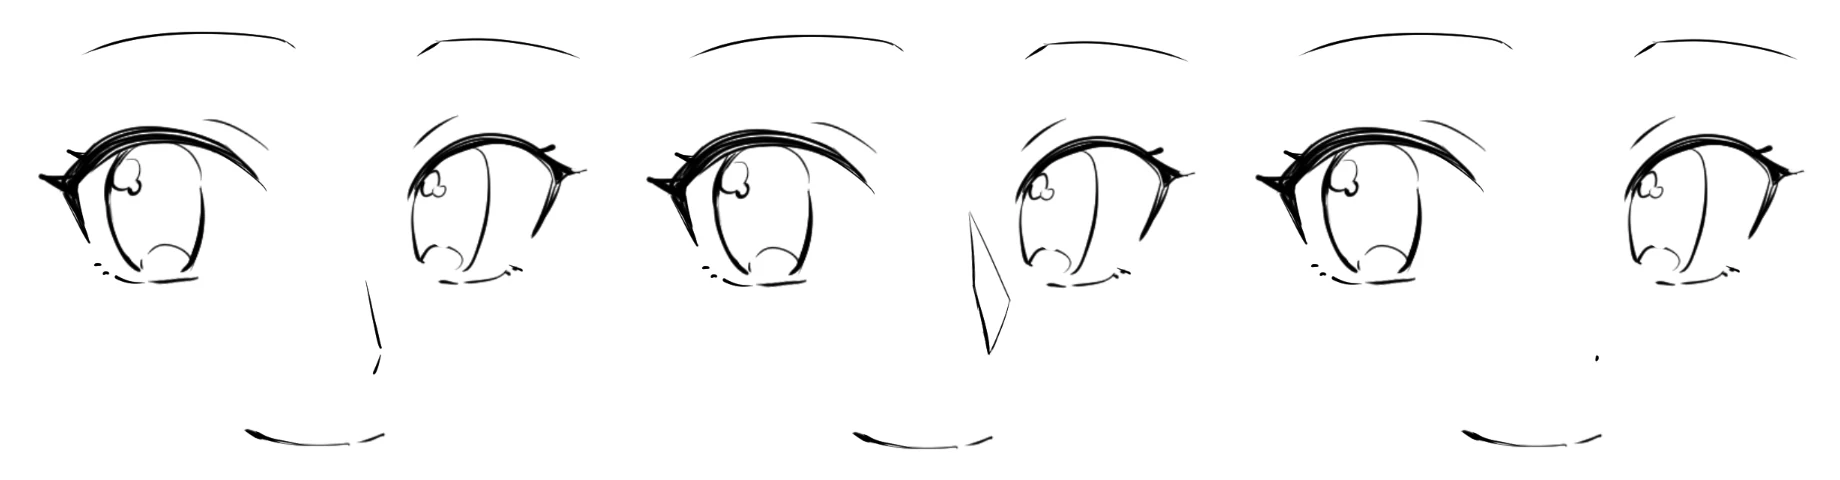 Real lesson material
The three stages at a glance
 01
 02
 03
Step 01 · Place the nose
Where does the nose go on an anime face?
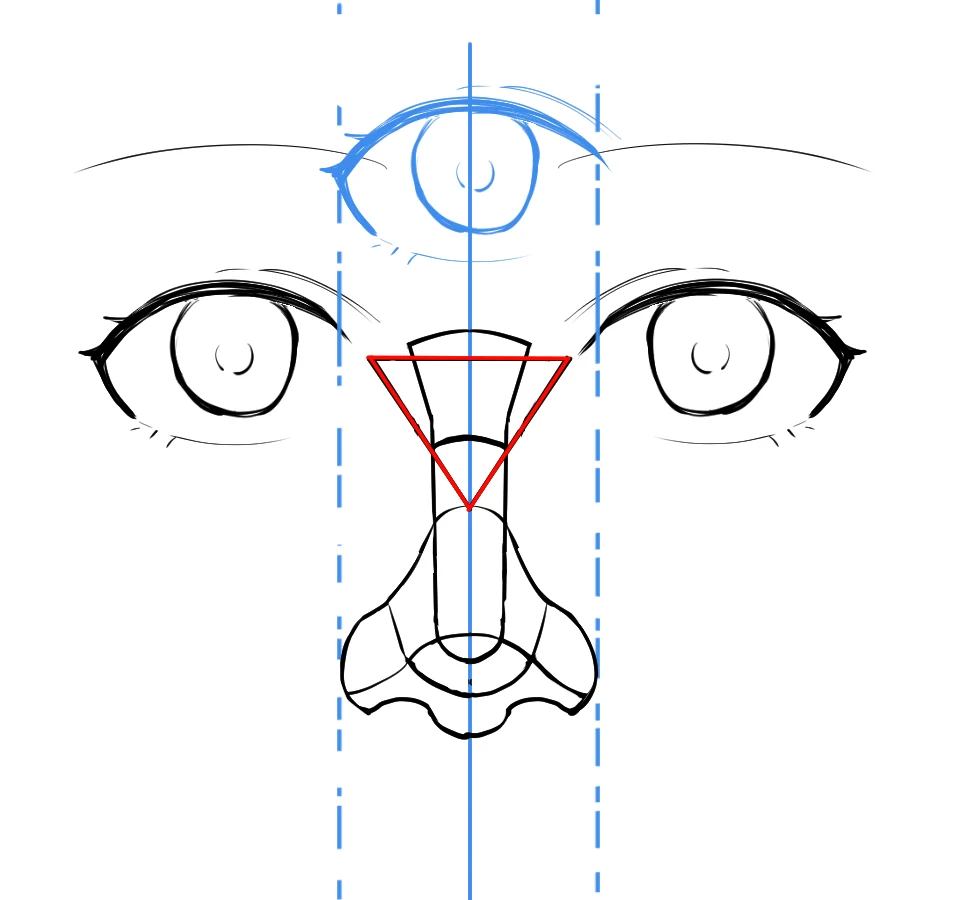
On the center line, inside the gap between the eyes.Start with the center line of the face. Then look at the space between the eyes. On a semi-realistic face it's about one eye wide. Remember that one number and spacing the eyes gets a lot easier. The nose lives inside that one-eye gap.
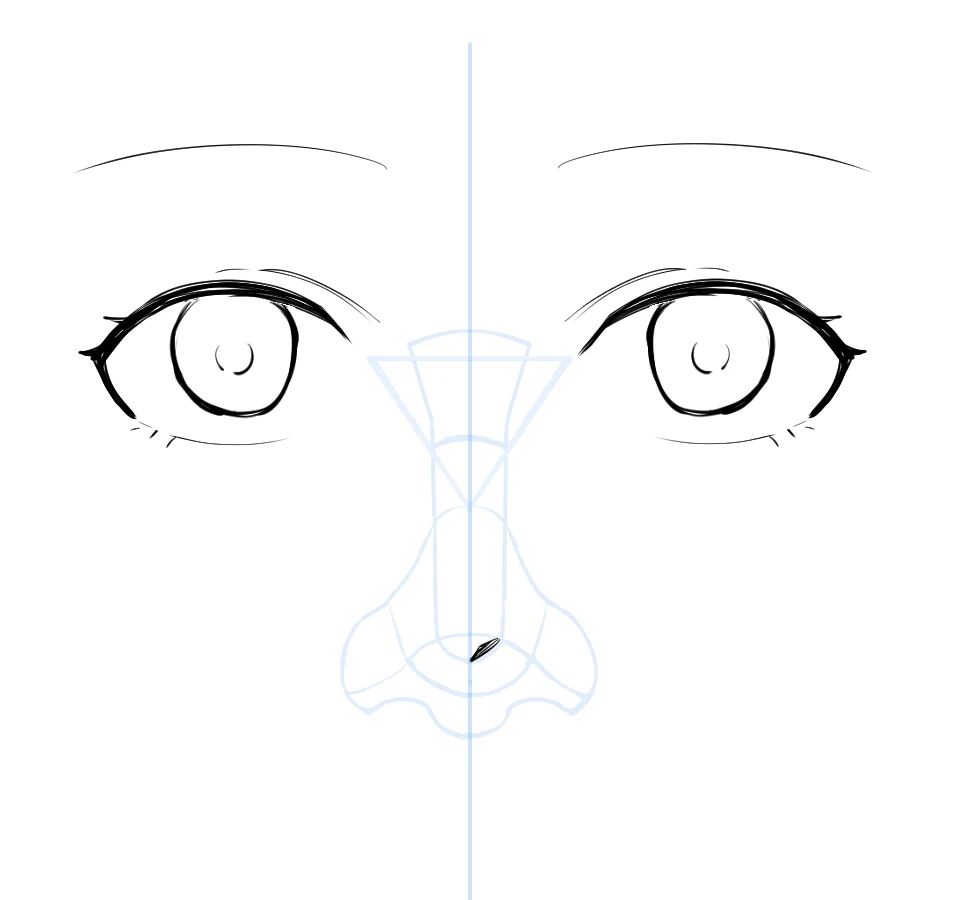
Now connect the inner corners of both eyes to the middle of the bridge. That red triangle is your guide. Sketch the bridge, the rounded tip, the wings and the nostrils over it, so you know where every part of the nose is before you decide what to ink.
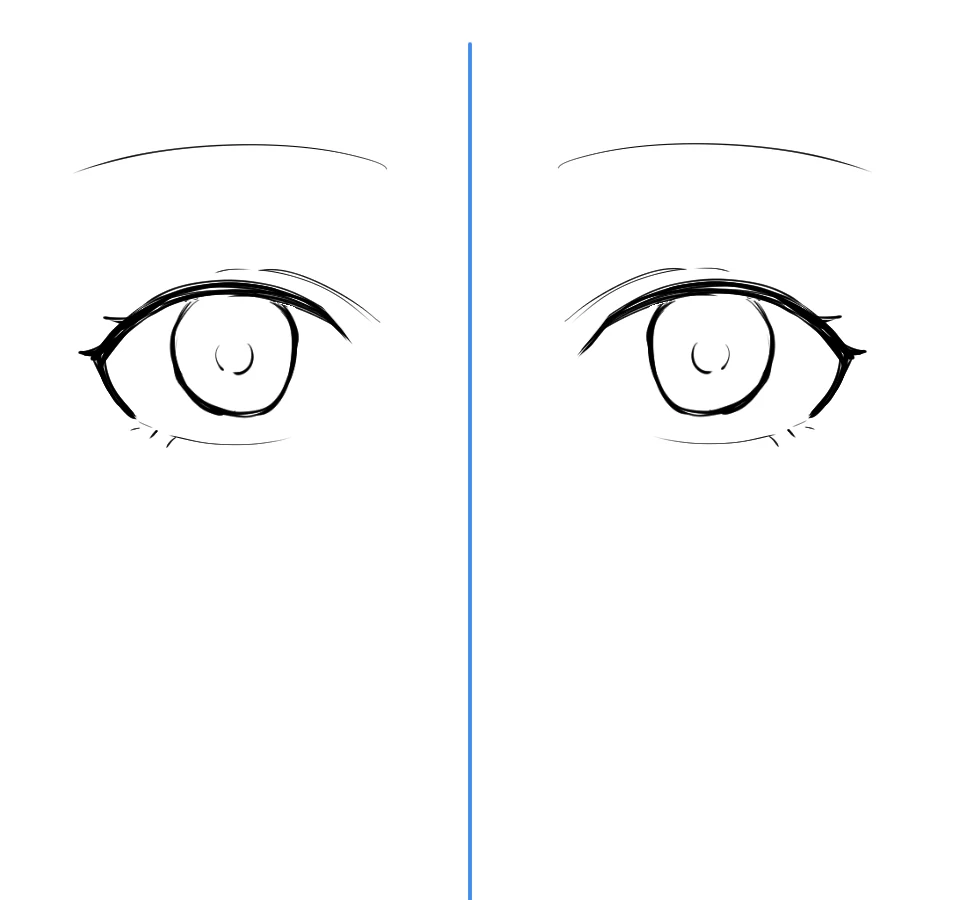
The center line
The blue line is the center line of the face.
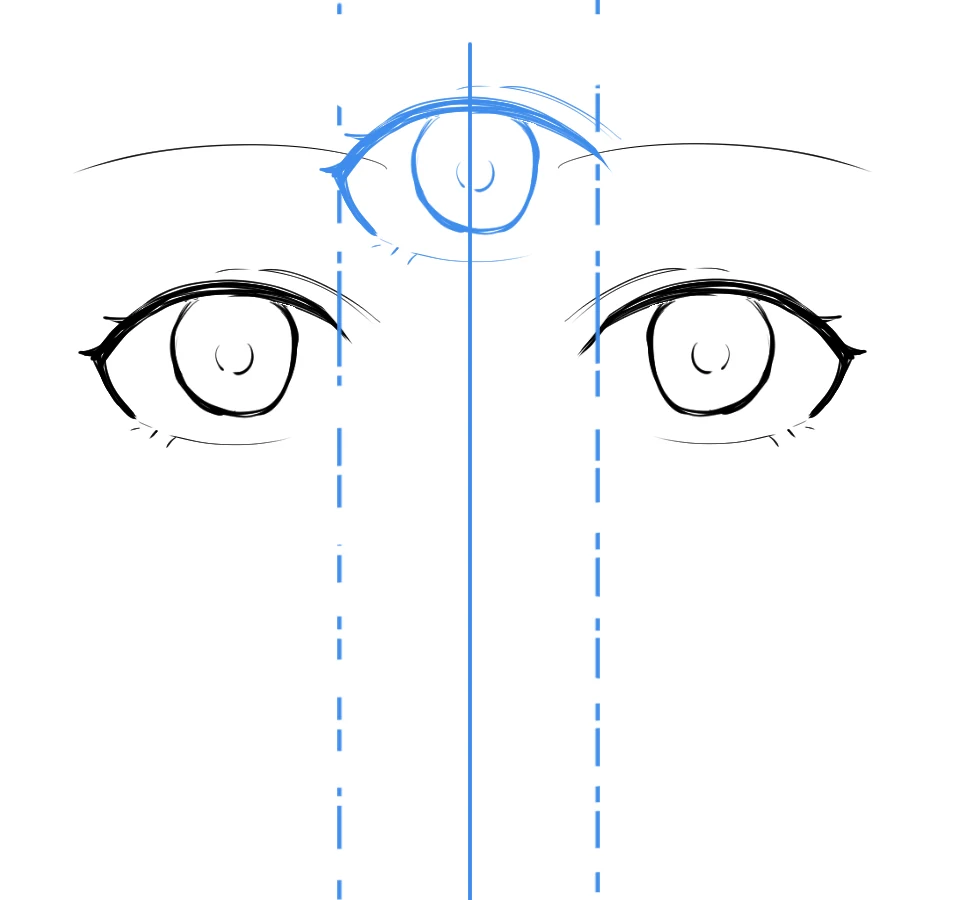
One eye apart
On a semi-realistic face, the gap between the eyes is about one eye wide.
The triangle guide
The red triangle joins the inner corners of the eyes to the middle of the bridge. The nose goes inside the one-eye gap.
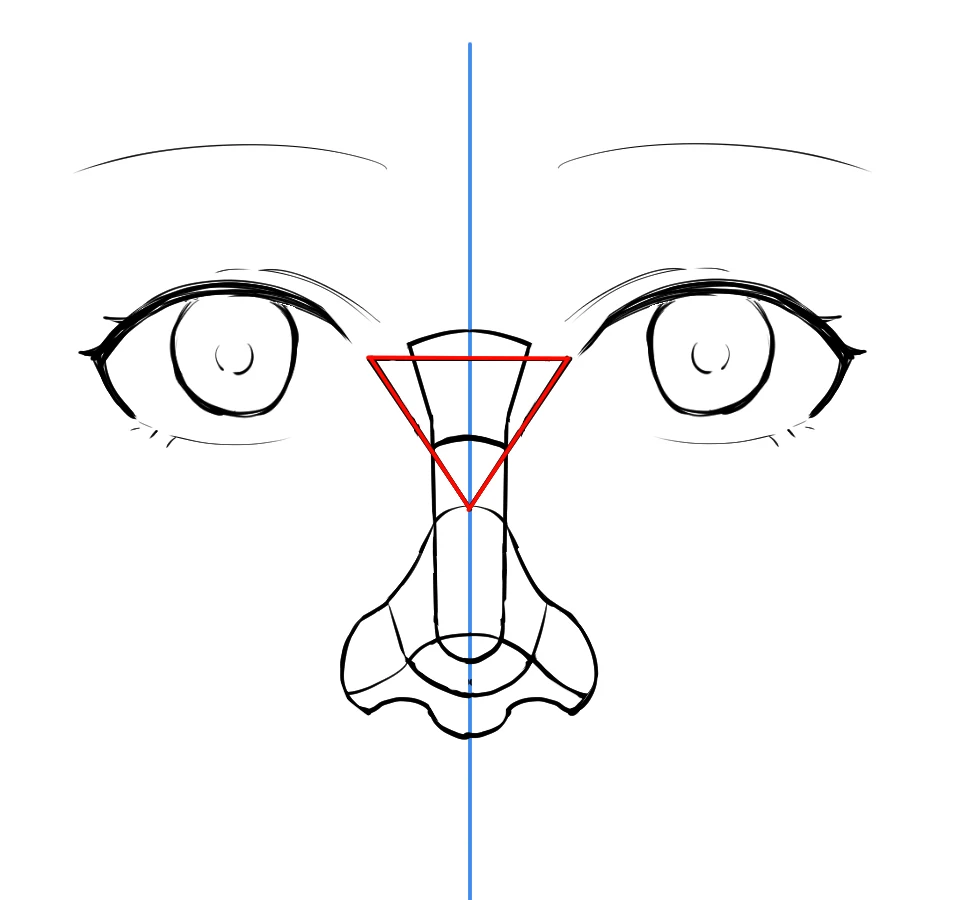
The nose on the guide
Sketch the whole nose over the triangle. You'll draw your final lines on top of this.
Step 02 · Semi-realistic noses
How do you draw a semi-realistic anime nose?
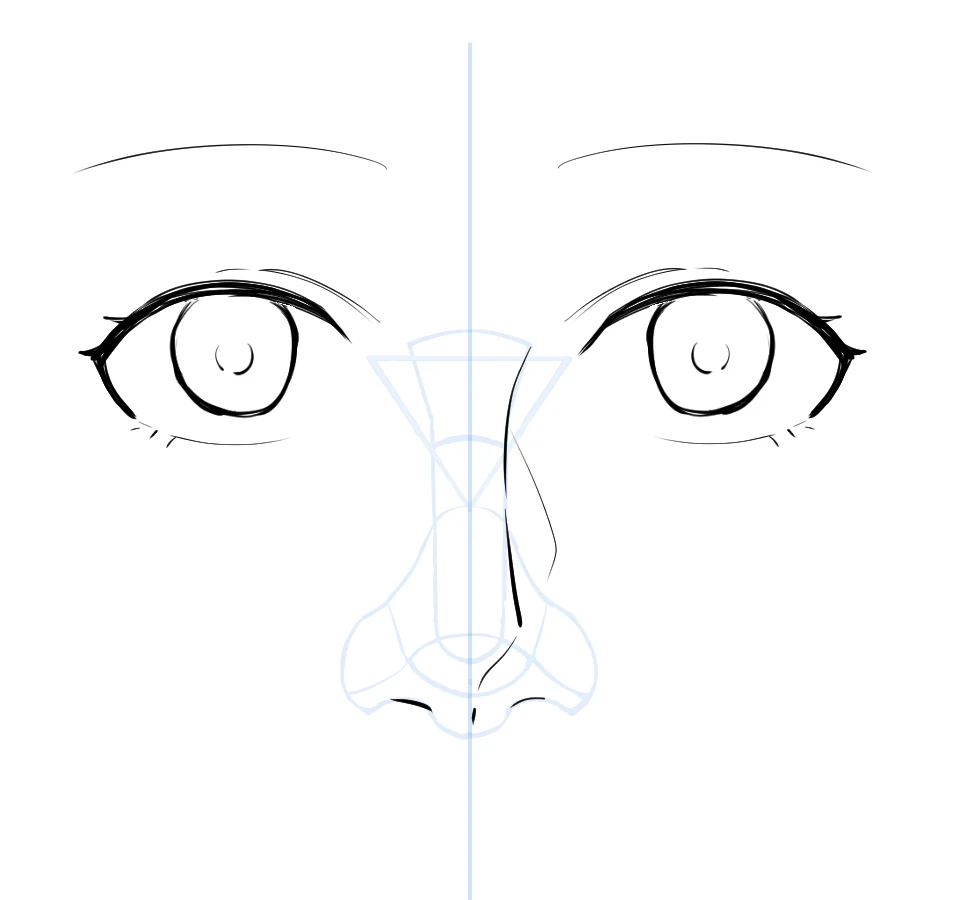
Decide how much of the sketched nose to ink. There's more than one right answer.There are several ways to show a nose, so pick the one you like. The teacher shows three on the same face. The first traces the outline and the nostrils, and you can read the shape of the whole nose. The second is the same idea, simplified. The third draws only the tip.
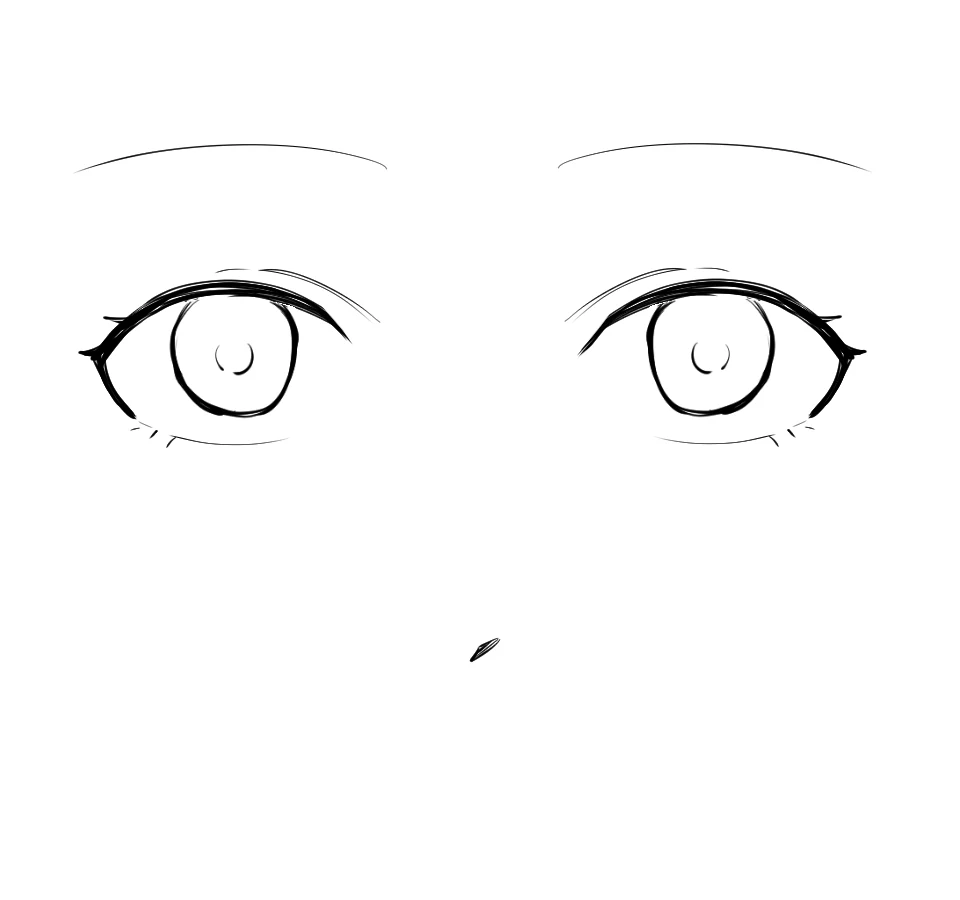
Then erase the guide lines. The face suddenly looks cleaner, even when all that's left is one small mark at the tip.
Outline and nostrils
Traces the outline and the nostrils. You can read the shape of the whole nose.
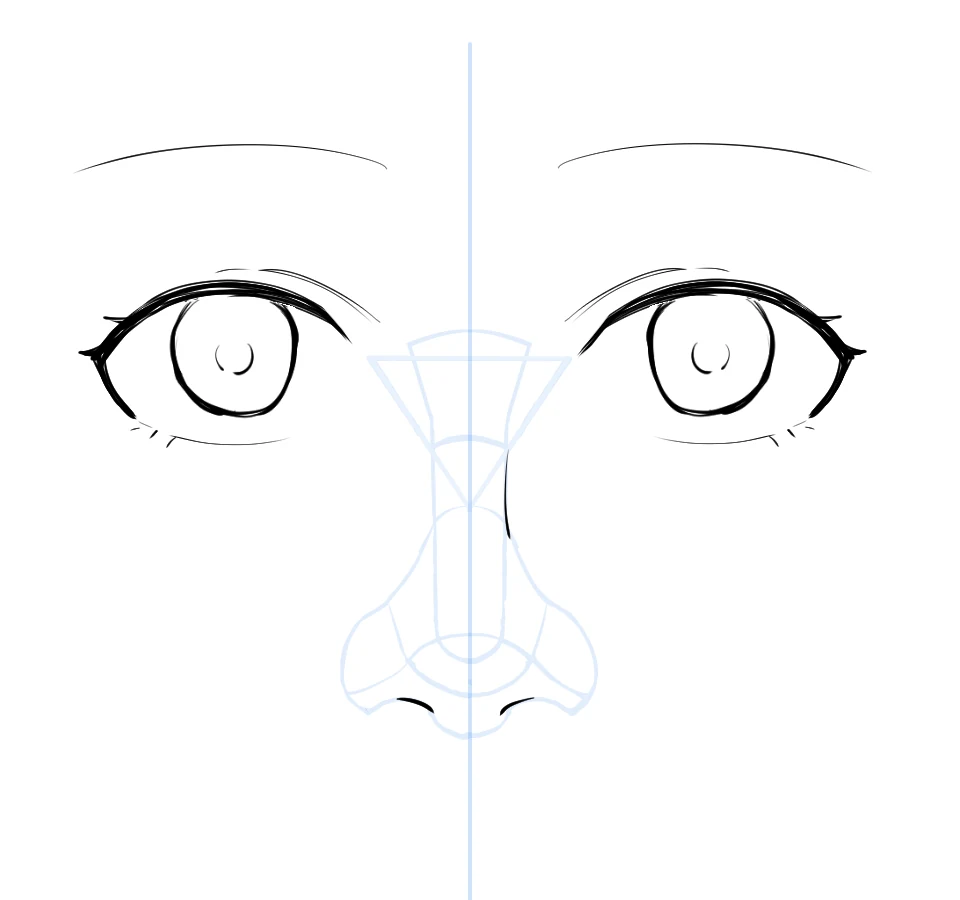
Simpler
The same idea as 05, with fewer lines.
Just the tip
Only the tip of the nose is drawn.
Guide erased
With the guide gone, the face looks cleaner.
Step 03 · Stylized noses
How do you draw a stylized anime nose?
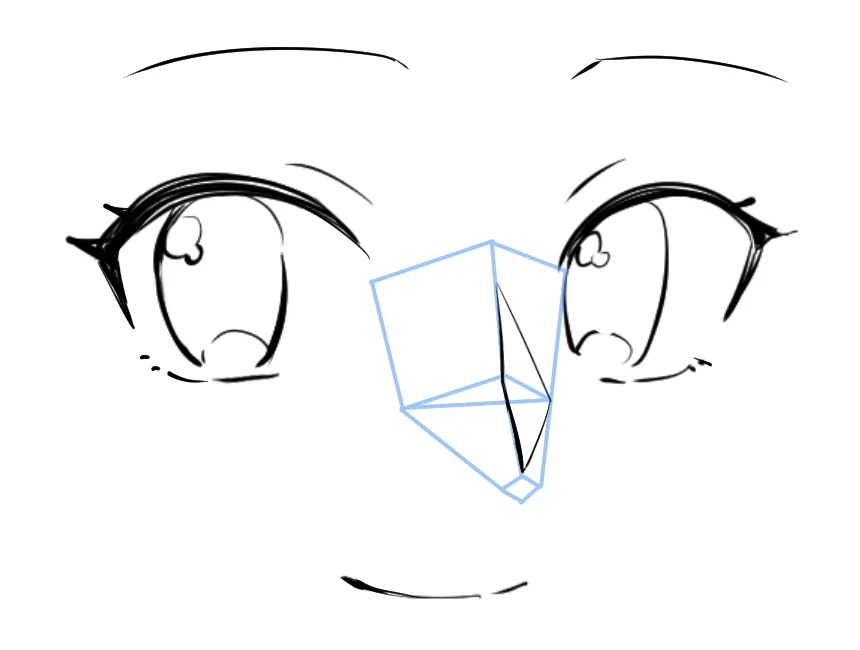
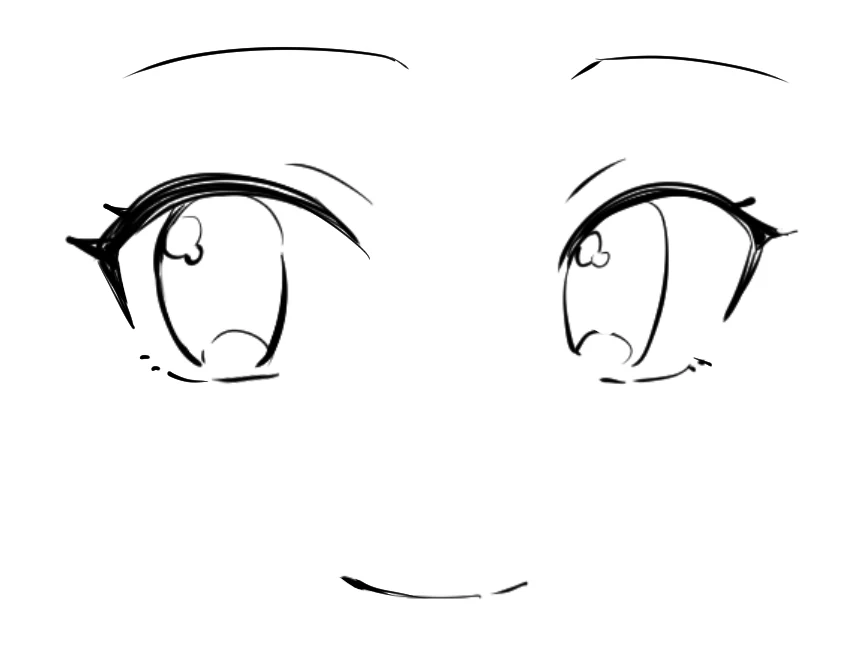
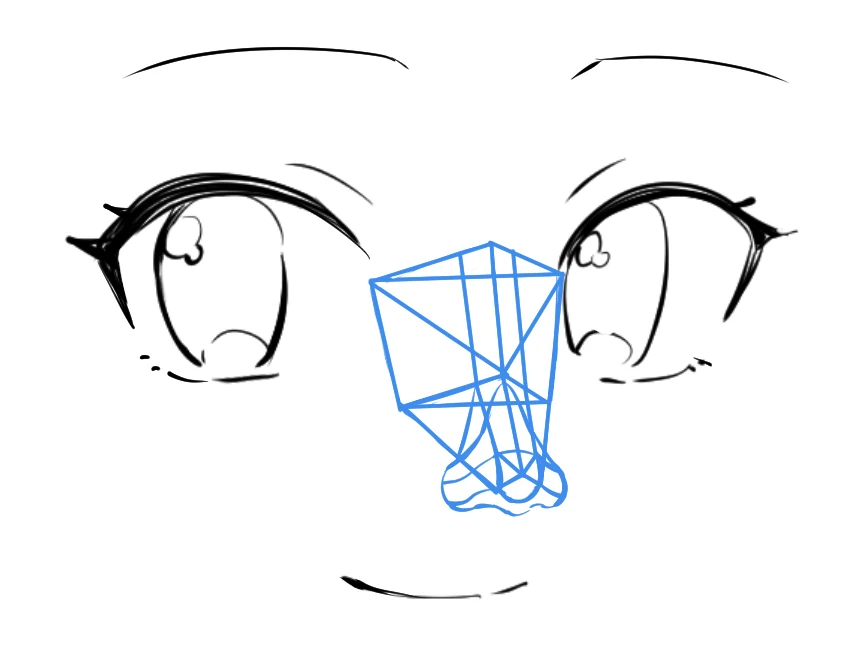
Make it smaller, build it on a box guide, and choose which edges to show.The more stylized the face, the smaller the nose. Put a guide on the face first. For your sketch, use only the part of the guide traced in black in picture 11. Every version below starts from that same sketch.
Then choose what to show. Trace the bridge and push the side that catches the light, and the nose still looks 3D on a simple face. Draw the bridge and the tip together and it's easy to tell which way the nose points. Or go all the way down to a single dot, the tiny nose you've seen on plenty of shoujo heroines. Eyes and mouths aren't the only things that change a face. The nose does too.
A more stylized face
The more stylized the face, the smaller the nose.
The guide
Put the nose guide on the face.
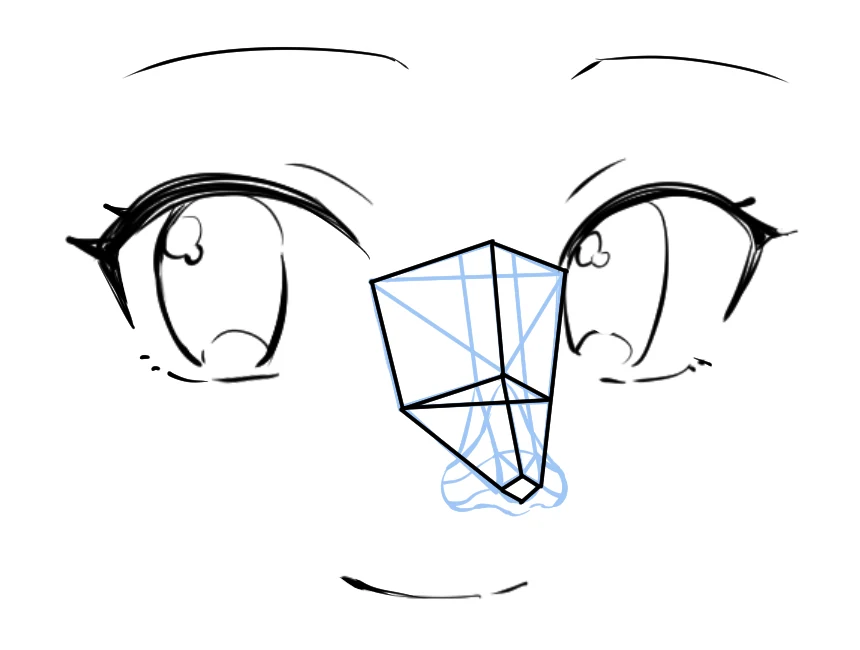
The sketch lines
The part traced in black is the sketch you'll use for every nose below.
Bridge and the lit side
Traces the bridge and stresses where the light hits. Stylized, but still 3D.
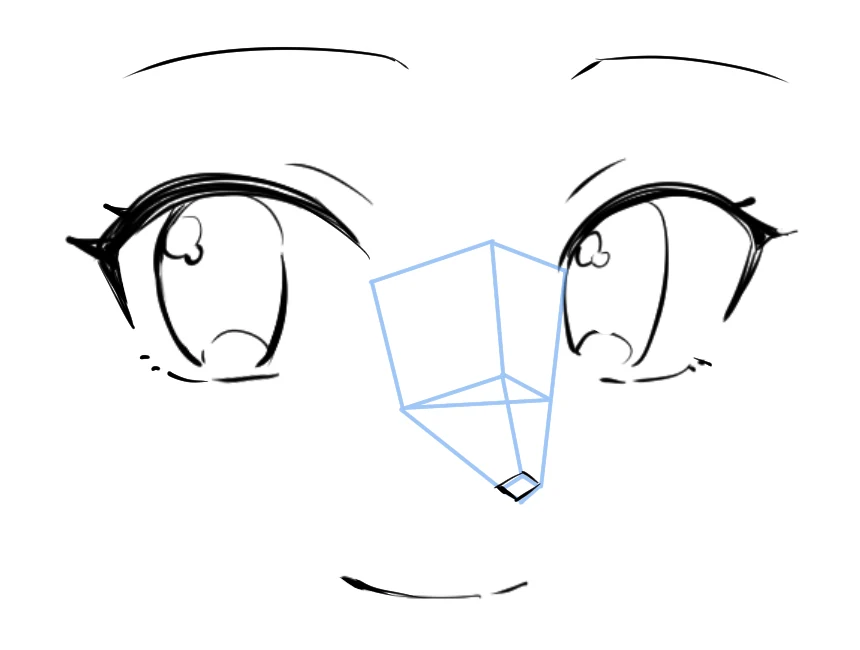
Below the tip
Stresses the part below the tip.
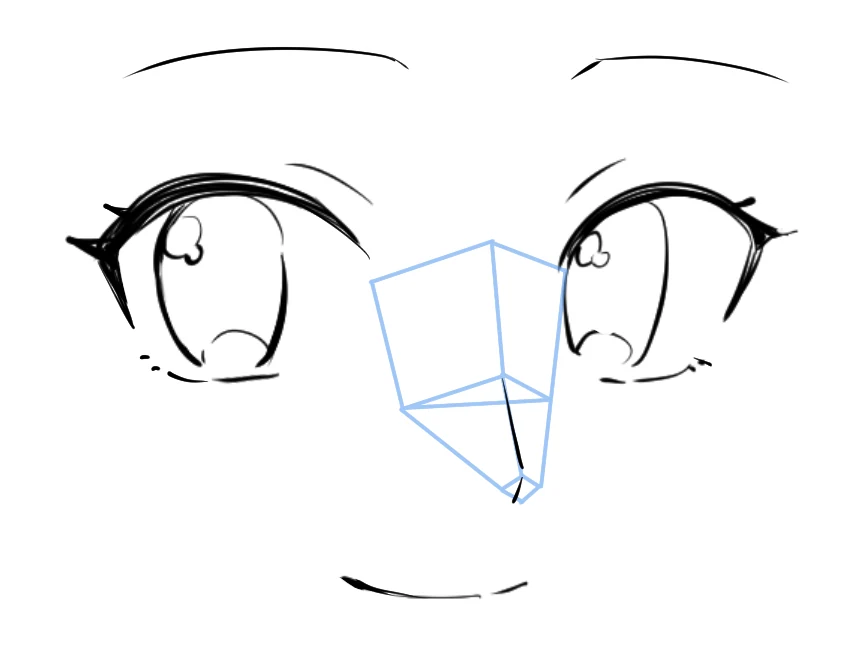
Bridge and tip
Stresses the bridge and the tip. It's easy to see which way the nose points.
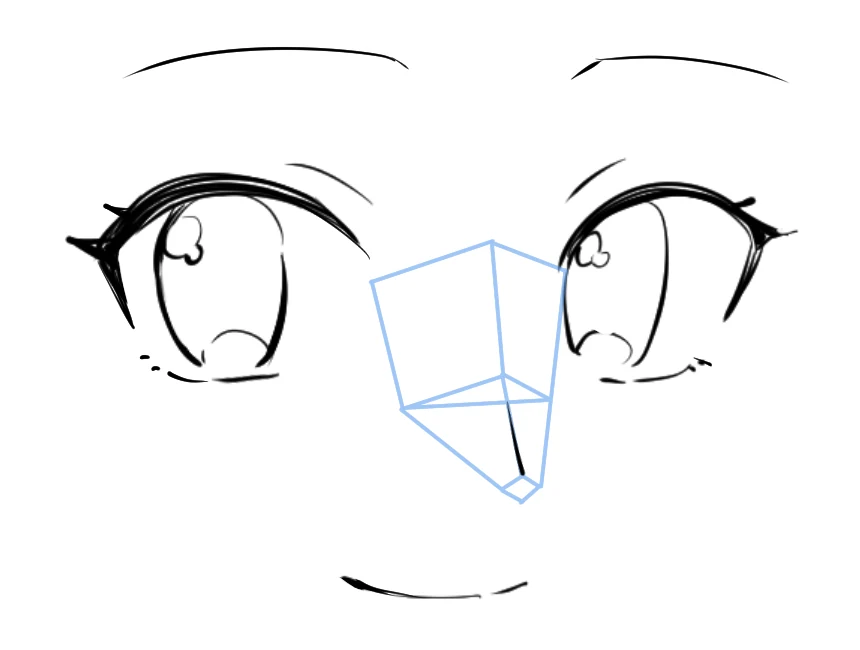
Bridge only
Traces only the bridge.
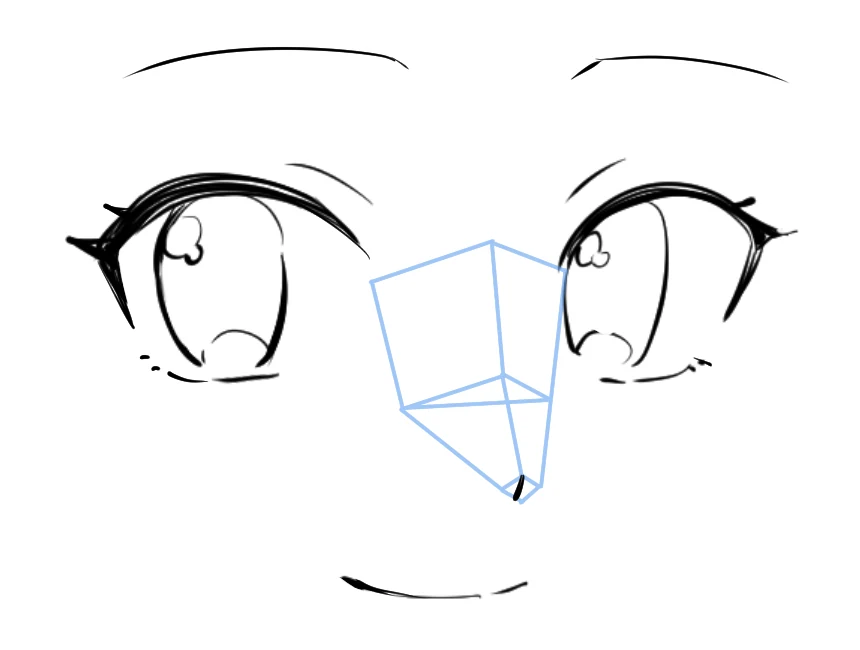
Long line under the tip
A longer line from the tip down to under the nose.
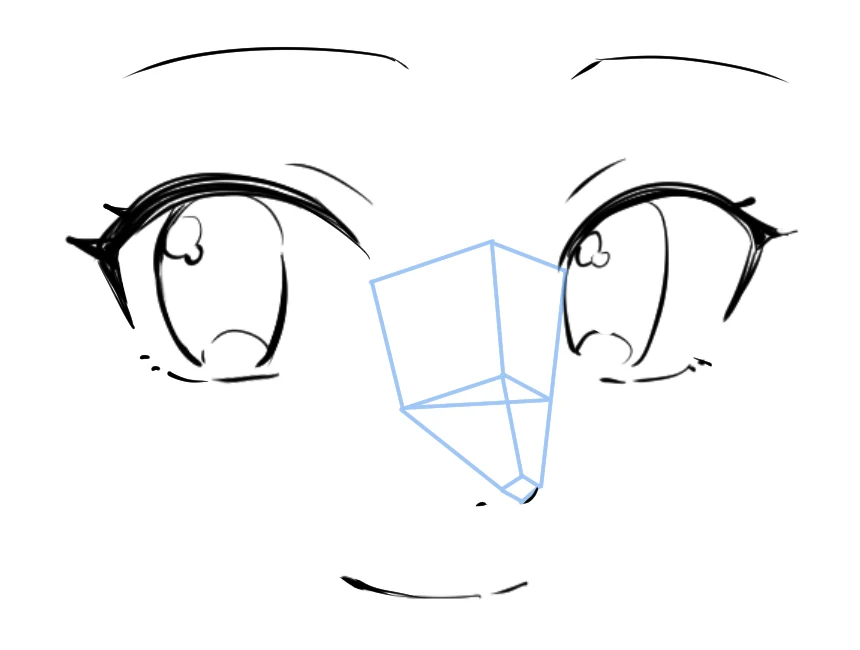
Nostril and wing
Stresses the nostril and the outline of the wing.
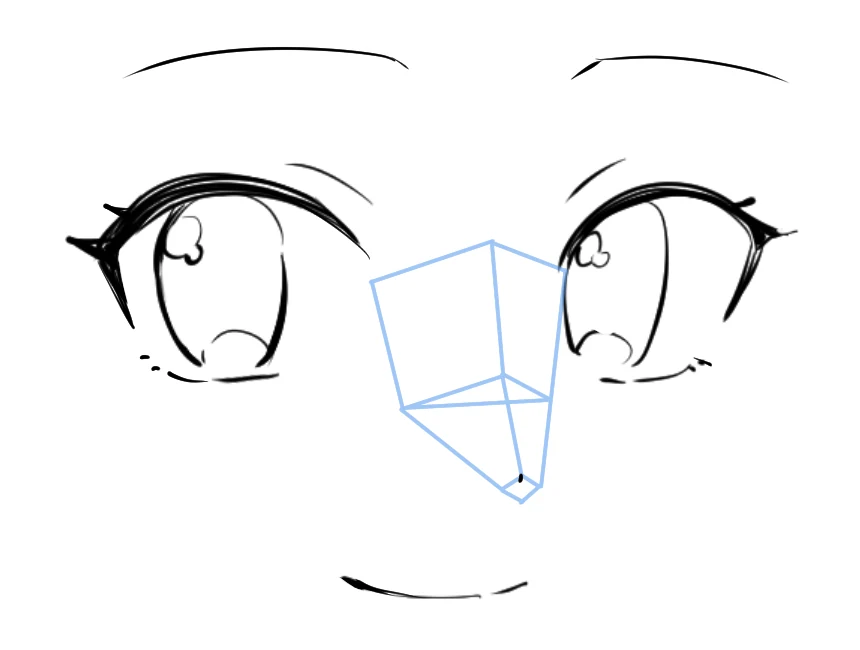
A single dot
Just one dot on the tip.
Guide on, guide off
Keep the guide light and erase it at the end. Here only the tip was inked, and that one small mark is enough.
With the guide still showing.
Guide erased. The face looks cleaner.
Where people usually get stuck
My anime nose looks too big. Why?
On a stylized face the nose has to shrink. Draw fewer lines, too: just the bridge, just the tip, or a single dot can be enough.
Where exactly does the nose start?
Between the inner corners of the eyes. The top of the triangle guide sits there, and its point lands on the middle of the bridge.
Which nose style is the right one?
There isn't one. A fuller nose gives the face more depth, and a simpler one makes it cuter. Try a few and find the one that fits your character.
Anime nose drawing FAQ
How far apart should the eyes be when I draw the nose?
On a semi-realistic face, leave about one eye's width between the eyes. The nose goes inside that gap, on the center line of the face.
What are the parts of a nose called?
The root is where the nose starts between the eyes, the bridge runs down from it, and the tip is the end of the nose. The wings are the rounded sides around the nostrils.
How do I draw a simple anime nose?
Put a small guide on the face, then draw only one part of it: the bridge, the tip, or a single dot on the tip. Erase the guide when you're done.
How do I get feedback on my nose drawings?
When you join an Anime Art Academy course, a professional Japanese artist gives you personal advice and draws red-line corrections directly on your drawing. There is no limit on how many times you can submit. The only rule: post one drawing at a time, and wait for your teacher's reply before posting the next.