How to Draw Chibi Characters: A Step-by-Step Guide by Japanese Pro Artists
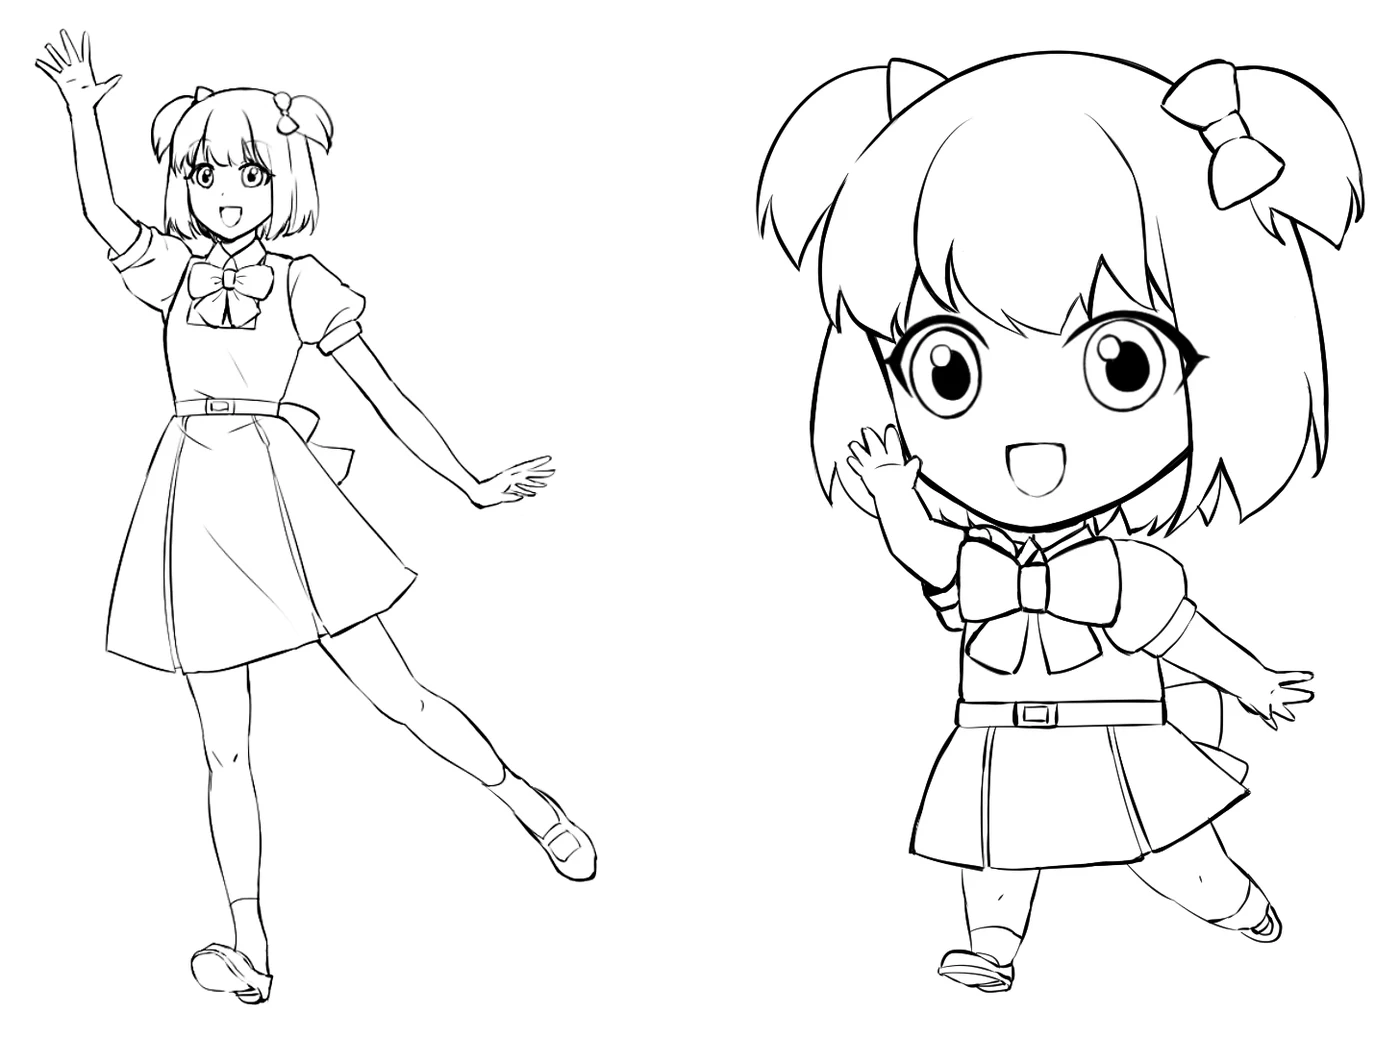
Chibis are what end up on stickers, keychains and acrylic stands, so they're worth getting right. If yours looks like a regular character with a giant head stuck on top, the body is the problem, not the face. Below, one girl drawn at regular proportions turns into a 2-head chibi, one decision at a time.
 Real lesson image
The four stages at a glance
 01
 02
 03
 04
Step 01 · Exaggerate and simplify
What should you keep when you turn a character into a chibi?
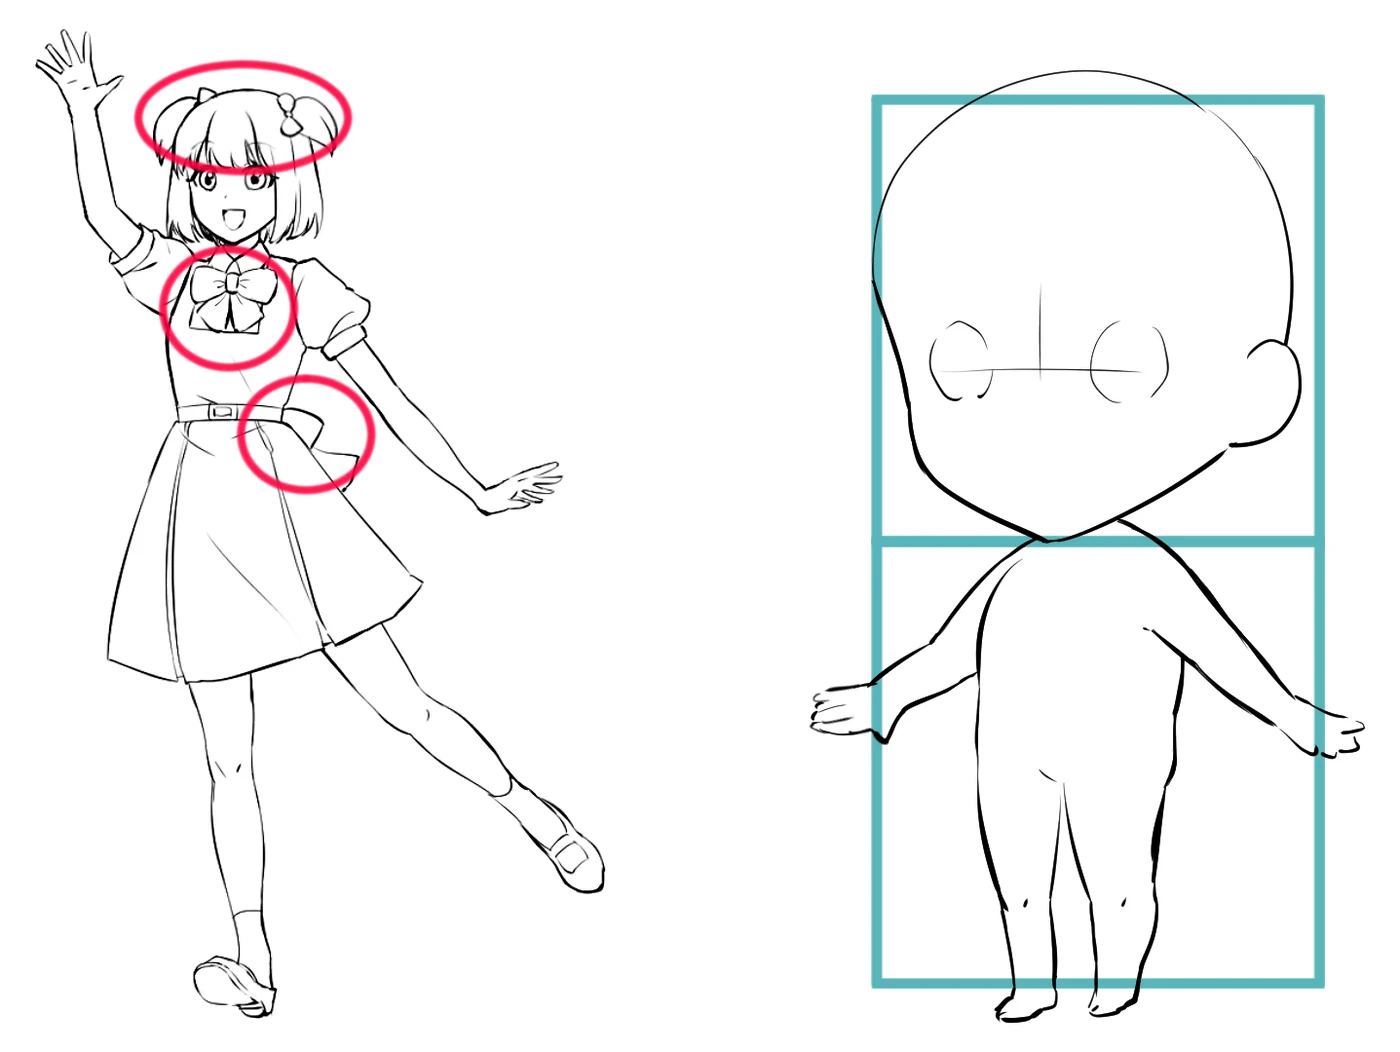
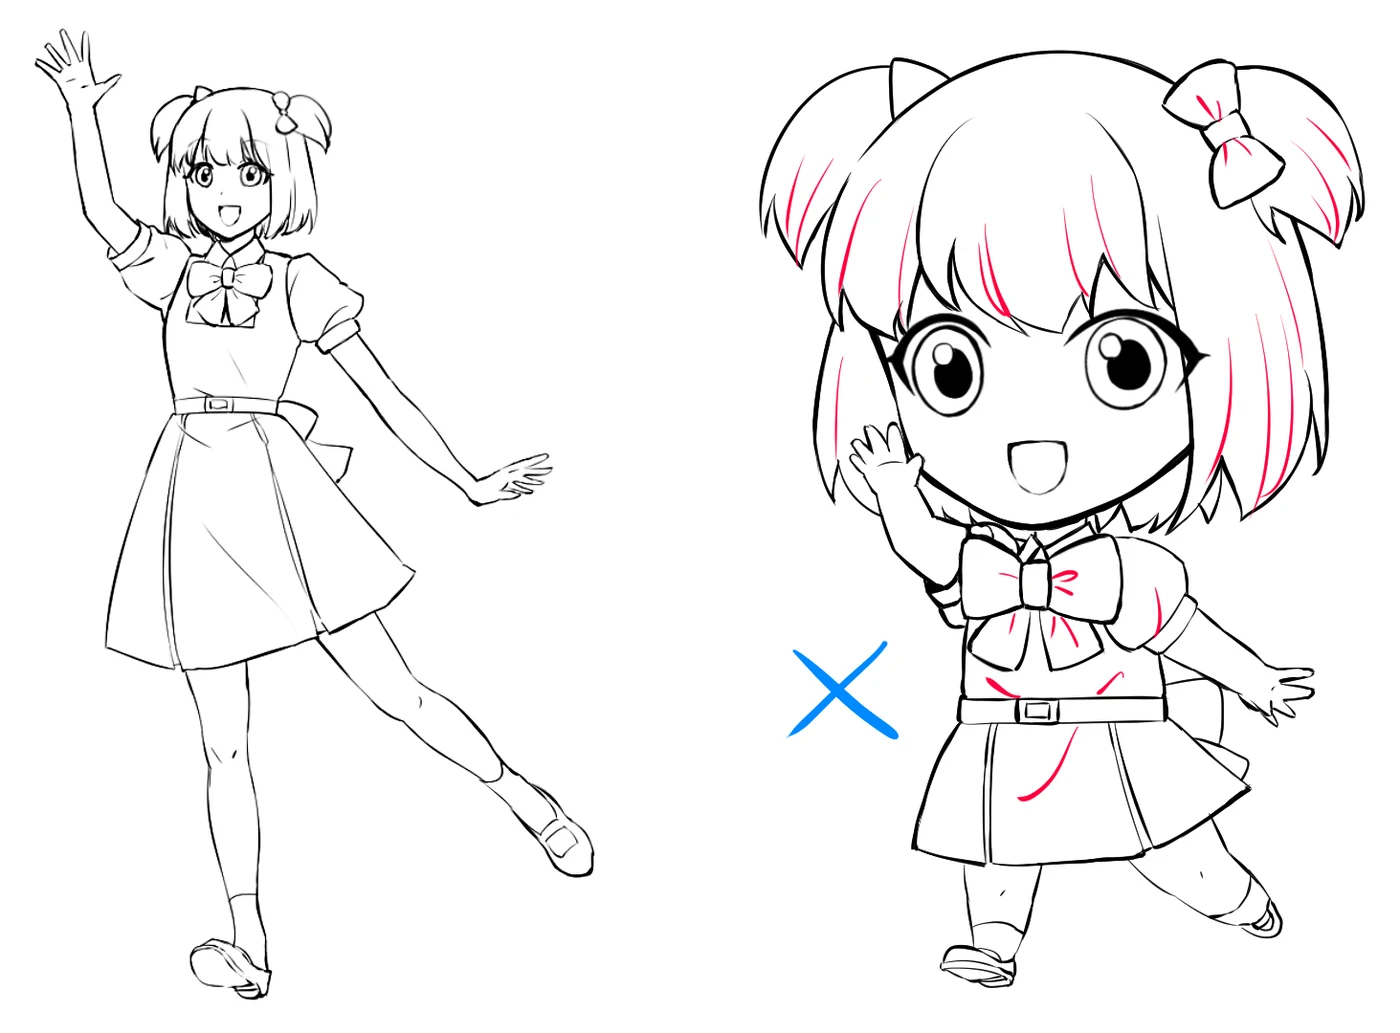
Keep the details people recognize the character by, draw them bigger, and simplify everything else.Start from a finished drawing of the character at regular proportions. Then look for her trademarks. Here that's the ornaments in her hair, the bow at her collar and the bow at her waist. In the chibi, those get drawn noticeably bigger than they'd be at full size.
Everything else gets simpler. Lines inside the hair and small wrinkles in the clothes are left out. Draw them back in and the chibi gets busy and stops looking cute. A chibi isn't a shrunken copy of the character. It's a summary.
Real lesson image
 Real lesson image
Step 02 · The 2:1:1 body
What are the proportions of a 2-head chibi?
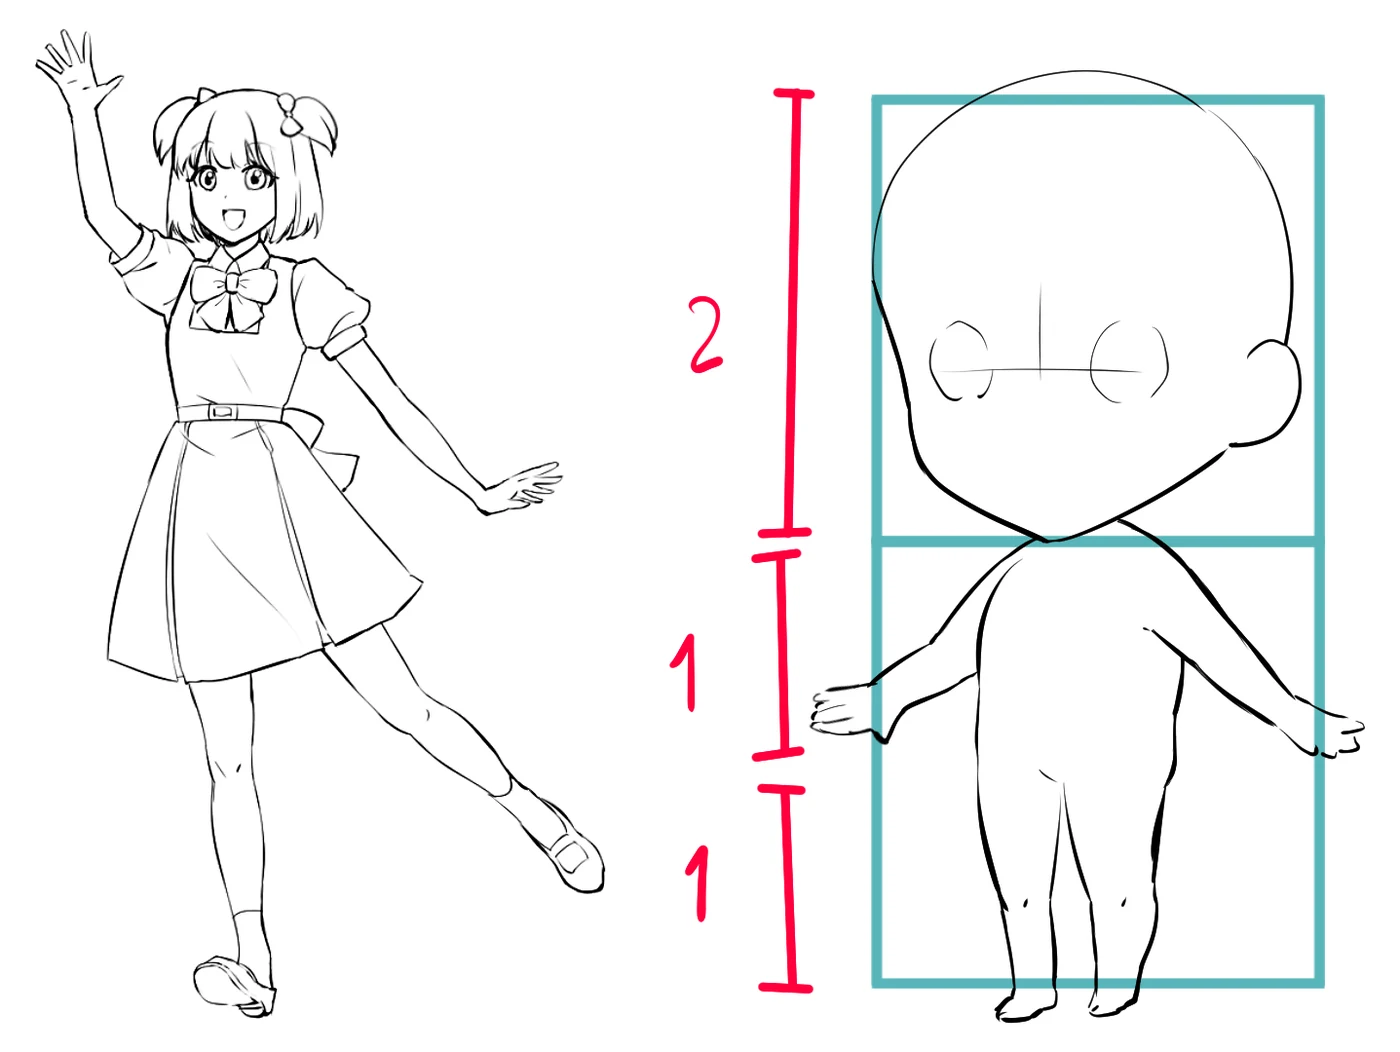
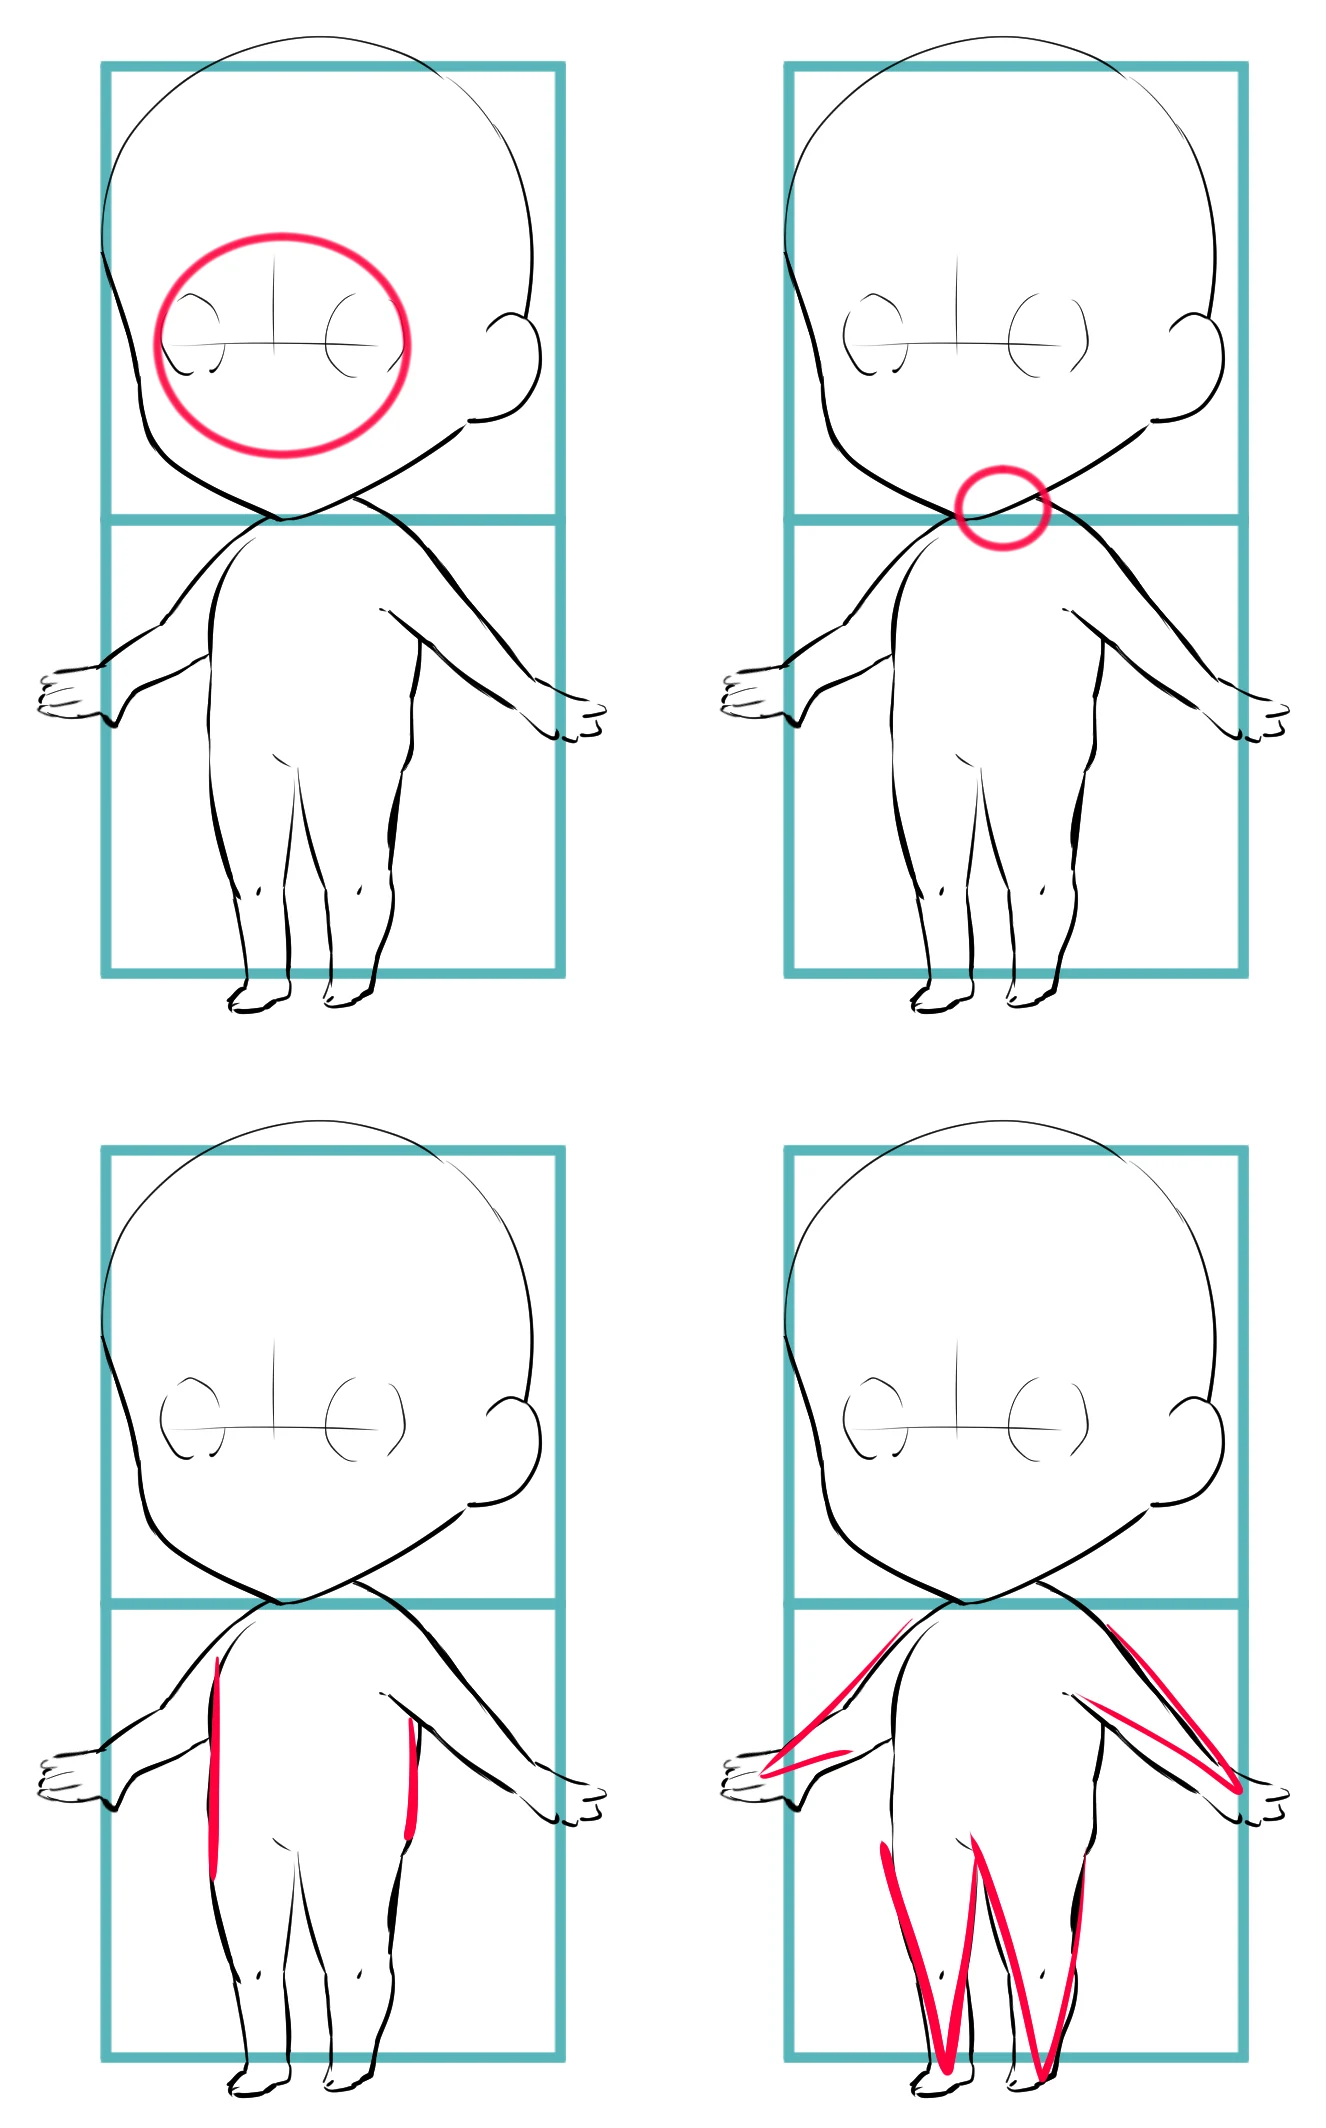
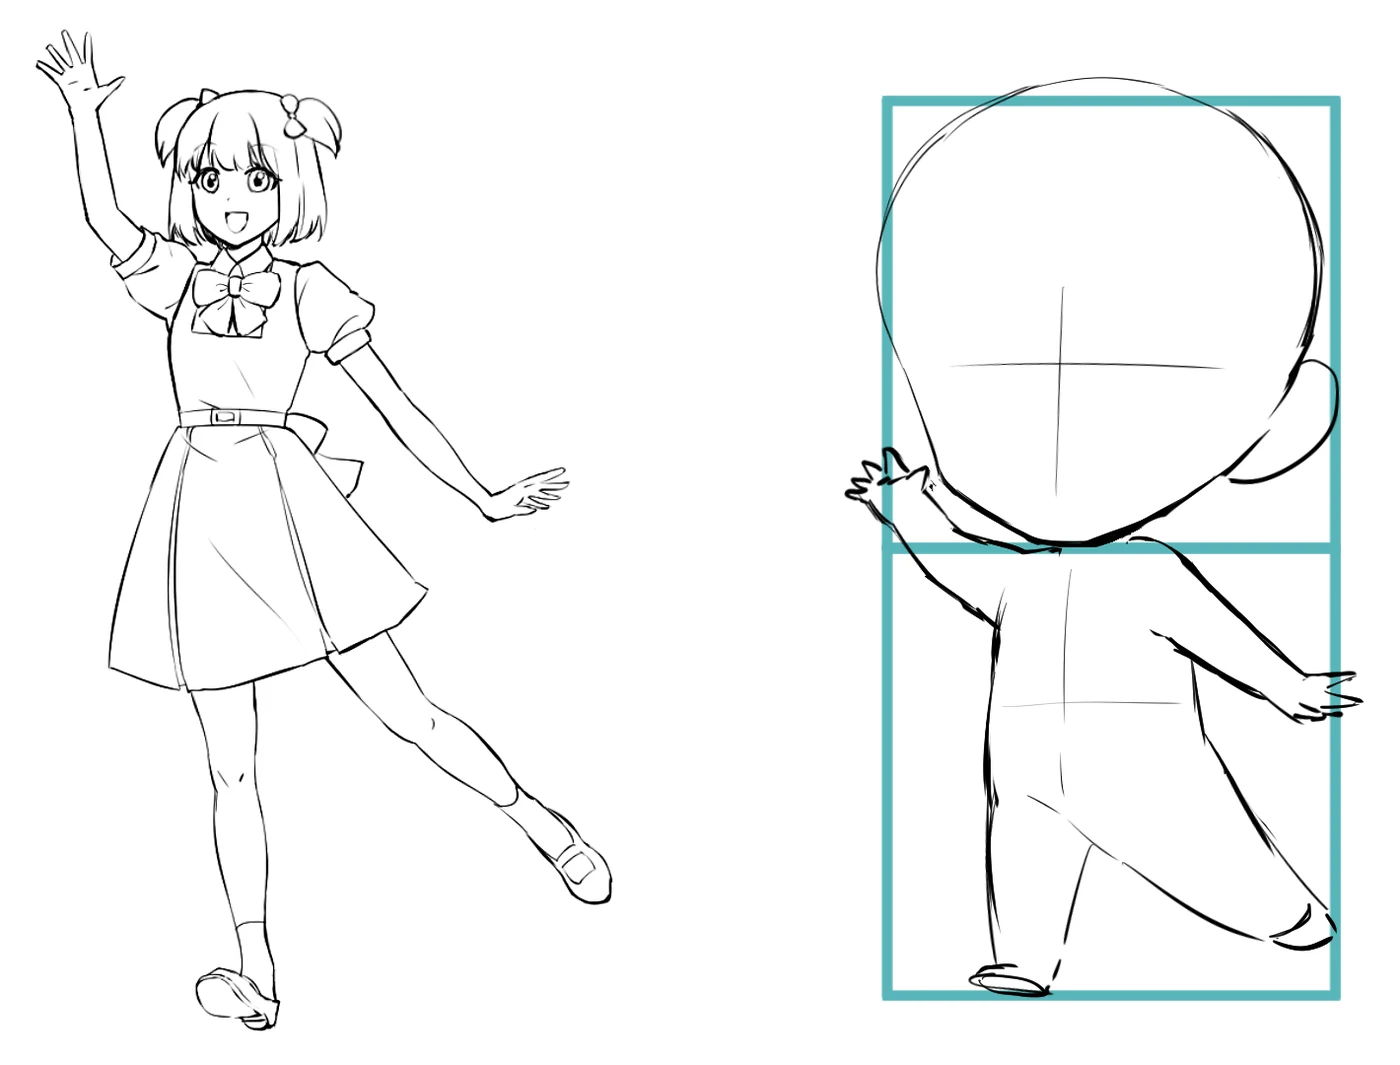
Split the height 2:1:1: two parts head, one part upper body, one part lower body.Half the character is head. Put the eyes, nose and mouth in the lower half of that head. Leave the neck out completely; the head sits right on the shoulders, and the chibi looks cuter that way.
Give the torso no waist. Think of a doll or a plush toy, not a person. Simplify the arms and legs too, and let them get thinner toward the hands and feet. Short limbs change the pose as well: when she waves, her hand ends up beside her head instead of high above it.
Real lesson image
 Real lesson image
 Real lesson image
Step 03 · Chibi eyes
How do you draw chibi eyes?
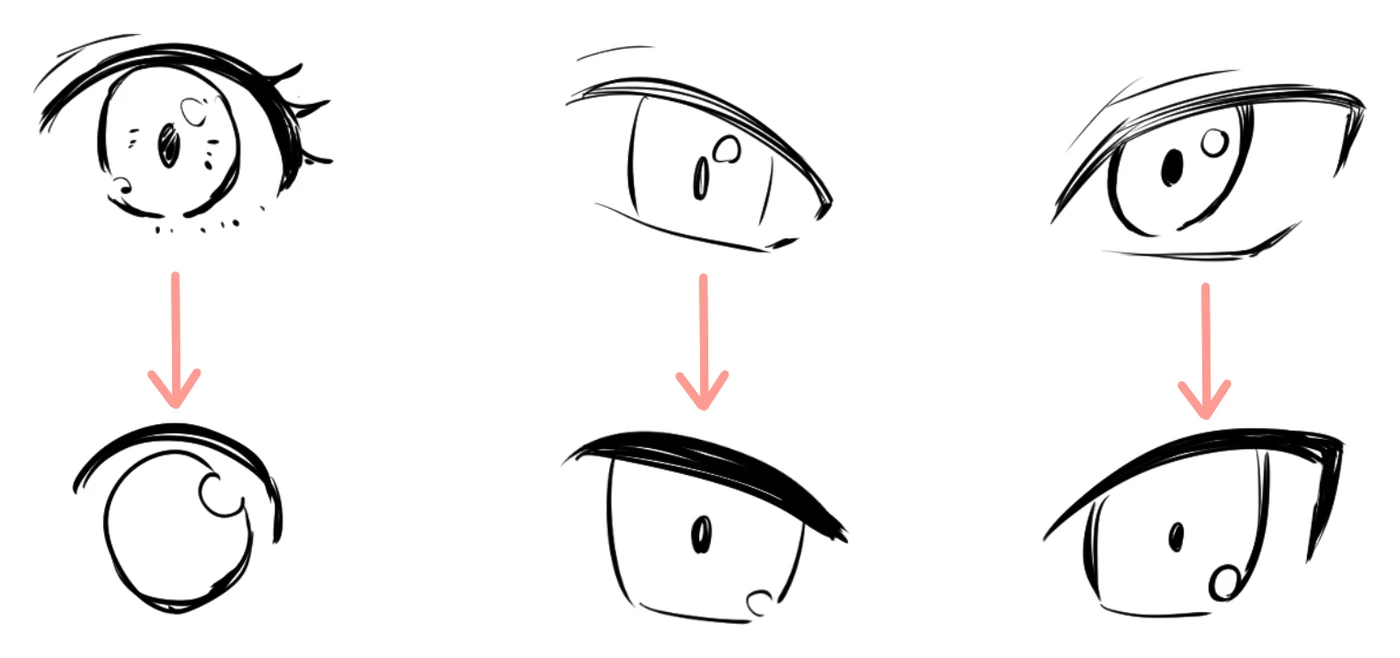
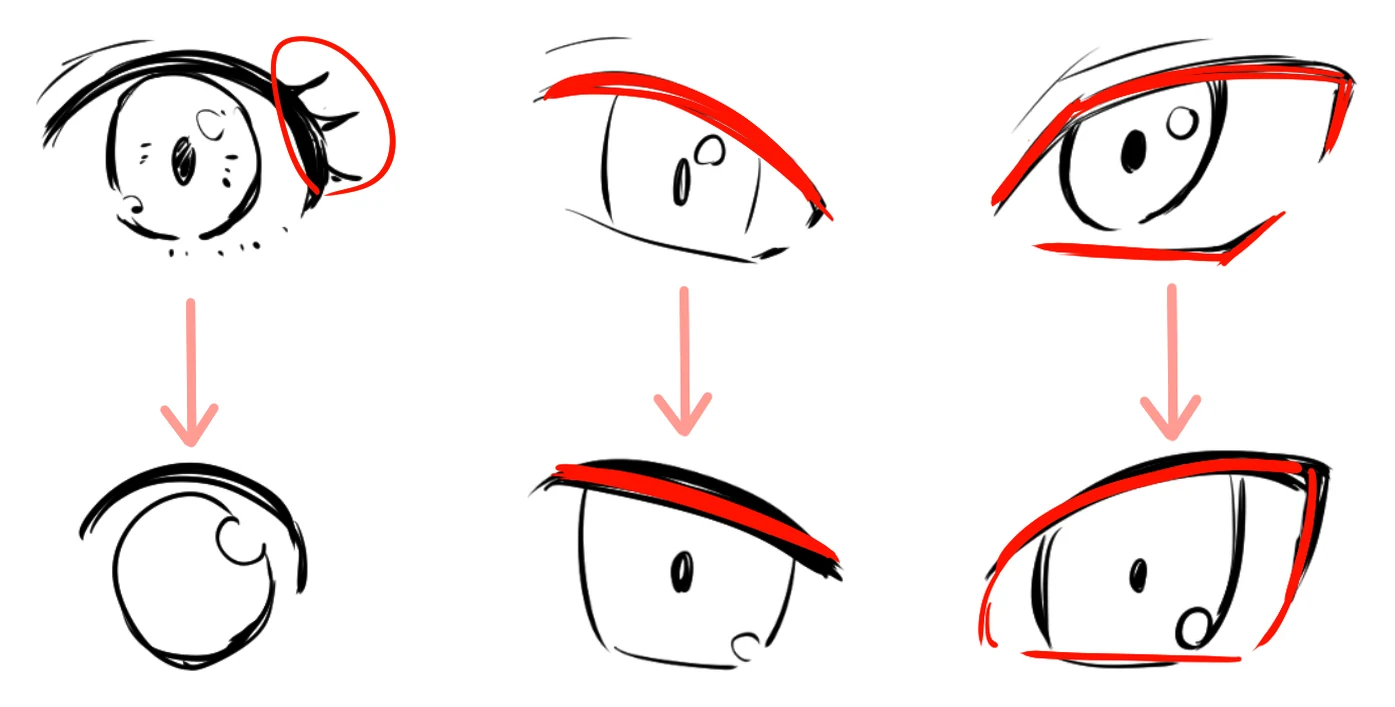
Turn each eye into a simpler symbol: fewer lashes, simpler shapes, fewer corners.In the top row are regular anime eyes; below each one is the same eye simplified for a chibi. On the round eye on the left, the lashes go, and the iris loses its inside detail until it's close to a perfect circle.
On the middle eye, the curve of the upper lid flattens into a nearly straight line, so the eye as a whole becomes close to a rectangle. On the sharp eye on the right, the corners of the upper and lower lids are cut off, and the iris becomes a simpler shape too.
Real lesson image
 Real lesson image
Step 04 · Two chibi styles
Do all chibis use the same proportions?
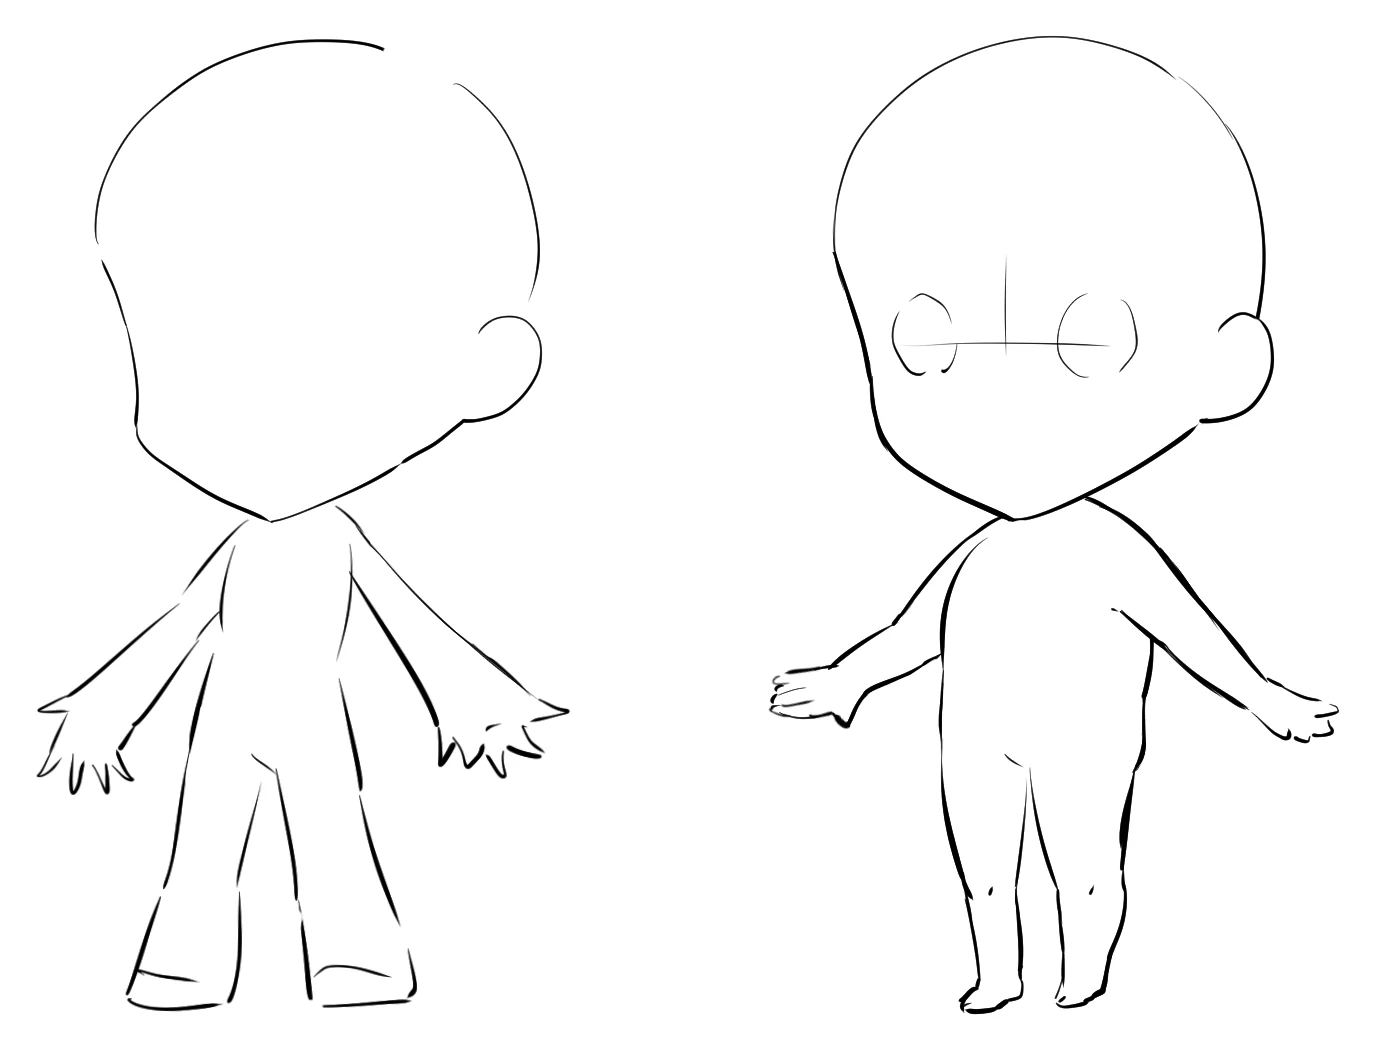
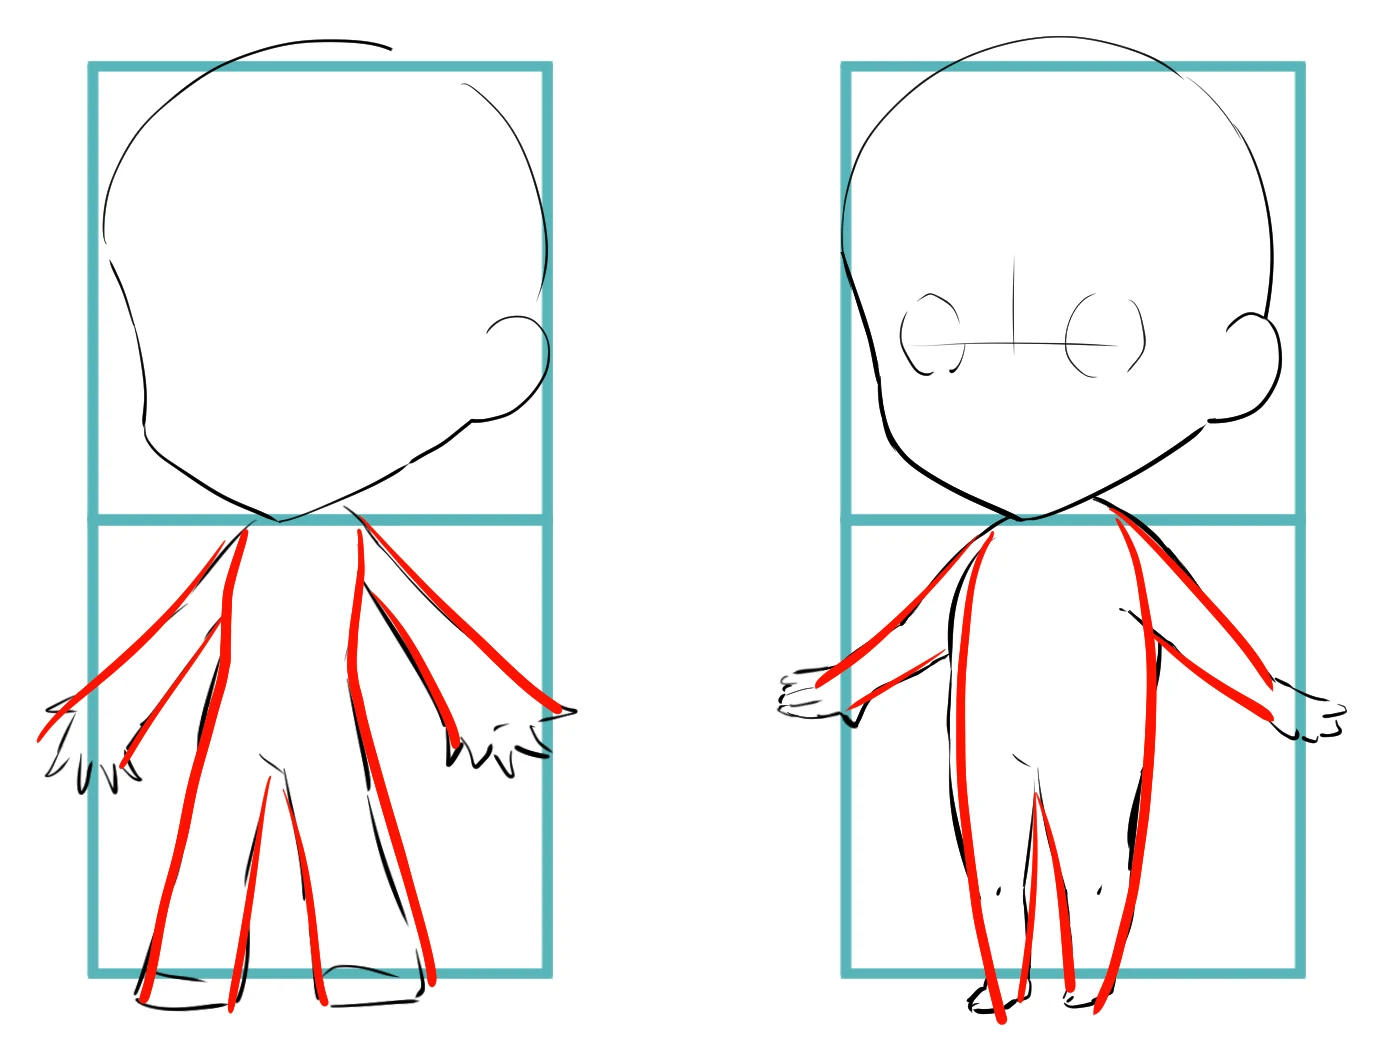
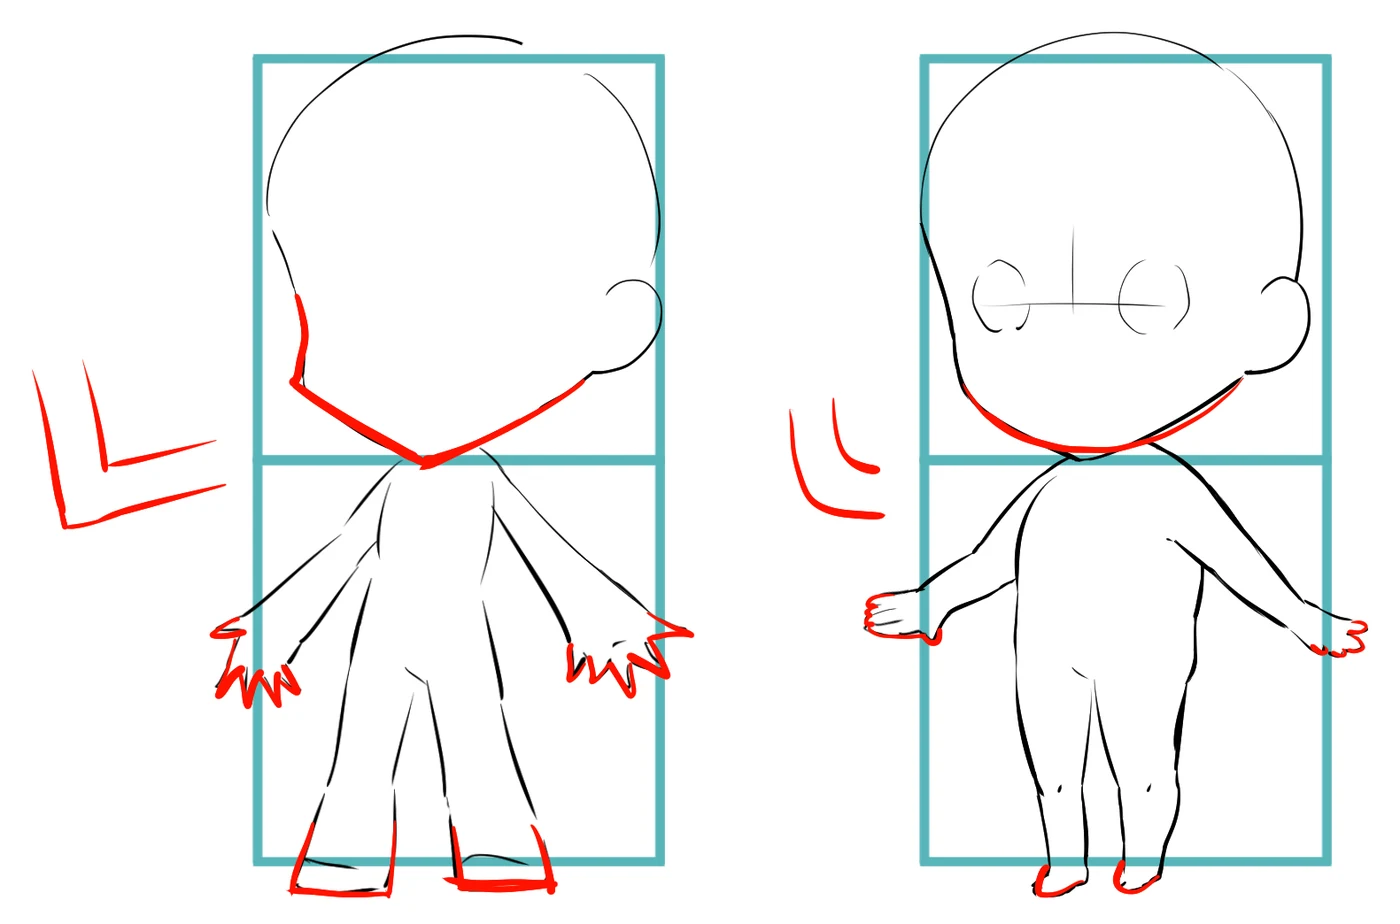
No. Two chibis can both be 2 heads tall and still look completely different.On the right is the style from Steps 1 to 3: the arms and legs get thinner toward the hands and feet. On the left, the torso is small and the hands and feet are big. Trace the body lines and they run in opposite directions.
The lines themselves change too. The right body is drawn with round, circle-based curves. The left one uses straighter lines with corners. Which balance you choose, and what you simplify, sets the whole mood of your chibi art.
Real lesson image
 Real lesson image
 Real lesson image
The most common mistake: a regular body under a chibi head
Same head, two bodies. With regular proportions, the head and body don't match and the cuteness is gone. The chibi body fixes it.
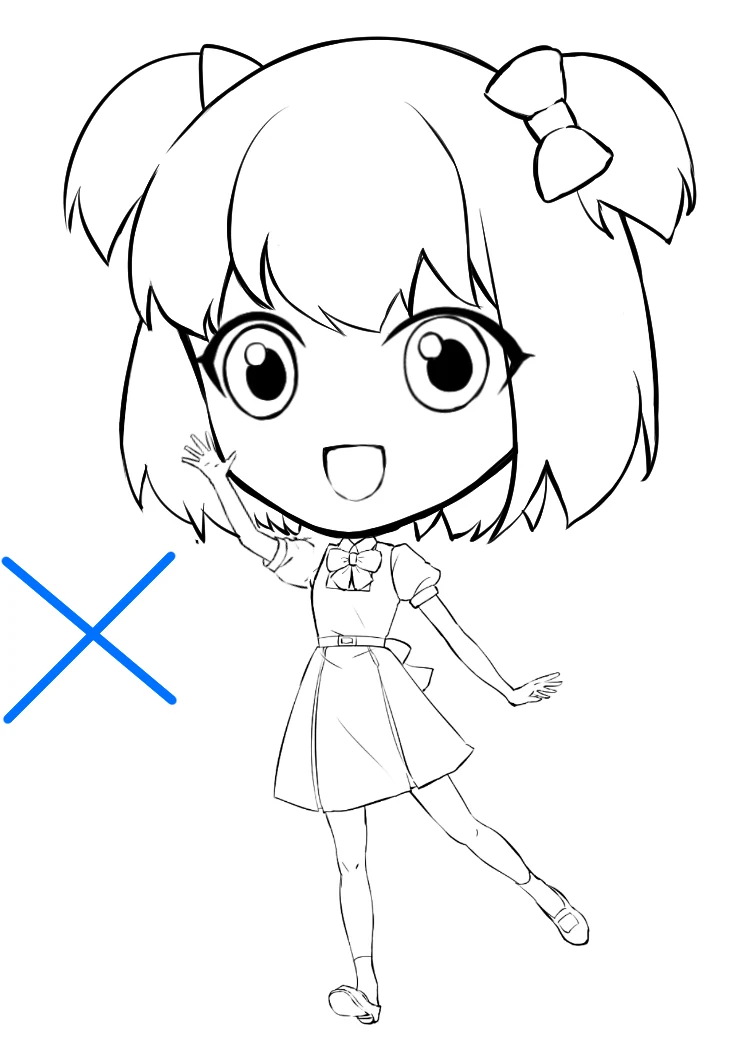
✕ Chibi head, regular body. The two halves don't match.
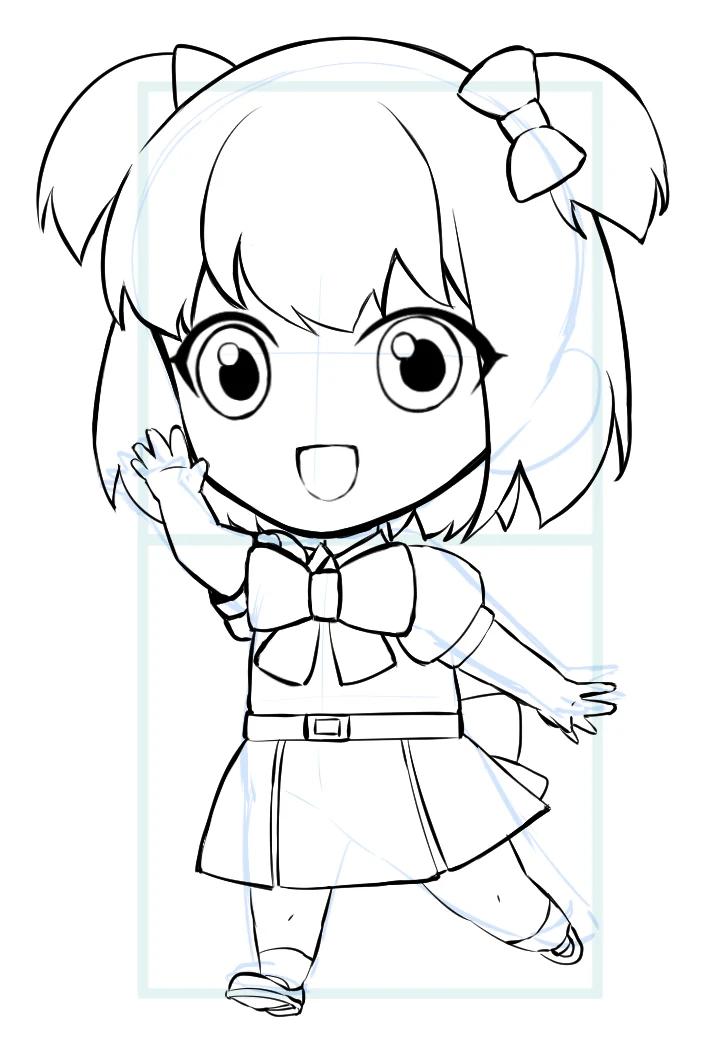
✓ 2:1:1 body with no neck, no waist and short limbs. The faint blue boxes are the guide.
Where people usually get stuck
"My chibi looks like a regular character with a big head."
Look at the body, not the head. Remove the neck and the waist, shorten the arms and legs, and let them taper.
"The face looks off."
The eyes, nose and mouth are probably sitting too high. Move them into the lower half of the head.
"It looks busy, not cute."
Too many lines. Cut the lines inside the hair and the small folds, and simplify the eyes into symbols.
Chibi drawing FAQ
How many heads tall is a chibi?
Chibis can be drawn at different head counts. This guide uses a 2-head chibi: the head takes half the height, and the upper body and lower body share the other half equally (2:1:1). Once you know the balance, you can turn a character of any age into a chibi the same way.
Should chibi characters have a neck?
Leave it out. Simplify the neck away and let the head sit right on the shoulders. The chibi looks cuter without one.
How should I color a chibi?
Keep it light. Use bright, saturated colors and put only small shadows where the forms turn. The detailed shading you'd use at regular proportions adds bumps a chibi doesn't have and makes it look heavy. Big eye highlights and round pink cheeks help, too.
How do I get feedback on my chibi drawings?
When you join an Anime Art Academy course, a professional Japanese artist gives you personal advice and draws red-line corrections directly on your drawing. There is no limit on how many times you can submit. The only rule: post one drawing at a time, and wait for your teacher's reply before posting the next.