How to Draw Sparkly Anime Eyes: A Step-by-Step Guide by Japanese Pro Artists
If your eyes still look flat after you add a highlight, one white dot is probably doing all the work. That shoujo-style sparkle comes from layers, not from one dot. Here, one eye goes from sketch to finish in six stages, using a few layer modes (Multiply, Glow Dodge, Overlay). At the end, the same eye changes color without being repainted.
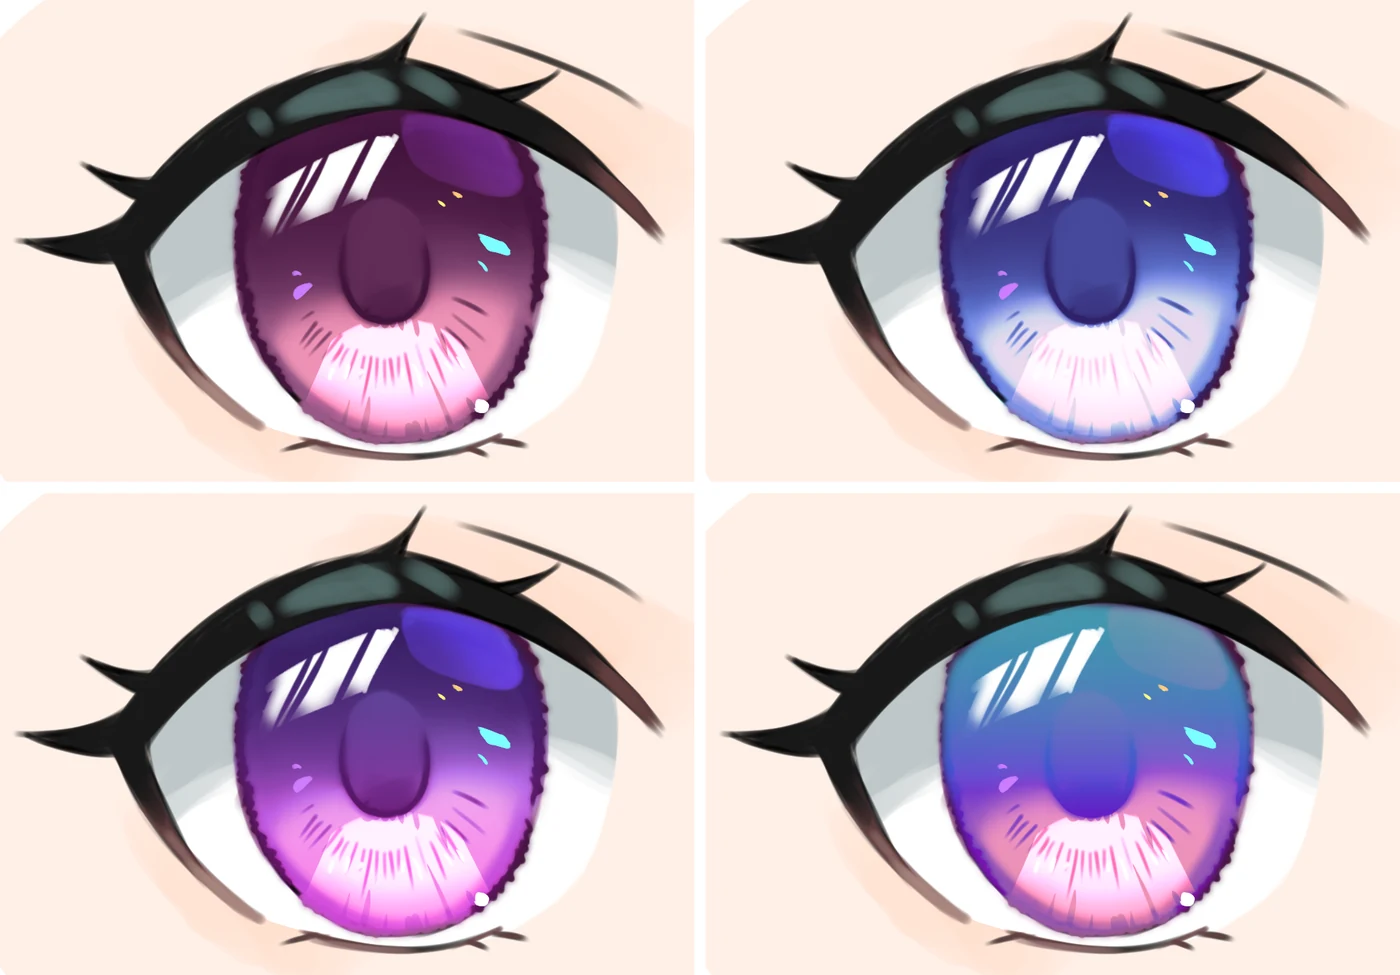 Real lesson image
The six stages at a glance
 01
 02
 03
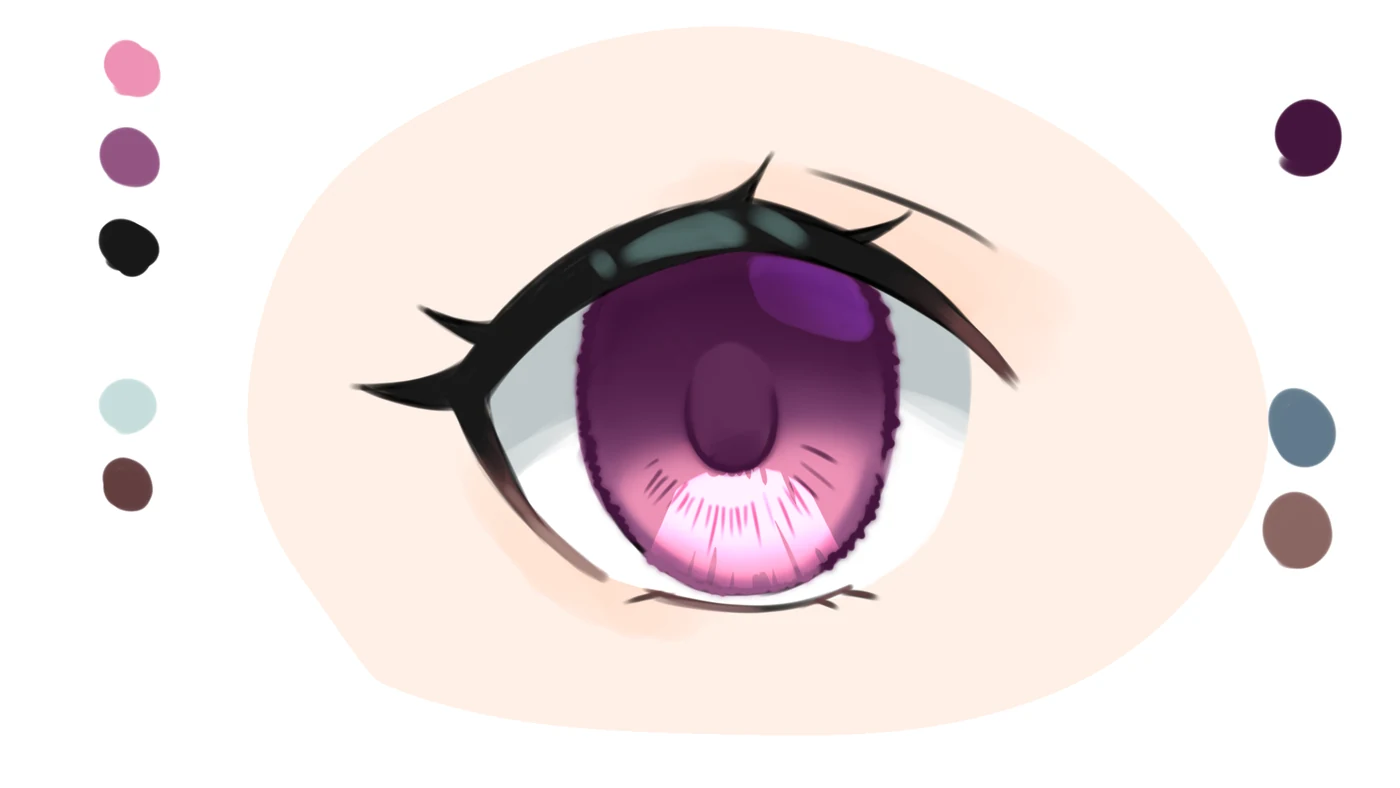 04
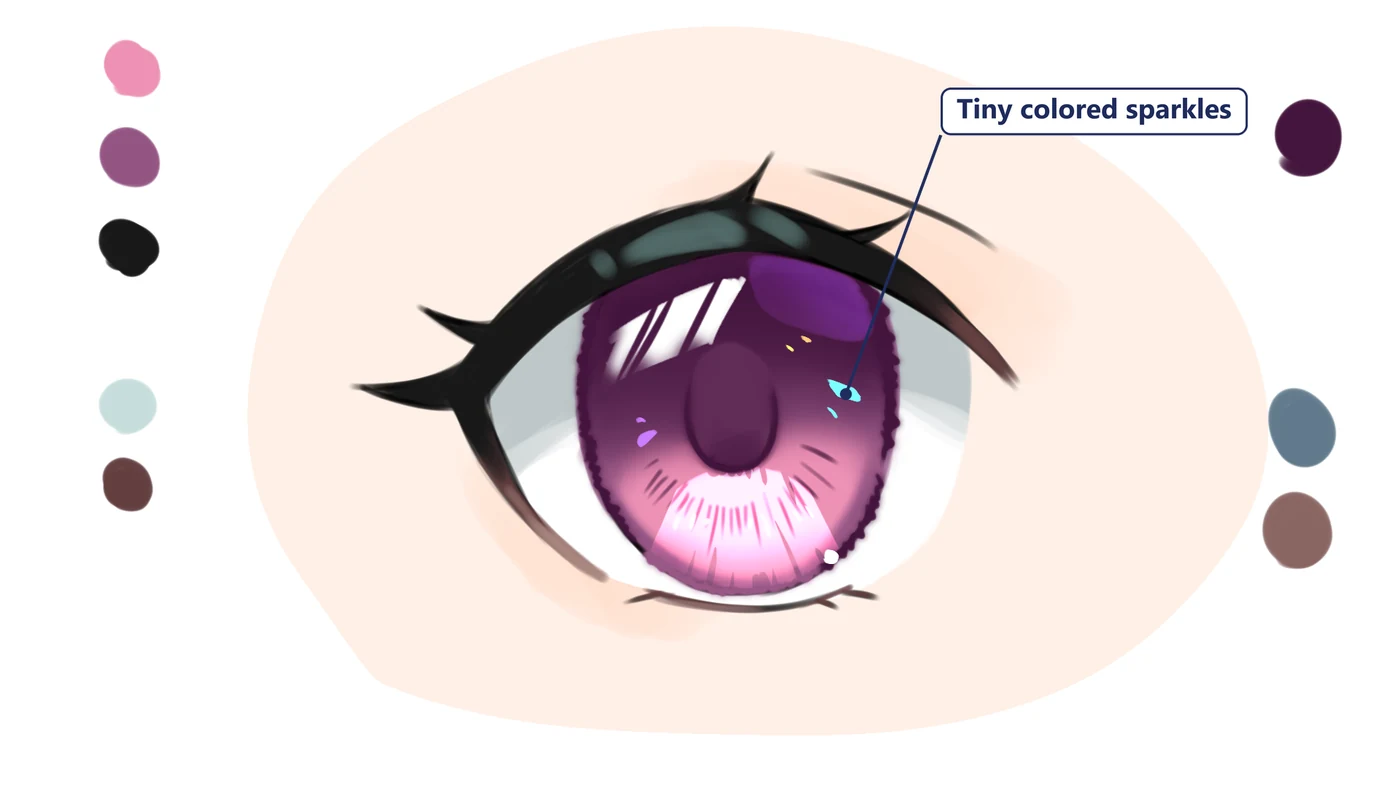 05
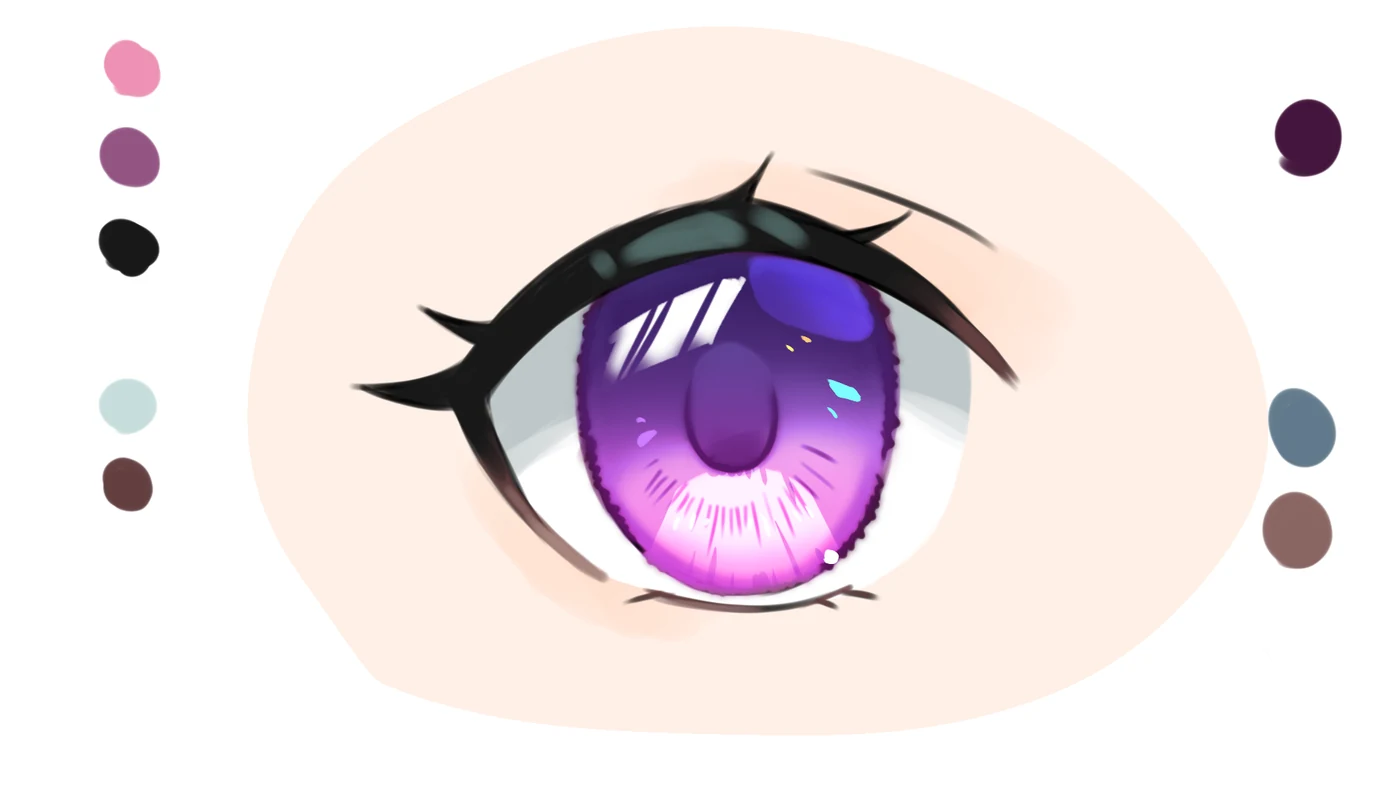 06
Step 01 · Skin, lid shadows and whites
Where do you start when coloring anime eyes?
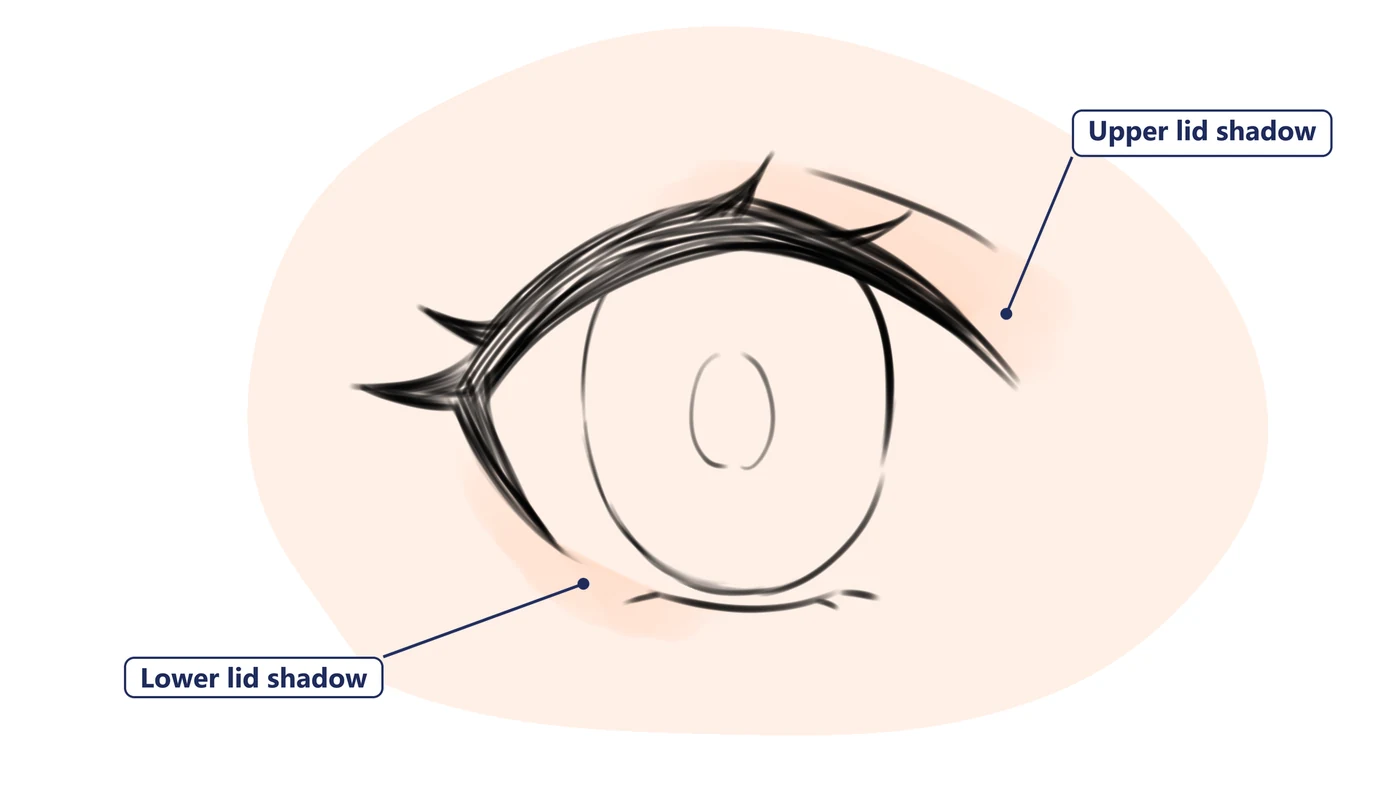
Color the skin, shade both lids, then fill the whites.Start from a clean sketch. Any eye shape works, but a big iris leaves more room for reflections and highlights later, so this one is large.
Fill the skin with any color you like. Then add a soft shadow on the upper lid and on the lower lid. That little bit of shadow gives the eye some depth. Fill the whites last.
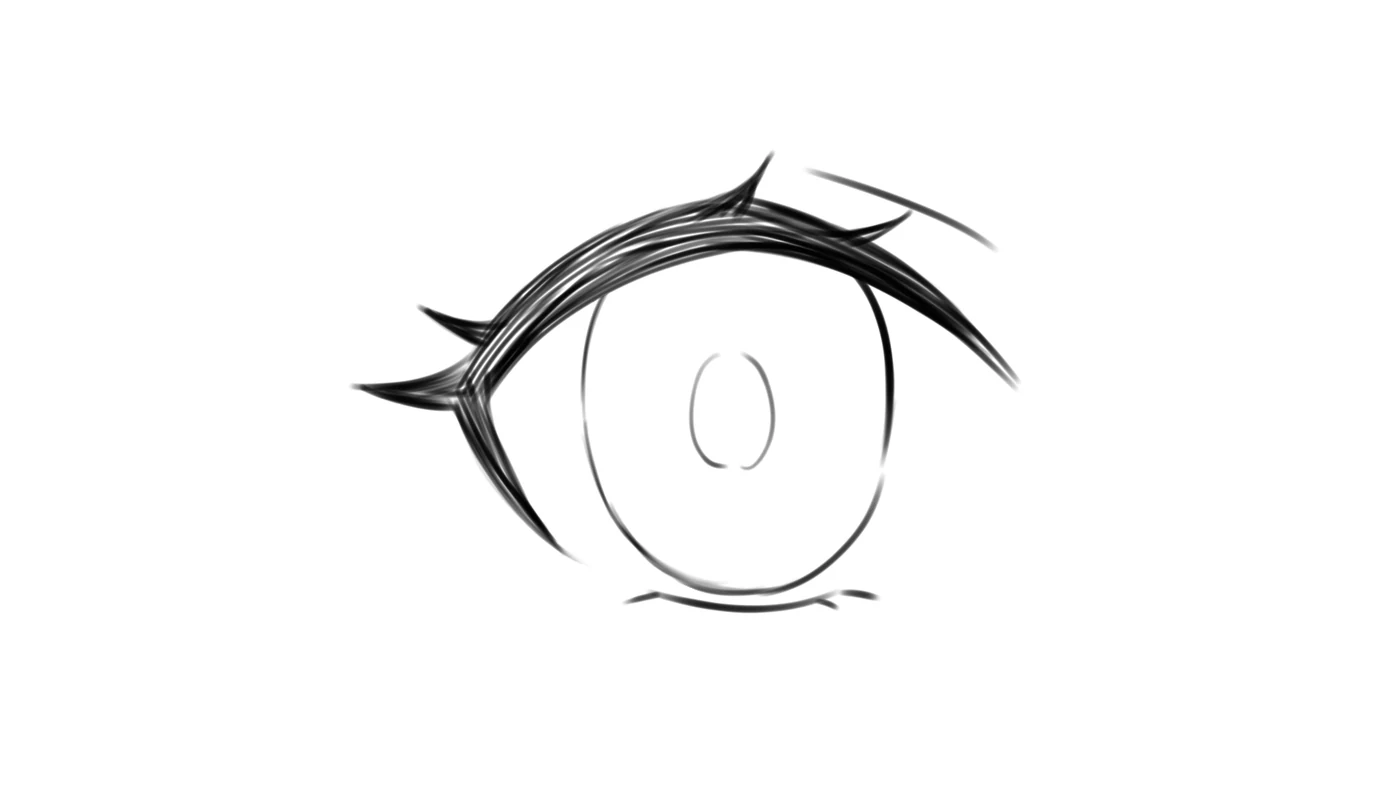 1Sketch
A large iris leaves room for the sparkle later.
2Lid shadows
Skin first, then a soft shadow on each lid.
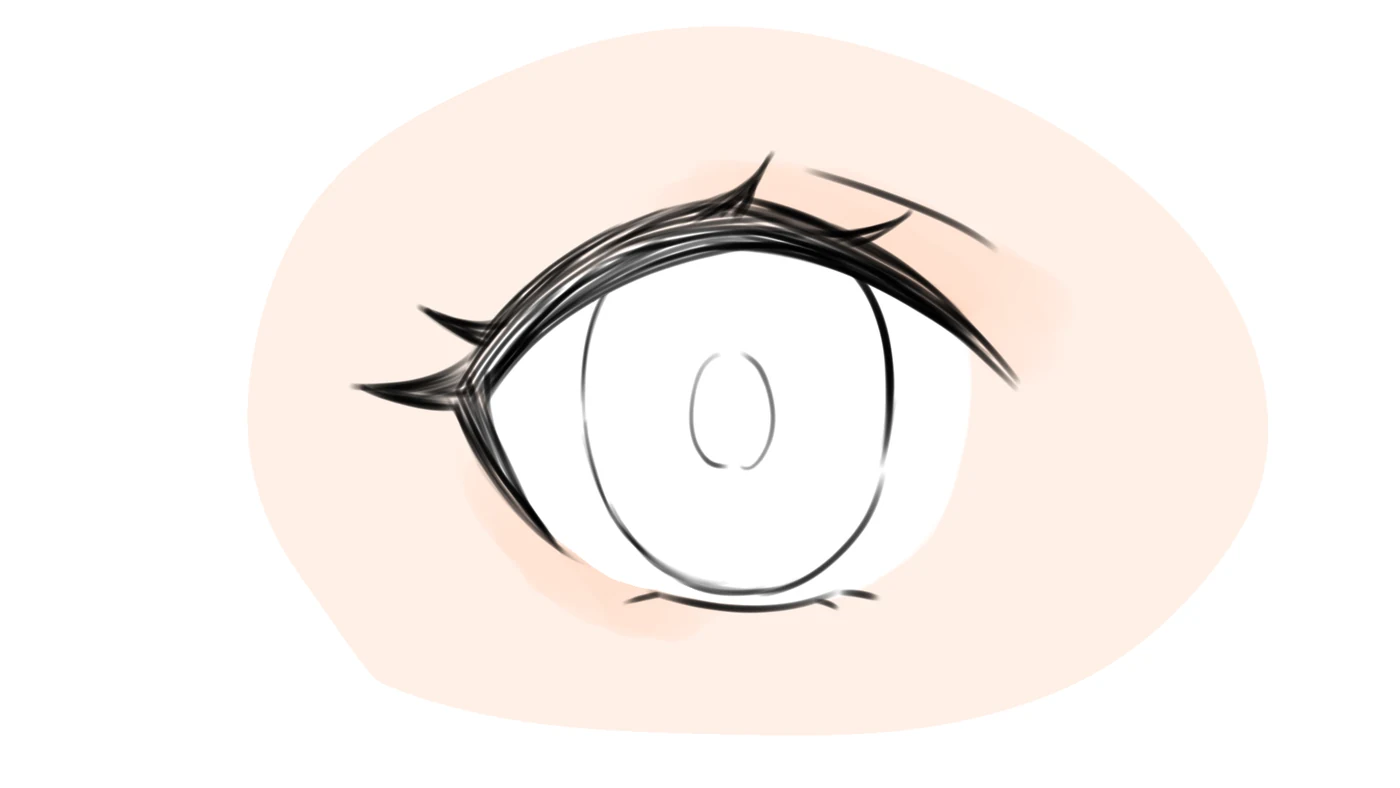 3Whites
Fill the whites of the eye.
Step 02 · Soft iris
How do you color an anime iris so it looks soft, not flat?
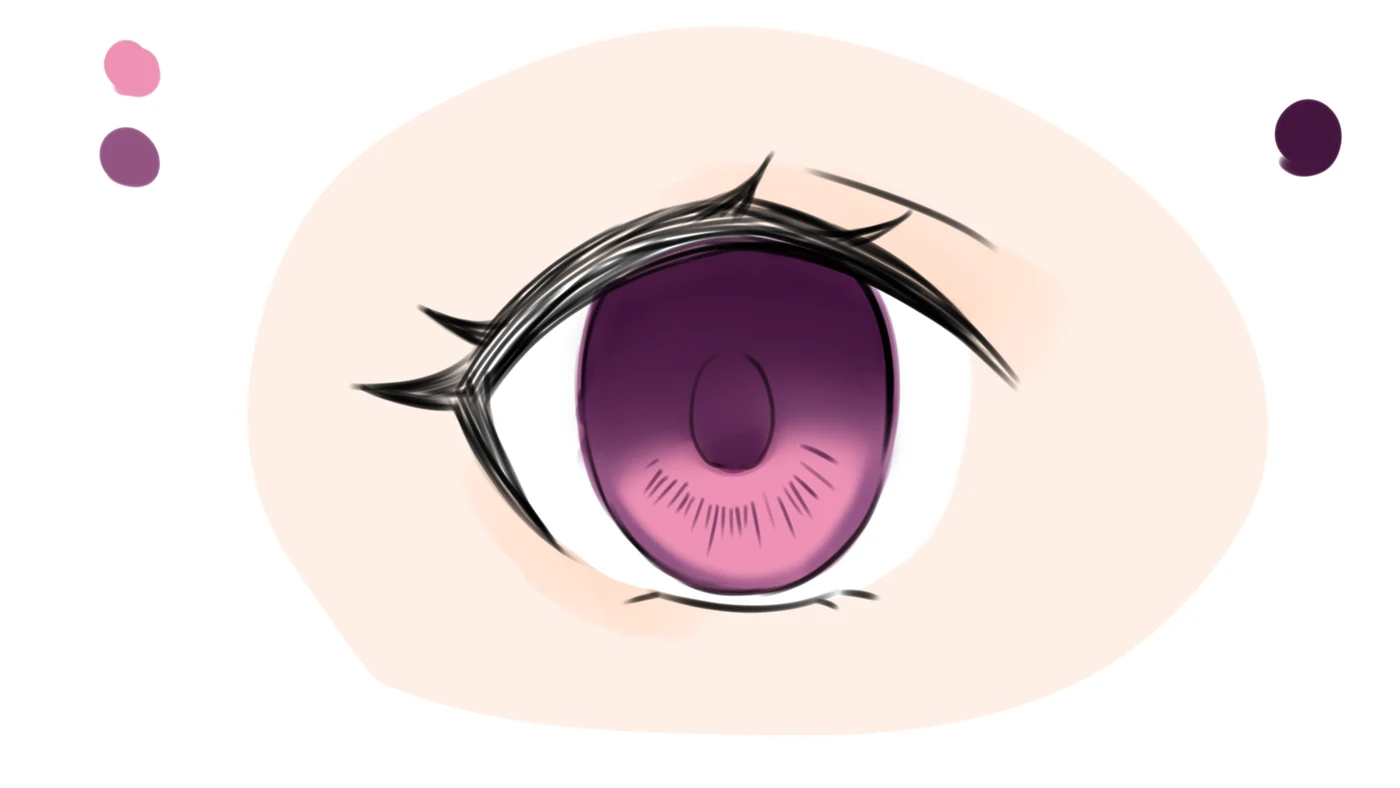
Lay down a base color, then build darker shadow from the top with blurred edges.Fill the iris with your base color. Then paint a darker color across the top. Any brush works. Blurring the edge makes it look cleaner. Let it spill a little past the rim so the outline of the iris looks soft.
Next, set a new layer to Multiply and paint the same dark color again, blending it into the first shadow as a gradient. Blur that edge too. Then draw the iris lines in an even darker color, and keep them a bit random so they look natural.
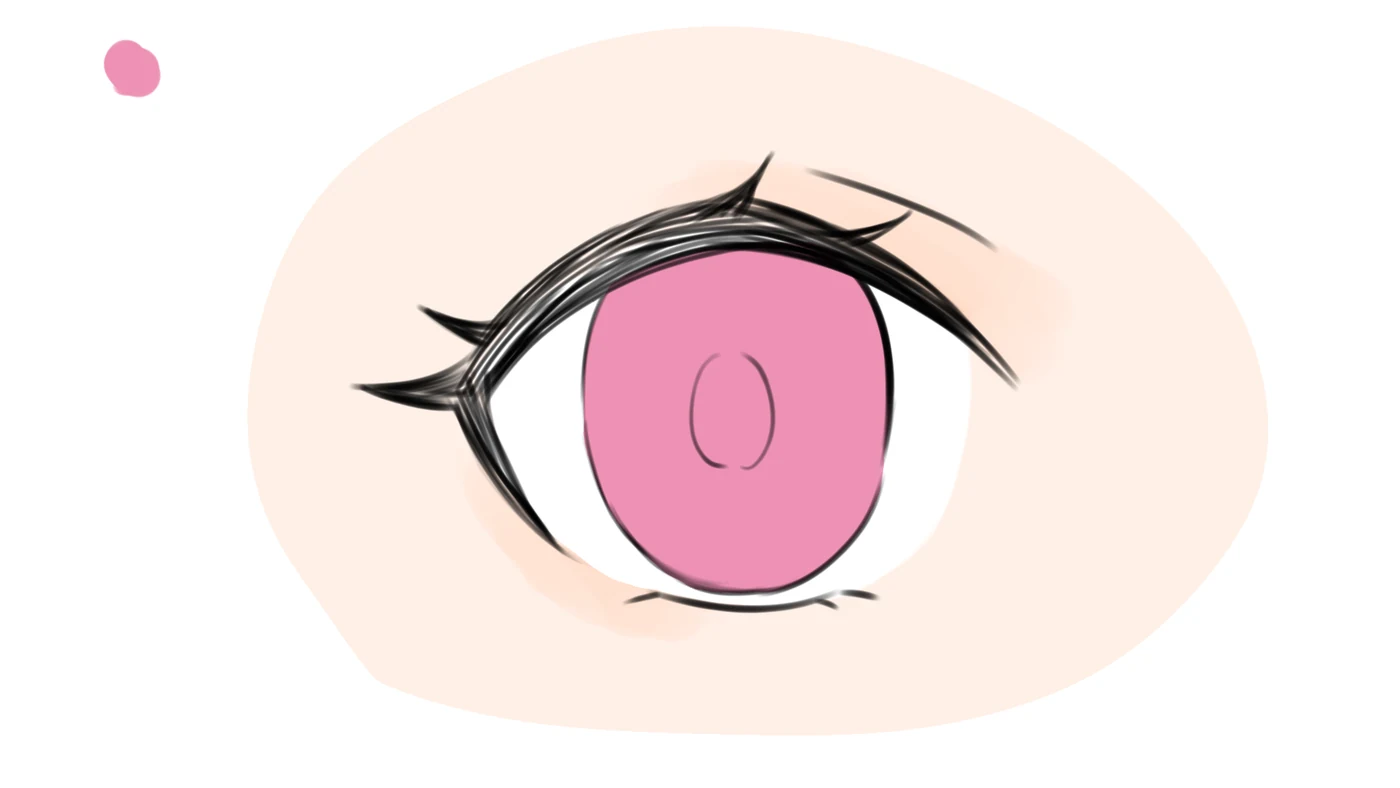 1Base color
One flat color for the whole iris.
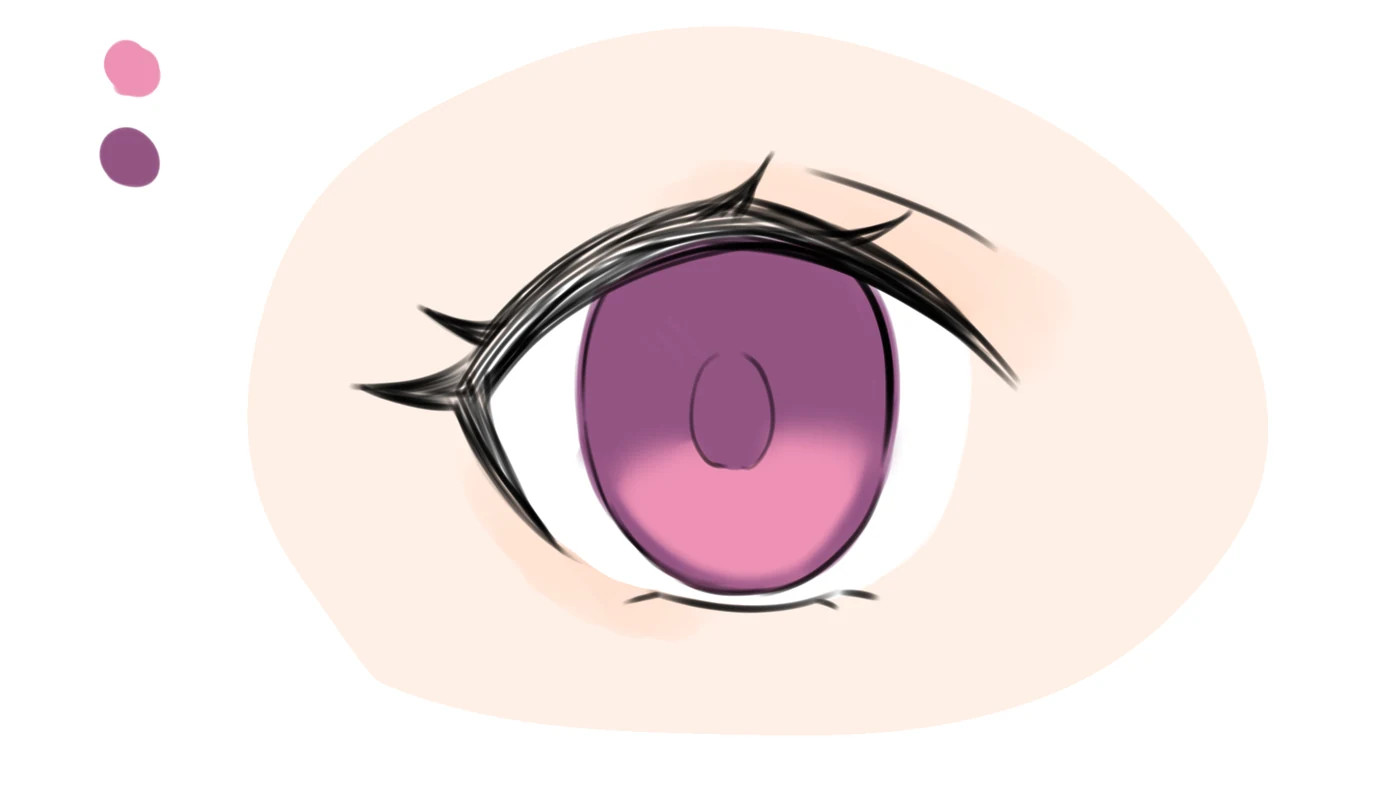 2Soft shadow
A darker color across the top, edge blurred, a little over the rim.
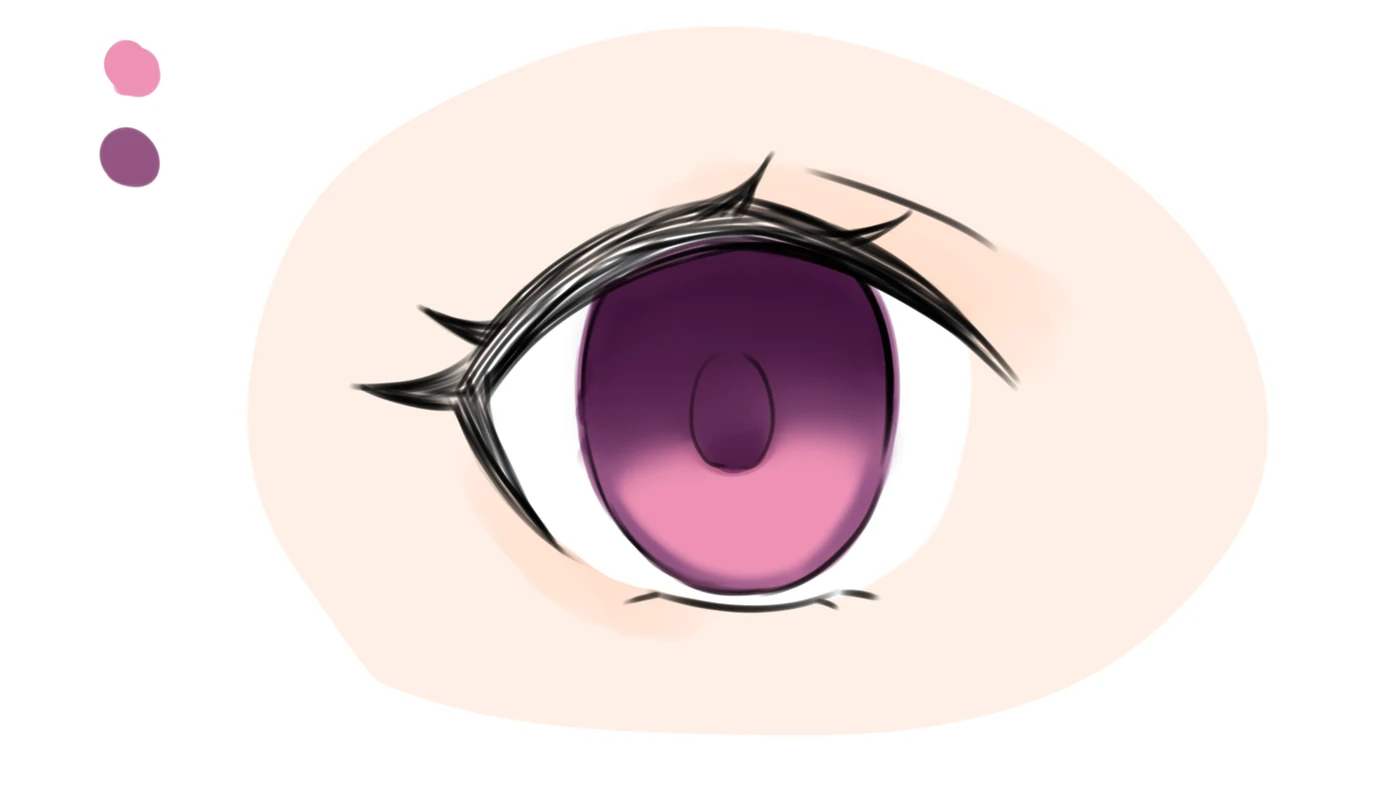 3Multiply gradient
The same color on a Multiply layer turns it into a gradient.
4Iris lines
Irregular lines in an even darker color.
Step 03 · Glow and a wet rim
How do you make anime eyes look wet and glowing?
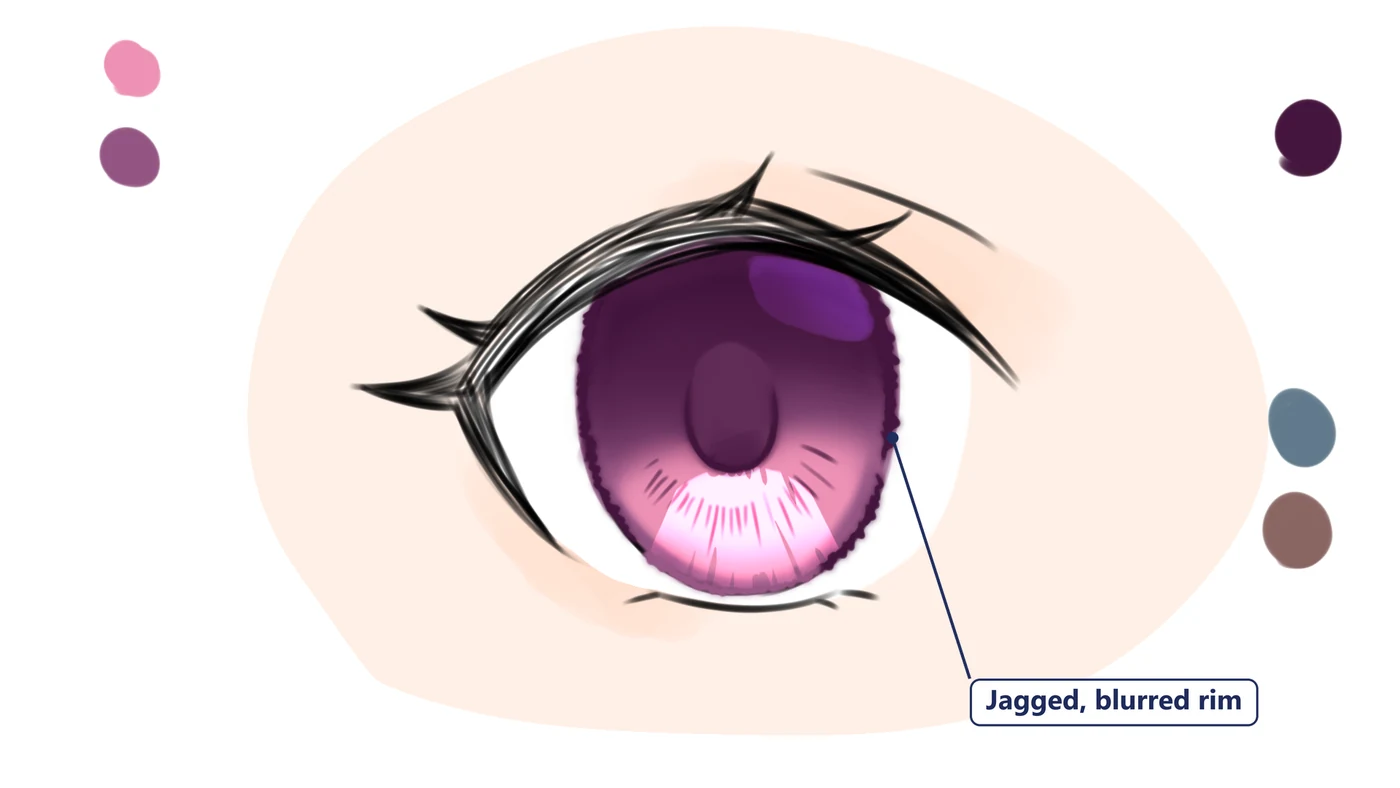
Add two colored lights on a glow layer, then roughen the rim and shade the whites.Paint reflected light inside the iris with two colors: blue at the top, brown at the bottom. Set the layer to Glow Dodge and the colors light up. Then shape them with erasers: a soft one to fade them out, a hard one to give the edges a little texture. They sink into the iris much better after that.
Next, draw a slightly jagged edge around the iris and blur it. That rough rim is what makes the eye look moist. Last, add a shadow to the whites, and put it where the shadow inside the iris is.
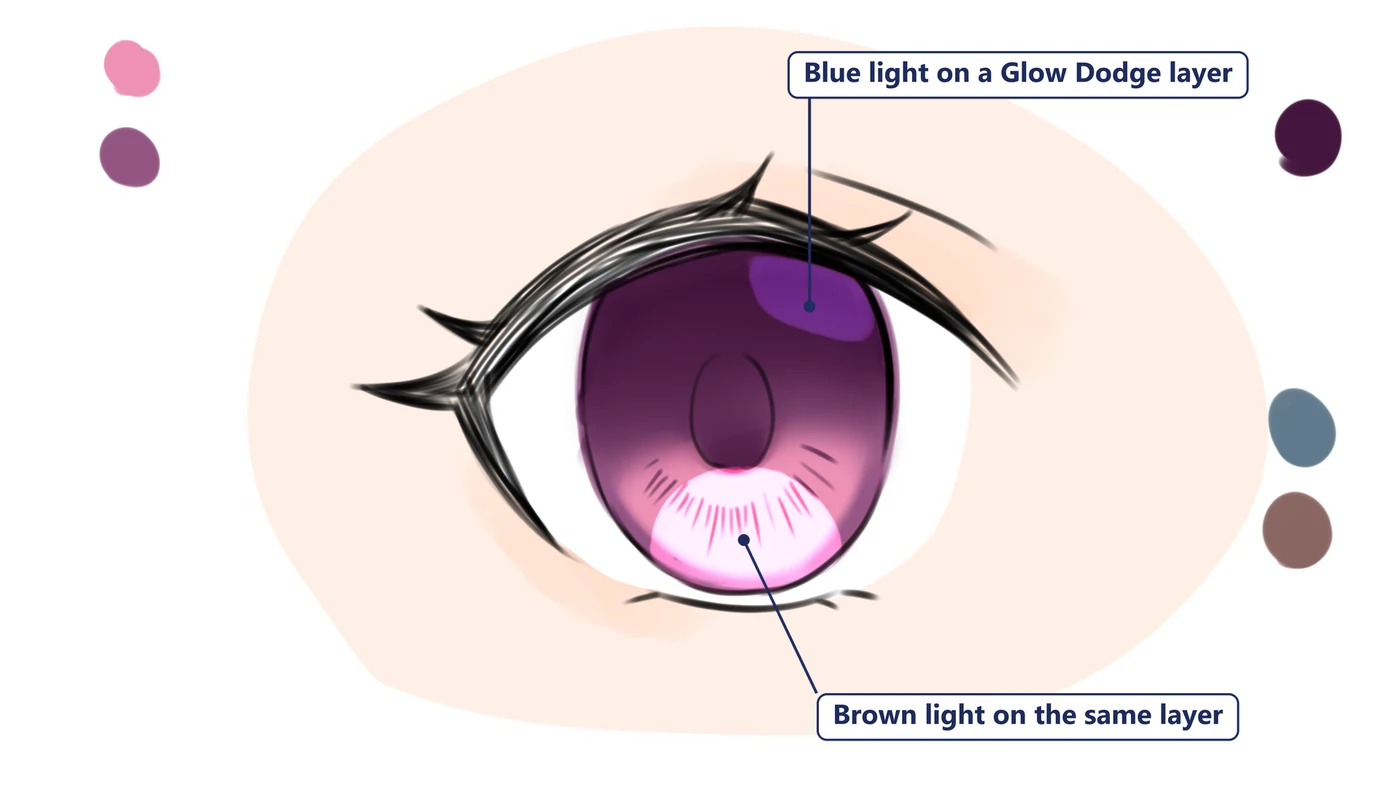 1Glowing lights
Blue on top, brown at the bottom, on a Glow Dodge layer.
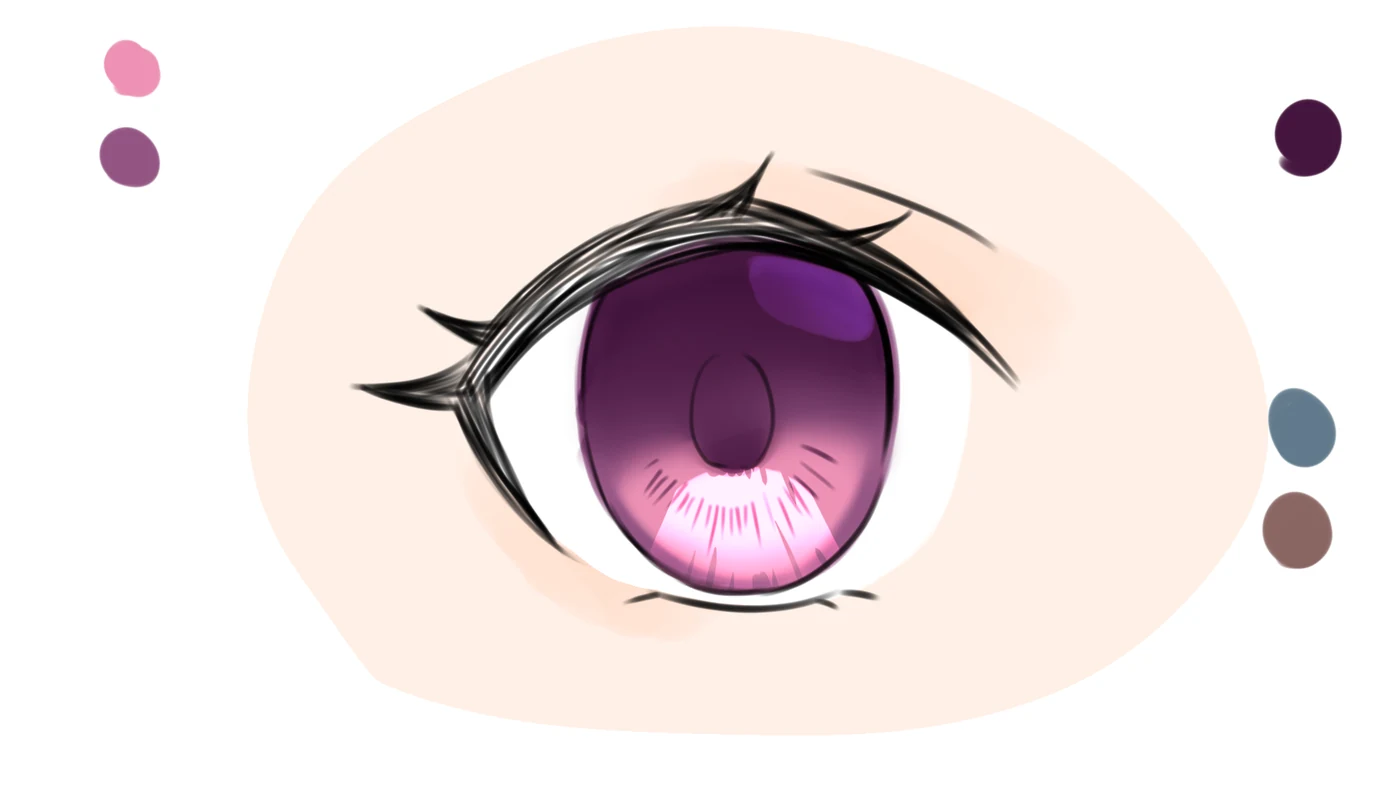 2Shaped with erasers
Soft eraser to fade, hard eraser for textured edges.
3Wet rim
A jagged, blurred rim reads as a wet eye.
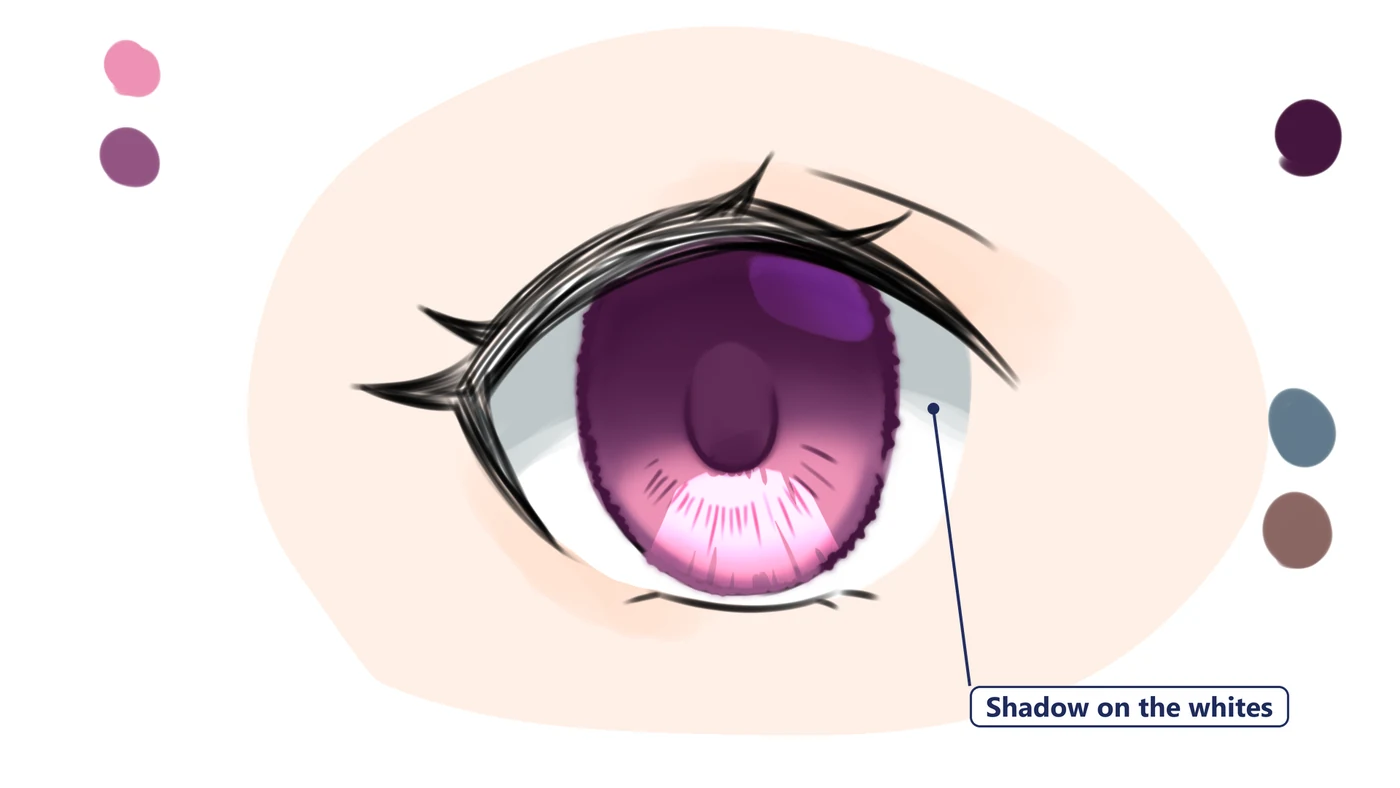 4Shadow on the whites
Placed to match the shadow inside the iris.
Step 04 · Off-black lashes
What color should anime eyelashes be?
A very dark color that is not pure black, with the ends blended into the skin.Fill the lashes with a black that is not pure #000000. In a color illustration, skipping pure black keeps the picture from feeling heavy, and color filters you add later show up on it more easily.
Blur the ends of the lashes with a brown so they melt into the skin. Then draw a few strands in a light blue so the lashes read as separate clumps.
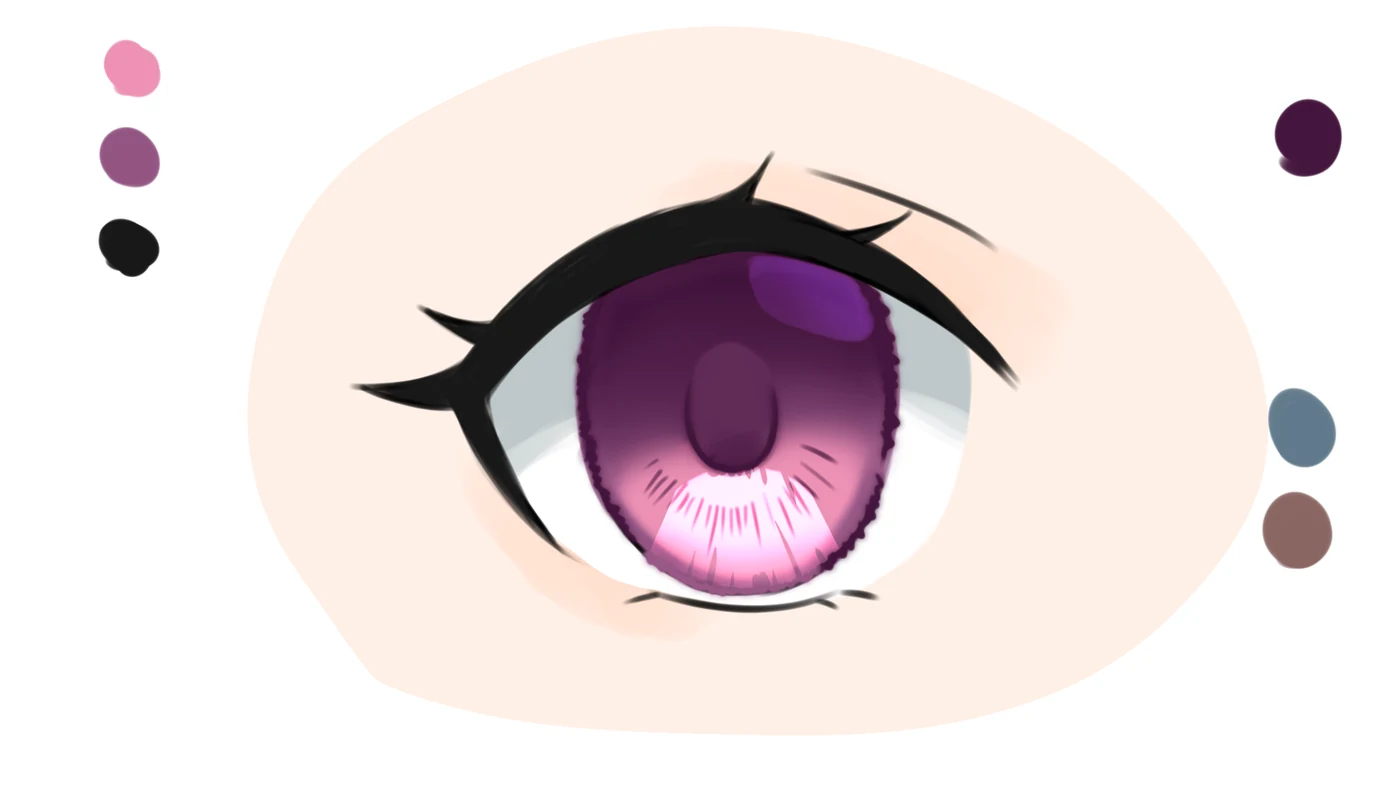 1Off-black fill
A dark color, not pure black.
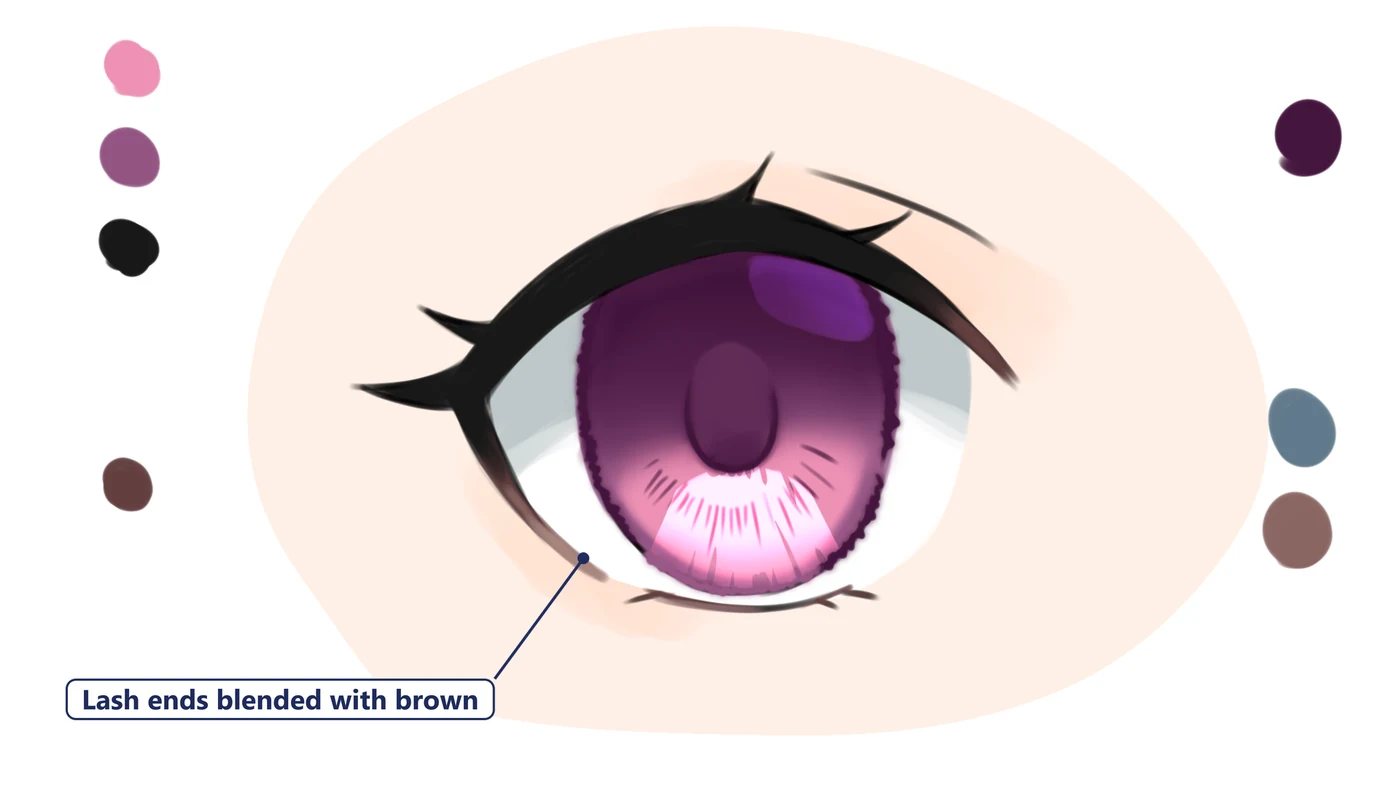 2Blended ends
Brown at the ends lets the lashes melt into the skin.
3Light strands
A few light blue strands split the lashes into clumps.
Step 05 · Sparkle highlights
Where do you put highlights to make anime eyes sparkle?
Block in one big white highlight, carve it into shape, then scatter tiny colored lights.Use white to block in a square where the main highlight goes. Carve it with a hard eraser so it looks like light slanting into the eye, and fade the bottom with a soft eraser.
Then add a few tiny lights in different colors. Small step, big payoff: these colored sparkles, together with the wet look from step 3, are what make the eye look cute and alive.
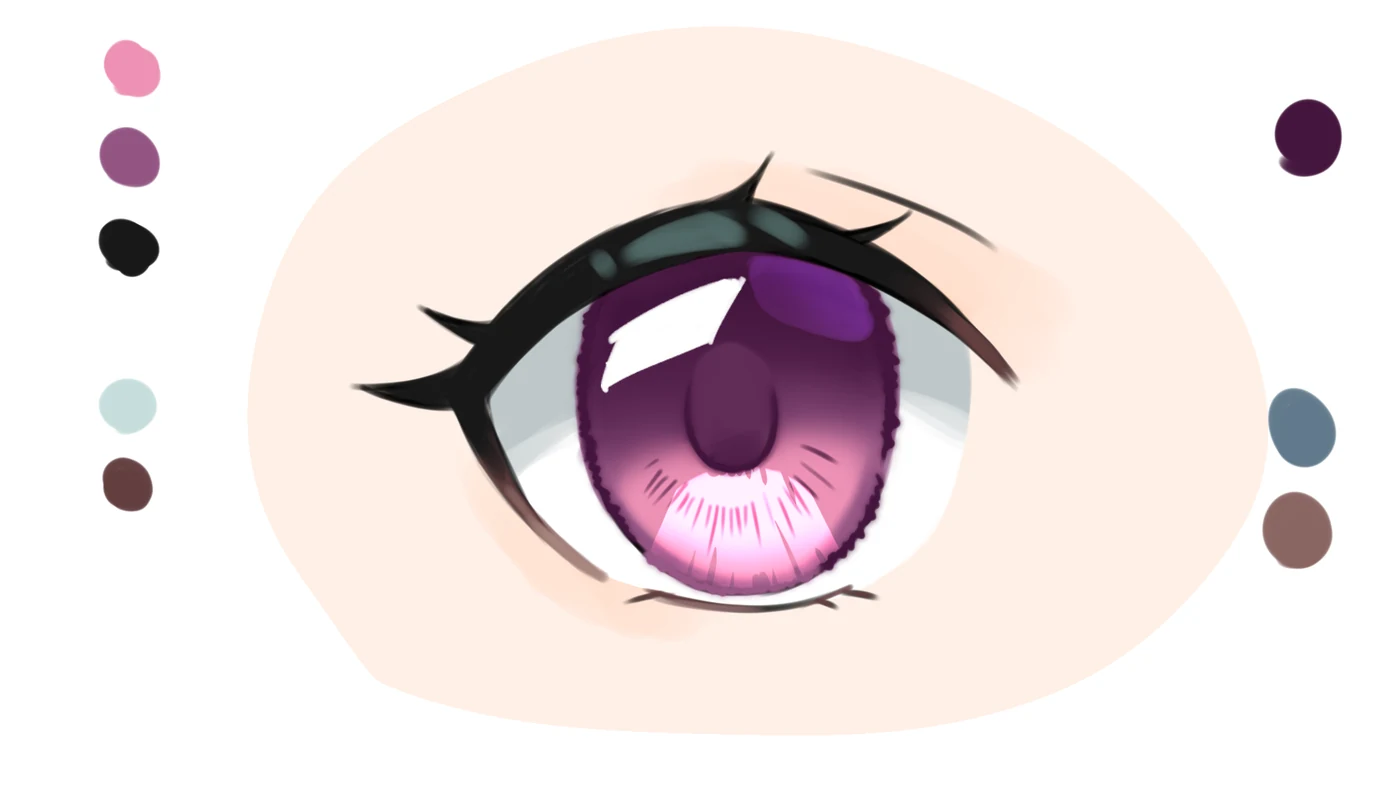 1Block in
A white square marks where the light comes in.
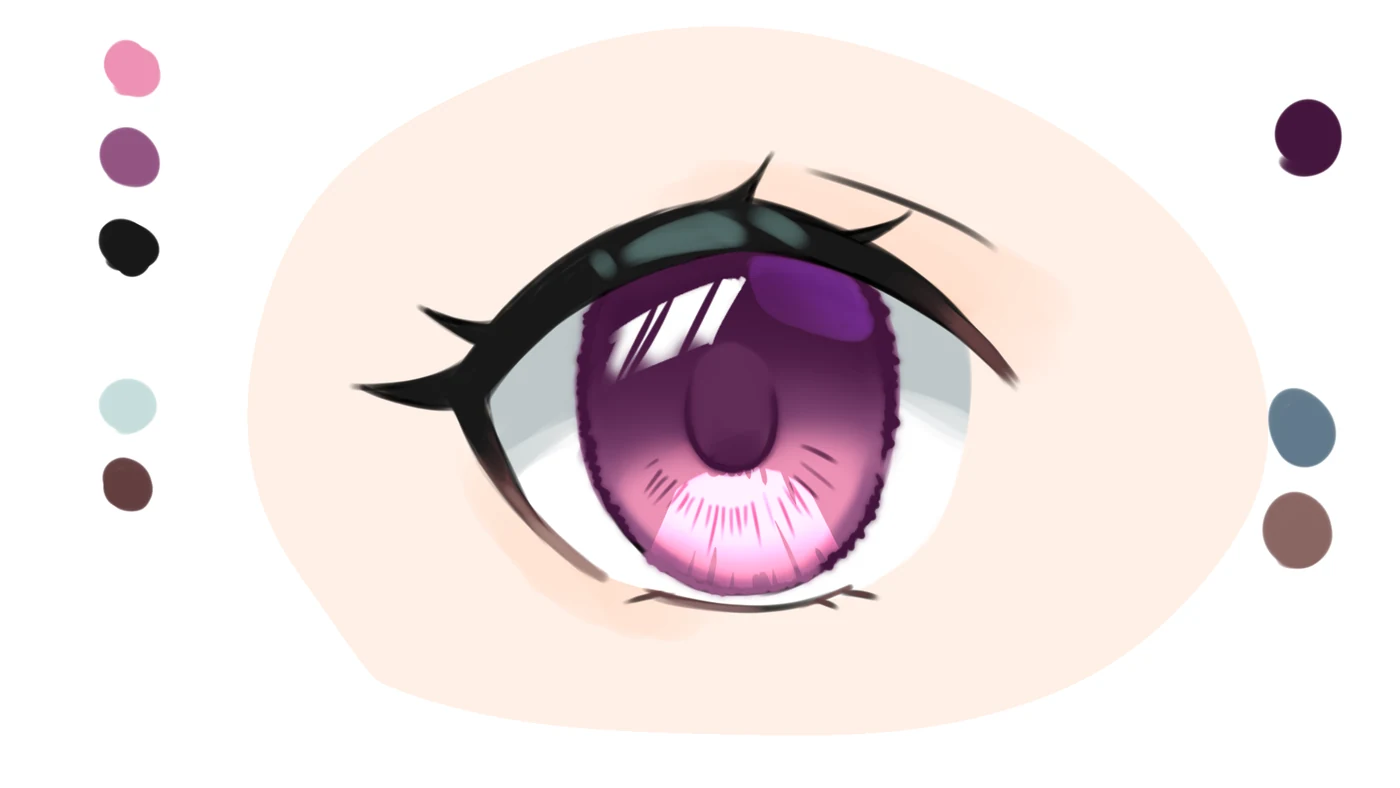 2Carve
Hard eraser for the shape, soft eraser for the bottom.
3Colored sparkles
Tiny lights in other colors finish the eye.
Step 06 · New eye colors
How do you change an anime eye color without repainting it?
Fill a new color on a layer below the highlights, then switch its layer mode.On a layer below the highlights, fill the iris with a new color and set it to Overlay. The pink eye turns blue, and all the painting underneath stays. Fill it with a gradient instead, and you get a purple eye whose color shifts from top to bottom.
The mode changes the mood. Color gives a more natural tone. Pin Light makes it look like a strong light is hitting the eye. Modes can look a little different from one painting app to another, but a mode with the same name gives almost the same result.
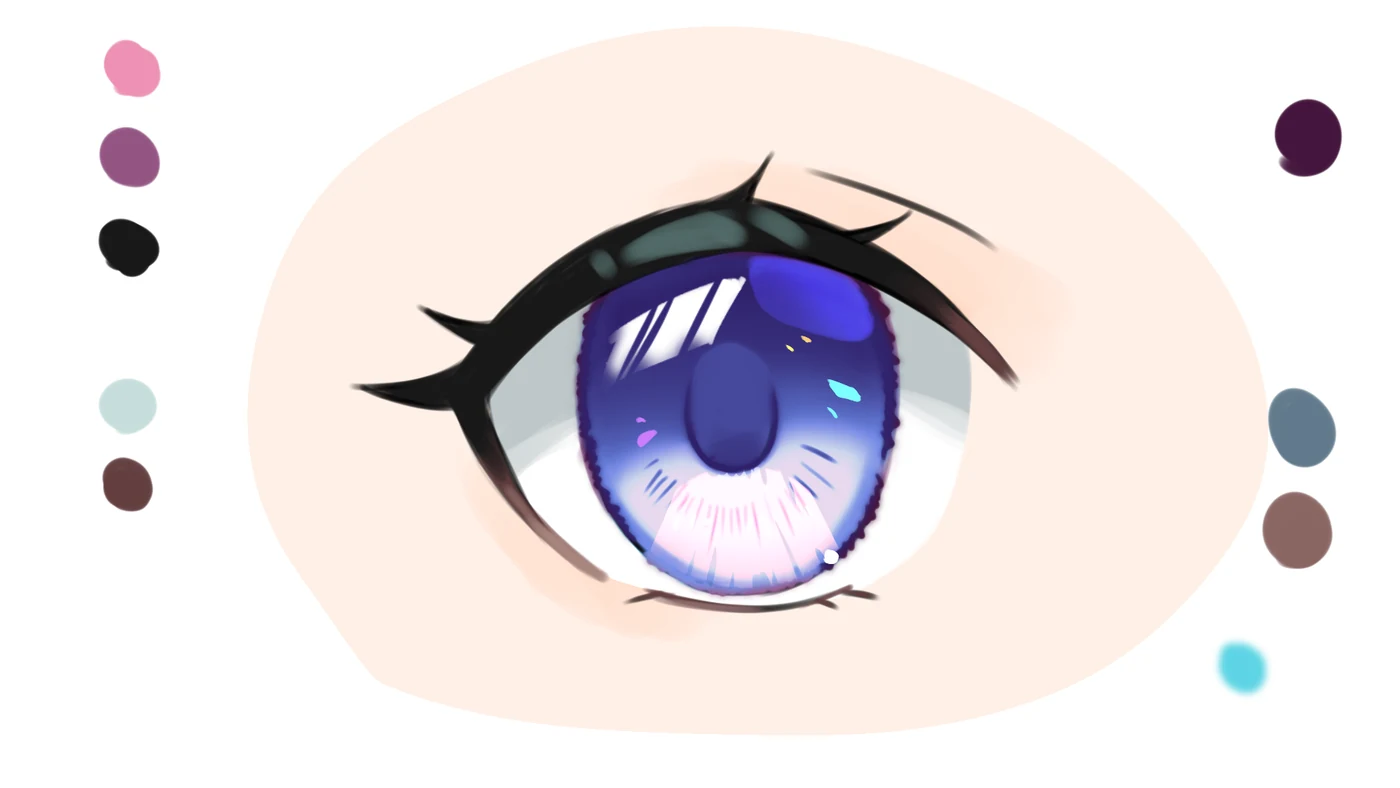 1Overlay, one color
A blue fill on Overlay keeps all the detail.
2Overlay, gradient
A gradient fill gives a color that shifts.
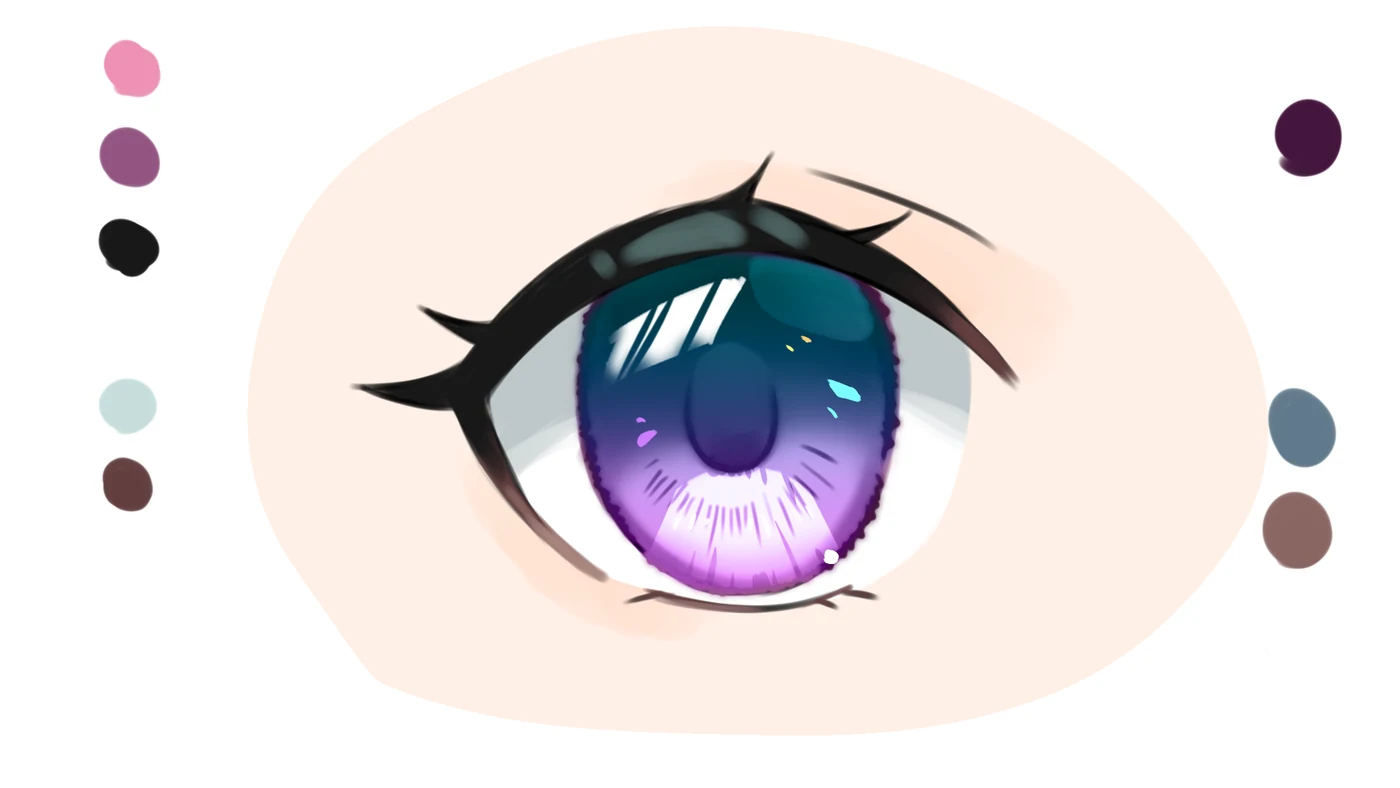 3Color mode
A more natural tone.
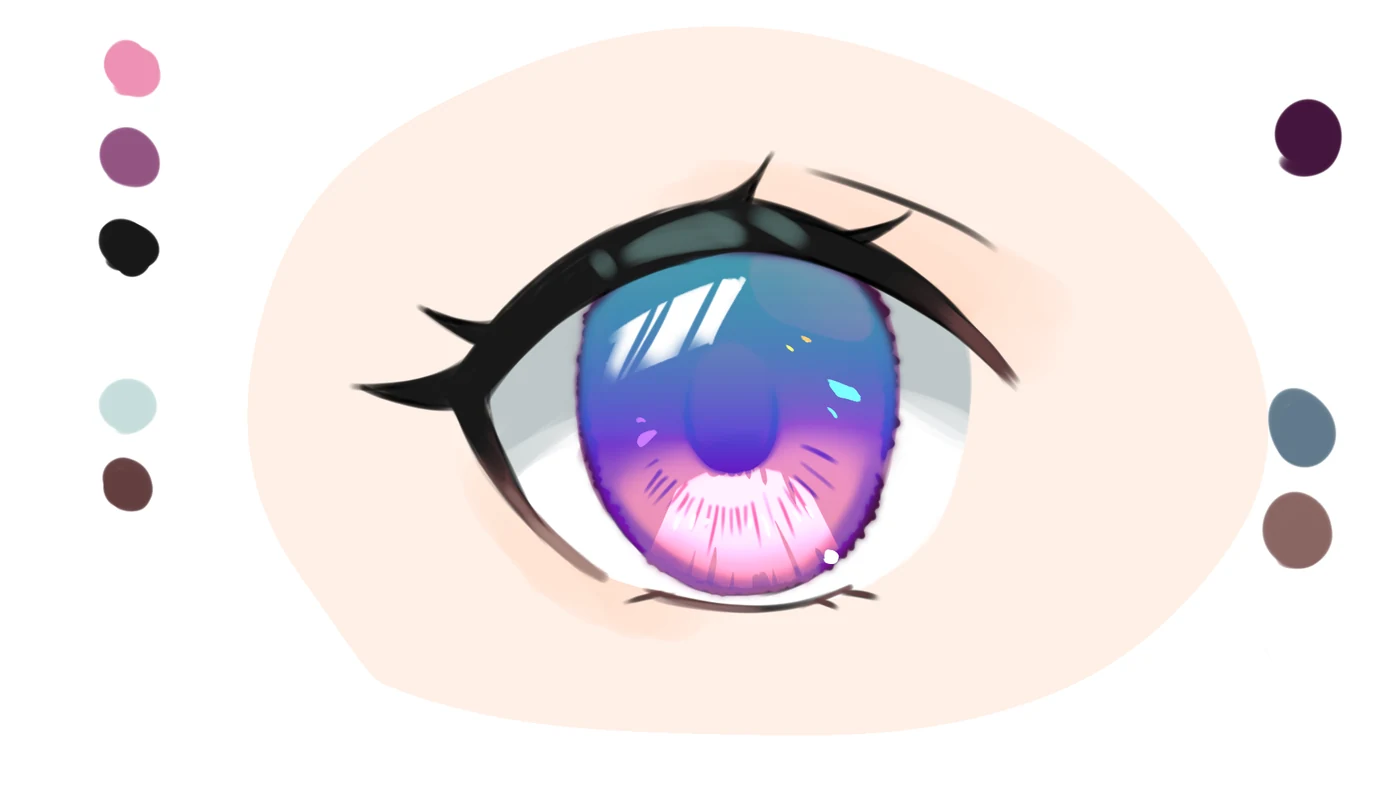 4Pin Light
Looks like a strong light is hitting the eye.
Flat color vs. finished sparkle
The same eye with only the base color, and at the end of step 5. The shape never changes. All the sparkle comes from the layers of shadow and light.
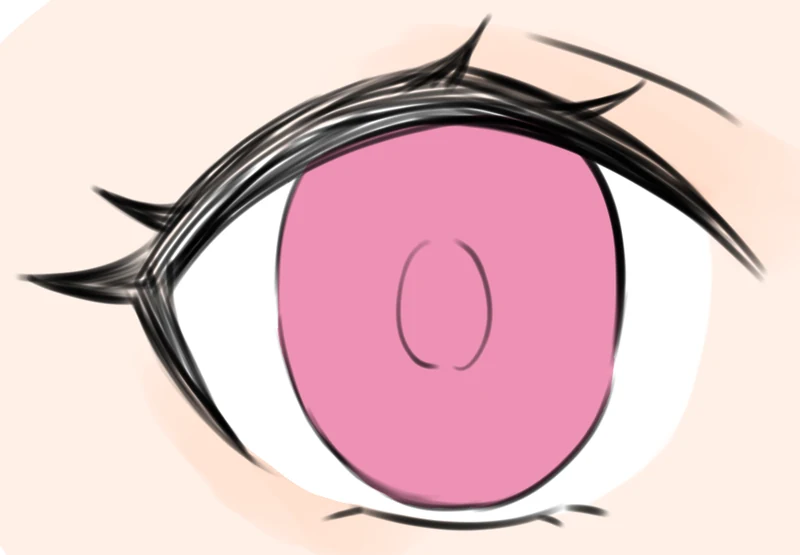
Before: one flat color in the iris.
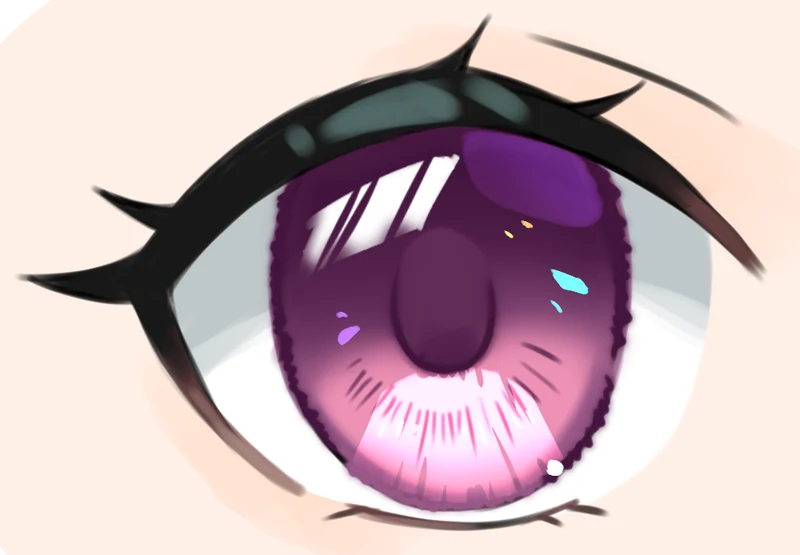
After: gradient, glowing lights, a wet rim and colored sparkles.
Where people usually get stuck
My highlights look like stickers.
Do not stop at one white shape. Carve the main highlight with a hard eraser, fade the bottom with a soft one, and add a few tiny lights in other colors (step 5).
My eyes still look flat after shading.
Check two things from step 3: the colored reflections on a Glow Dodge layer, and the jagged, blurred rim that makes the eye look moist.
The eye looks heavy and dark.
Look at the lashes. Swap pure black for a very dark color, blend the ends into the skin with brown, and add a few light strands (step 4).
Sparkly anime eyes FAQ
Which layer modes do you need for sparkly anime eyes?
This eye uses Multiply to deepen the iris shadow into a gradient, Glow Dodge for the glowing reflections, and Overlay, Color or Pin Light to change the eye color at the end. Results can differ a little between painting apps, but a mode with the same name gives almost the same look.
Should anime eyelashes be pure black?
Better not. In a color illustration, try to avoid pure black (#000000) as much as you can: a very dark color keeps the picture from feeling heavy, and color filters added later show up on it more easily.
How do I make anime eyes look wet?
Draw a slightly jagged edge around the iris, then blur it. That rough, soft rim makes the eye look moist. Using blur on the colors inside the eye adds to the wet look too.
How do I get feedback on my anime eye drawings?
When you join an Anime Art Academy course, a professional Japanese artist gives you personal advice and draws red-line corrections directly on your drawing. There is no limit on how many times you can submit. The only rule: post one drawing at a time, and wait for your teacher's reply before posting the next.